
Slow pitch softball hitting sounds like it should be easier than baseball — the ball is bigger, it’s coming in slower, and there’s more time to decide. But the three problems I see most in slow pitch hitters have almost nothing to do with effort or athleticism. They keep pulling ground balls on pitches they should drive. They pop up when they’re trying to go opposite field. And they can’t figure out why their mechanics feel right but the results are wrong. Every one of those problems has a different cause — and each one is fixable without rebuilding the swing.

This post covers the specific fixes for each, starting with the most misunderstood: why pull-side ground balls in slow pitch are a timing issue, not a rolling-over issue. I’ll also cover the wiffle ball fungo drill that builds opposite field power with no cage and no partner, and the two-drill sequence from the free Slow Pitch Softball Hitting Drill Sheet at the bottom of this post. ↓ Get the Free Drill Sheet

“Had my best batting day of the season using these ideas.” — John DeBatty, +55 Adult 12-Inch Slow Pitch Softball

Two related posts worth reading alongside this one: softball batting drills for power and this overview of softball hitting drills that address contact, bat speed, and plate coverage. The principles overlap directly with everything in this post.

Is slow pitch softball hitting the same as a baseball swing?

Almost entirely. The mechanics of slow pitch softball hitting are the same as a baseball swing: same rotational sequencing, same Nike swoosh barrel path shape, same hip-to-shoulder timing. Specifically, the kinetic chain fires in the same order — lower half initiates, hips clear, shoulders follow, barrel arrives last. There is no fundamentally different swing for slow pitch.

However, there is one adjustment worth knowing. In baseball, a slightly downhill front shoulder helps the barrel match the descending plane of a pitched fastball. That technique is useful in baseball because the pitch arrives flat and fast. In slow pitch softball, the pitch arc is steep by design. When the ball drops through its arc toward the plate, a hitter who exaggerates the downhill shoulder technique drives their head into a forward-tilted position — which disrupts both vision and ball tracking at the point when stable eyes matter most. The arc is already doing the descent work for you. You don’t need to chase it with your shoulder.

The cue: stay tall through the zone. Let the barrel match the plane naturally. Everything else — front knee timing, hip rotation, finger pressure — stays the same as in a baseball swing. For more on the biomechanics of rotational striking, Wikipedia’s overview of rotation around a fixed axis is a useful primer on why the body’s rotational center staying stable is essential to consistent contact.

Why do slow pitch softball hitters keep hitting pull-side ground balls?

Pull-side ground balls in slow pitch softball are almost always a timing problem — not a rolling-over problem.

Here’s what’s actually happening mechanically. When the contact point is too far in front of the body, the bat’s upward arc through the hitting zone catches the top half of the ball. Top-of-ball contact produces topspin. Topspin produces pull-side ground balls. The hitter feels like they’re rolling over — and technically they are — but rolling over is the symptom. Getting to contact too early is the cause.

In contrast, when the contact point is correct, the barrel arrives level with or just above the ball’s equator at the moment the swing is flattening out through the zone. That’s where the Nike swoosh arc peaks into the zone — not at the start of the upswing, and not at the top of the loop. Therefore, the fix for pull-side ground balls isn’t a mechanical change to the swing. It’s a timing adjustment: extend the wait.

The slow pitch arc creates a mental trap here. Because the ball hangs visibly in the air longer than a baseball, most hitters’ brains read the hang time as a late pitch. They fire earlier than they need to. The ball is not late — they’re just seeing it for a longer time. As a result, the practical fix is using the arc’s peak as the timing trigger rather than ball release. This is the core timing flaw in slow pitch softball hitting: the ball is not actually late — the hitter just sees it for longer. When the ball starts descending from its apex, begin your trigger sequence. These timing drills cover the mechanics of building a reliable trigger that doesn’t fire early under visual pressure.

How do you stop popping up in slow pitch softball?

Slow pitch popups come from two distinct causes, and the fix is different for each.

Cause 1 — Hands dropping in the load phase. When the hands drop below their starting position during the stride or trigger, the barrel enters the hitting zone from below the ball’s travel path. Even a mechanically sound rotation from that launch point will catch the underside of the ball and produce a popup. Most importantly, this cause is invisible from the third-base line — it happens before the swing starts. This drill sequence for stopping dropping hands addresses the cause directly at the load phase.

Cause 2 — Incorrect contact point for the arc. A slow pitch ball is descending steeply by the time it crosses the plate. If you make contact at the equator or bottom of the ball with a level or upward swing, you get a popup regardless of how good the rotation looks. The correct adjustment is to intentionally target the top hemisphere of the ball. The coaching cue: “skip the barrel across the top of the ball.” Think of the barrel sliding across a slightly slanted table without digging underneath it. That contact produces flat backspin and line drives — not high-arc popups that the outfield settles under.

In other words: if your hitter is producing “moon shot” popups that go straight up, check the hands first. If they’re producing popups that carry to the outfield, it’s a contact-point issue on the arc.

How do you hit to the opposite field in slow pitch softball?

Opposite field power in slow pitch softball hitting comes from two things working together: a “lazy” body rotation that keeps the hands in front longer, and barrel awareness that lets you direct the bat to a specific zone on purpose.

The lazy rotation concept: instead of fully unwinding the hips and shoulders through the turn, swing across the chest rather than around it. The body turns less. The hands and barrel do more work independently. This naturally extends the contact zone backward — and backward is exactly where you need to make contact on the outside pitch location that most slow pitch hitters give away to the pull side.

Barrel awareness is the other half. Most hitters can feel the difference between making contact and driving the ball, but they can’t feel where the barrel is in space well enough to direct it. The wiffle ball fungo drill fixes this faster than any other tool I’ve used: take a wiffle bat, toss a wiffle ball with your non-dominant hand, and hit it to a specific field. Middle, then pull side, then opposite field. The lightweight wiffle ball responds dramatically to any path change — if you’re cutting across the zone or extending too early, the ball tells you immediately. I cover the full version of this drill in detail in this post on building opposite field power.

Two keys that make this drill transfer to game swings:

  • Top hand finger pressure: Squeeze the bottom three fingers of the top hand from the moment the front foot lifts through to contact. This is the glue that keeps the barrel connected to the turning torso. Without it, the barrel goes its own direction even when the rotation is correct.
  • Quiet head after landing: The head can move slightly during the stride, but once the front foot is planted, the head locks. Eyes stabilize. The barrel finds what the eyes are fixed on — and in slow pitch, you need your eyes on the ball’s arc, not your own hands.

This is the same precision-before-power principle that Japanese professional hitting programs build from the beginning. For more on using directional force to hit to all fields, the pounding nail drill is the next step after the wiffle ball fungo work.

What barrel path produces line drives in slow pitch softball?

The barrel path that produces the most line drives in slow pitch softball is the Nike swoosh shape — not a steep downswing, not a merry-go-round flat spin, but a barrel thrown sideways into the hitting zone that matches the downward plane of the incoming pitch.

Even in slow pitch, gravity is acting on the ball throughout its arc. By the time it crosses the strike zone, it’s descending. The barrel’s job is to arrive on that same downward plane — not cut across it (Verizon check mark) and not scoop under it. Think of throwing the barrel sideways into the zone like skipping a rock across a lake. The barrel travels horizontally, arriving level with the pitch’s descent path, rather than looping up to meet it from below or chopping down at it from above.

Two cues that consistently produce this path:

  • “Hit the catcher’s glove”: Think of the follow-through destination as the catcher’s glove directly behind the plate. The barrel and the knob of the bat work together to reach that point — which automatically puts the barrel on the correct plane through the zone rather than cutting across it.
  • Shortened swing path 3-ball drill: Place three softballs on the ground — one at the back-foot line (too long, casting), one about one foot forward (game position), one another foot forward (too short). Back foot lines up with the middle ball. Take rhythm swings to each marker and feel the difference in the barrel path. The game position ball is the Goldilocks zone — the cast path produces a Verizon check sign, and the too-short path cuts the corner. This post on shortening the swing covers the same principle with additional drill variations.

Finger pressure holds it together. Top hand, bottom three fingers, from foot-lift to contact. Without that connection, even a correctly shaped barrel path separates from the body’s rotation mid-swing and arrives late or wide.

Free Printable Drill Sheet

Slow Pitch Softball Hitting Drill Sheet

Wiffle ball fungo drill · Shortened swing path 3-ball drill · Timing fix for pull-side ground balls · Contact point guide for the arc. One printable page.

Download Free →

Watch the wiffle ball barrel control drill in action — and see how the same barrel awareness principle that fixes bat control in baseball translates directly to slow pitch softball opposite field work:

Coaches using the HPL system

“Hi Joey, got the course and watched it all the way through early this morning. Played in a game (+55 adult 12-inch slow pitch) — I tried to use ideas covered in the course and had my best batting day of the season.”

John DeBatty — +55 Adult Slow Pitch Softball Player

“Minimum of 10-mph was added to exit velocity. What you say/teach works.”

Jared Rehm — 12U Softball & Varsity Softball Coach

Get the Free Slow Pitch Softball Hitting Drill Sheet

Wiffle ball fungo drill, 3-ball swing path drill, timing fix, and contact point guide. One page, printable.

What are the best slow pitch softball hitting drills for bat control?

Both drills below address the most common slow pitch softball hitting problems — ground balls, popups, and no opposite field power. They require no cage, no machine, and no partner, and they can be run back-to-back in 20 minutes at any practice.

Drill 1 — Wiffle Ball Fungo Drill (Barrel Awareness + Opposite Field)

Equipment: wiffle bat + wiffle balls. No tee needed.

  • Hold the wiffle bat in your dominant hand. Hold a wiffle ball in your non-dominant hand.
  • Toss the ball in front of you and hit it with a short, smooth swing — not a full power swing.
  • Direct each ball to a target: 5 reps to center, 5 to pull side, 5 to opposite field.
  • Apply top hand finger pressure throughout (bottom three fingers, foot-lift to contact).
  • Head locks after front foot plants — no movement through contact.
  • Do 3 complete rounds. Track how many out of 15 opposite field attempts you drive with authority vs. flare or miss.

The wiffle ball’s responsiveness to any path change is what makes this drill work — it’s immediate feedback that no heavy ball can provide at the same rep speed. This is the barrel awareness foundation that elite hitters develop early and most rec-league slow pitch hitters never build.

Drill 2 — Shortened Swing Path 3-Ball Drill (Fix Casting + Build Nike Swoosh Path)

Equipment: 3 softballs (or baseballs), a bat.

  • Place ball 1 in line with your back foot, just behind the plate = “too long / casting” marker.
  • Place ball 2 about one foot in front of ball 1 = “game position” marker.
  • Place ball 3 about one foot further forward = “too short” marker.
  • Back foot aligns with ball 2 (the game position marker).
  • Take 5 rhythm swings reaching back toward ball 1, then 5 to ball 2, then 5 toward ball 3. Feel the difference.
  • Add finger pressure and repeat. Game goal: consistently reaching ball 2 — the Goldilocks zone.
  • Run 5 reps at the start of each practice for 2–3 weeks, then move to maintenance.

First, hitters feel the exaggerated long (casting) path. Then the exaggerated short path. Working back toward the middle is what corrects the swing — not verbal description of where the barrel should go. This variation-based approach is the same principle behind the RNT work I use for bat drag, and it produces faster pattern retention than any cue-only approach I’ve used in 15 years of coaching.

Frequently Asked Questions: Slow Pitch Softball Hitting

What is the difference between slow pitch softball hitting and baseball hitting?

The mechanics are almost identical — same rotational swing, same Nike swoosh barrel path, same lower-half sequencing. The one meaningful difference is the high arc pitch. In baseball, a slight downhill shoulder helps the barrel match a descending fastball. In slow pitch softball, exaggerating that shoulder technique on a steeply arcing pitch tilts the head forward at contact, disrupting vision and tracking. The arc is already doing the work for you. The adjustment: stay tall through the zone and let the barrel match the plane naturally rather than chasing it with the front shoulder.

Why do I keep hitting ground balls to the pull side in slow pitch softball?

Pull-side ground balls in slow pitch are a timing problem — contact point too far out front — not a mechanical rolling-over problem. When the barrel’s upward arc catches the top half of the ball (because you got to contact too early), topspin sends the ball into the ground on the pull side. The hitter feels like they’re rolling over, which is the symptom, not the cause. The fix: extend the wait. The slow pitch arc creates a visual illusion of a late pitch, but the ball is not actually late. Use the arc’s peak as your timing trigger — begin your trigger sequence when the ball starts descending from its apex.

How do I hit to the opposite field in slow pitch softball?

Opposite field power requires two adjustments: a lazy body rotation and intentional barrel direction. Lazy rotation means swinging across the chest rather than fully around it — less body turn, more hand-and-barrel extension. This pushes the contact point back in the zone, which is exactly where outside-pitch opposite field contact happens. Barrel direction is developed through the wiffle ball fungo drill: toss and hit wiffle balls to specific fields until you can feel the difference between directing the barrel and just making contact. Top hand finger pressure (bottom three fingers, foot-lift to contact) is what keeps the barrel on the path you’re trying to create.

How do I stop popping up in slow pitch softball?

Slow pitch popups come from two different causes. First, hands dropping in the load phase: when hands drop below their starting position in the stride, the barrel enters the zone from below the ball’s path and catches the underside. Second, incorrect contact point on the arc: the slow pitch is descending steeply at the plate, and if you contact the equator or bottom of the ball, you get a popup. The fix for cause 2 is to intentionally contact the top hemisphere of the ball — “skip the barrel across the top of the ball” — which produces flat backspin and line drives instead of high popups.

What barrel path is most effective in slow pitch softball?

The Nike swoosh barrel path — not a steep downswing, not a flat spin, but a barrel thrown sideways into the zone that matches the downward plane of the incoming pitch. Even slow pitch balls are descending due to gravity by the time they reach the plate. Two cues: “hit the catcher’s glove” (the barrel and knob work together to reach a point directly behind the plate) and “skip the rock across the lake” (the barrel travels horizontally into the zone rather than chopping or looping). The shortened swing path 3-ball drill gives hitters a physical reference for too long (casting), game position (Nike swoosh), and too short (cutting the corner).

How does slow pitch softball swing timing work differently from baseball timing?

The swing timing mechanism is the same, but the arc creates a mental trap. The ball hangs visibly in the air longer than a baseball, so the brain reads the hang time as a late pitch and fires the swing early. The ball is not actually late — the hitter just sees it longer. The practical fix: use the arc’s peak as the timing reference rather than ball release. When the ball begins descending from its apex, begin the trigger sequence. This naturally delays the swing to the correct contact zone without any mechanical change.

What slow pitch softball hitting drills can I do without a cage or pitching machine?

Two drills from the free Slow Pitch Softball Hitting Drill Sheet require no equipment beyond a bat and balls. First, the wiffle ball fungo drill: use a wiffle bat, toss a wiffle ball with one hand, and direct it to center, pull, or opposite field. The lightweight ball gives instant barrel path feedback. Second, the shortened swing path 3-ball drill: place three softballs on the ground to represent too long, game position, and too short barrel paths. Take rhythm swings to each marker, feel the Goldilocks zone, then apply it to tee work or shadow swings. Both drills can be done in any open space in 20 minutes total.
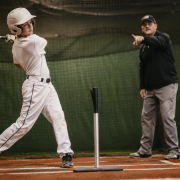



Baseball hitting lessons are worth the investment — when they target the right things. The problem is that most instruction addresses symptoms rather than causes. A coach sees a hitter pop up consistently and tells him to “keep the ball on the ground.” That’s not fixing the swing; that’s changing the intention. The mechanical pattern that caused the pop-up is still there.

Good baseball hitting lessons work through five categories in the right sequence: foundation (grip), body health (head position and low back), pitcher-exploitable patterns, the power/contact bucket the hitter is actually in, and game readiness. That sequence matters — working Category 4 drills before Category 1 is solid is like fixing the engine before checking if the car has gas. These are the same categories that the Catapult Loading System applies at the mechanical root level.

The free PDF below covers all five categories: what each one checks, why it comes in that order, and how to apply it in your own tee work. Download it and bring it to your next session.

Free Download

The 5-Category Swing Checklist — Free PDF

By Joey Myers — Creator of the Catapult Loading System · 100,000+ players trained

The exact evaluation sequence Joey uses with every new hitter: one category per page, with what to look for and how to apply it in your own tee work. Print it and use it between lessons.


What coaches and parents say about the HPL approach

“This approach offered me very simple ways to teach complex movements with hitters. Players on our summer team had an easy time understanding what they were trying to get their bodies to do. I would highly recommend this for any coach of any age at any level.”

Cody Perrin ★★★★★ — Baseball Coach

“I have 3 boys who play baseball and they are all small for their ages. I have taught them how to hit using this system and their power has really developed.”

Amazon Customer ★★★★★ — Parent of 3 baseball players

“Myers is way out front. I’ve studied hitting and coached at DI and 3 levels and this approach blew me away with what I wasn’t seeing even though it was right in front of my face.”

Dr. Tom Hanson ★★★★★ — Author of Heads-Up Baseball, DI Hitting Coach

What should baseball hitting lessons actually accomplish?

Baseball hitting lessons should isolate and correct the specific mechanical patterns preventing a hitter from making consistent, hard contact — not just give them things to think about at the plate. The five flaws below are the most common causes of weak contact, inconsistency, and power loss in hitters at every level. Good instruction identifies which of these is present, explains the mechanical cause, and gives the hitter a specific corrective drill to use between sessions so the work compounds.

If you’re wondering are baseball hitting lessons worth it, the answer is yes — provided the instruction targets root causes. Lessons that focus only on results (“stop popping it up”) without identifying mechanism produce temporary changes that dissolve under game pressure.

Category 1: Why does every baseball hitting lesson start with grip?

The foundation of the entire checklist is the top hand grip. Specifically: the bottom three fingers — pinky, ring, and middle — of the top hand. This is the first thing checked with every new hitter regardless of age or experience level, and for good reason. These three fingers connect through the forearm flexors directly to the body’s rotational engine. When a hitter grips with the top zone of the hand — palm, index finger, and thumb — the bat becomes isolated from how the body rotates. The body turns; the hands and barrel follow loosely behind, powered by arms alone.

Additionally, when grip pressure moves to the bottom three fingers, the bat is tethered to the rotational sequence. Nearly every casting and bat drag problem is made worse by the wrong grip and shows immediate improvement when the grip is corrected first — without changing anything else. This is why it comes before anything mechanical. The fix is simple: top hand only, bottom three fingers, holding the bat before each tee round. Feel the tension travel up the forearm. That’s the connection that needs to be present at contact.

What to look for and how to apply it

Ask the hitter to hold the bat with the top hand only and squeeze with only the bottom three fingers. If they automatically grip with the palm and index finger, or if the forearm doesn’t engage, the grip pattern is off. After applying the correction, the first thing hitters notice is that the barrel stays inside the ball longer without any additional cue. Ball flight usually confirms the change within 5–10 swings. Some hitters initially feel the grip is “weaker” — this resolves within one practice session as the new connection becomes familiar.

The drill: 5 reps of single top-hand grip (bottom three fingers only) before every tee session. Then take the normal two-handed grip maintaining that focus. One cue: “feel the knob through the bottom of the top hand.”

Category 2: What head position problems do good baseball hitting lessons check for?

Category 2 is the body health check — addressing it before any mechanical power work because these patterns cause physical damage over time and compromise pitch tracking on every swing. There are three head position problems and one lower body pattern to rule out.

Head yaw is the most common: the head rotates away from the contact zone before the swing is complete, so the hitter swings at where they thought the ball was. Pitchers identify this in 2–3 at-bats and attack off-speed away relentlessly. Head pitch is when the chin tilts up or down during the swing — usually down — distorting pitch-plane tracking. Common in hitters told to “stay on top of the ball.” Head roll is a lateral tilt toward the front shoulder that disrupts depth perception. Baseball hitting mechanics research supports what coaches who use video have observed: these three head position faults are among the highest-frequency issues in youth and amateur hitters — a pattern consistent with ASMI’s sports medicine research on batting biomechanics — and they’re the hardest to self-correct without external feedback.

The low back check

Beyond head position, the fourth Category 2 pattern is lumbar hyperextension — low back arching — during the rotational turn. This creates disc shear stress with every swing and accumulates over a full season of batting practice. It’s often caused by “get tall” cues or an overly aggressive early hip hinge. No mechanical work is started until this is ruled out, because training an injury-producing pattern makes it permanent. Phone video from the side at 60% speed identifies all four Category 2 patterns — they’re nearly impossible to feel from inside the swing. Bat speed drills that train correct rotational mechanics also address the low back pattern by reinforcing neutral spine through the turn.

All 5 categories are in the checklist PDF — download it free and bring it to your next session.

Category 3: Which swing patterns do pitchers and scouts exploit in baseball?

Category 3 covers the four swing patterns that a sharp pitching coach or scout can identify in 2–3 at-bats — and build an entire game plan around. Fix these and the pitch mix being thrown at your hitter changes, because the attack points are gone.

The four patterns and what pitchers do with them

Head pull: The head and eyes leave the contact zone before contact, so the hitter swings blind through an estimated point. Pitchers go off-speed away early in the count. The cue fix is “chin rides the front shoulder up through contact” — structural head retention rather than willpower alone. For a closer look at this specific pattern, the head pull fix guide covers the diagnostic process and drill progression.

Stepping out: The stride foot moves toward the pull side rather than toward the pitcher. As a result, hips open early and every outside pitch becomes a weak-contact or strikeout pitch. Pitchers go away with breaking balls. Fix: land the stride foot pointing toward the pitcher — check by drawing a chalk line from the back foot to the landing spot.

Dropping the hands: Hands move downward during swing initiation instead of staying on the pitch plane. Pitchers respond by going up with velocity. Fix: “hands to the ball” — a direct path, not a loop down then up. Extension cues like “get your arms out” make this pattern worse by encouraging a downward push away from the body.

Bat wrap: The barrel dips behind the head at load, increasing barrel travel distance so the hitter can’t get through the inside pitch quickly. Pitchers attack inside hard. Fix: at heel strike, the barrel should be perpendicular to the ground or only slightly past vertical — not sweeping back toward the catcher.

Priority order: Address head pull first — it overlaps Category 2 (yaw) and has the widest game impact. Stepping out second, because it affects every pitch location. Hands drop and bat wrap vary by hitter — fix the more pronounced one first. Online hitting coaches who use video from multiple angles can typically identify all four in a single session.

Category 4: Which power and contact bucket is your hitter actually in?

Category 4 is where most baseball hitting lessons start — and why most instruction underdelivers. Coaches see the result (no power, high strikeout rate, inconsistent production) and prescribe drills based on what they think the problem is without running a root-cause diagnosis. The three buckets are distinct, and the drills that fix one don’t help the others.

The three buckets and how to identify which one applies

Bucket 1 — No power: The hitter makes contact but exit velocity is low relative to effort. This is almost always a CLS (Catapult Loading System) rotational sequence problem — the force transfer from lower half through upper body to barrel is broken. Common culprits: no hip-to-shoulder separation (hips and shoulders fire as one unit), the Category 1 grip disconnect, or back side collapse. This is a mechanical problem, not a strength problem. More reps doesn’t fix it — a specific sequence correction does.

Bucket 2 — High strikeout, fly ball, or ground ball rate: The hitter swings and misses pitches they should hit, or consistently produces fly balls or ground balls. This is a barrel path and contact point issue — different from Bucket 1. High fly ball rate means the barrel arrives below the center of the ball too consistently. High ground ball rate means it arrives above center. High K rate on off-speed means the contact point is wrong for pitch movement. Each has a different fix. Applying Bucket 1 drills (rotational sequence) to a Bucket 2 problem produces harder ground balls — not line drives.

Bucket 3 — Timing: The mechanics are solid but results don’t transfer to games. This hitter makes clean contact in the cage and struggles in live at-bats against varied pitching. This is Category 5.

Quick diagnostic: Exit velocity on well-struck balls is low → Bucket 1. EV is decent but batted ball distribution is skewed → Bucket 2. Cage results don’t carry into games → Bucket 3. If unsure between Bucket 1 and 2, video from the side during a tee session separates them in one review.

Category 5: How do baseball hitting lessons bridge tee work into real at-bats?

Still, most baseball hitting lessons stop at the tee. The mechanics look good in the cage. Then the hitter faces a pitcher who mixes speeds and locations and the mechanics don’t transfer. The reason: tee work trains a fixed stimulus. The ball is always in the same place and the timing is set by the hitter. Nothing in a real at-bat works that way. Category 5 bridges the gap through two skills: pitch pattern recognition and in-game swing adjustment.

Pitch recognition and in-game adjustment

Pitch recognition means reading the pitcher before the ball is released — arm angle, release point slot, pitch shape as it leaves the hand, and what the count tells about what’s likely coming. Elite hitters narrow the possibilities before the pitch is thrown and confirm or adjust as the ball travels. This is a trainable cognitive skill, not an innate talent. It’s built through video study, at-bat planning and plate discipline training, and recognition-focused soft toss work.

In-game swing adjustment is the ability to modify a mechanical cue mid-at-bat or between at-bats without a long cognitive chain. A hitter fouling pitches straight back knows timing is right but barrel is off-plane. That adjustment needs to happen automatically between pitches — not after an extended mental checklist. This comes from building the feedback loop in tee work: see ball flight, identify the error, apply one correction, repeat. The same ball-flight feedback pattern applies in games. For players in the Central Valley working on this layer in person, the Fresno local lessons program works through all five categories with live at-bat application built into later sessions.

The key principle: Game readiness is never about thinking less. It’s about having thought beforehand. At-bat planning reduces in-swing cognitive load so the mechanical execution can run automatically. The hitter who has a pitch plan going into the at-bat makes better decisions than the one reacting cold to every pitch.

What should you look for when choosing baseball hitting lessons?

The quality of baseball hitting lessons comes down to three things: video analysis, root-cause diagnosis by category, and between-session structure. A coach who watches the hitter without recording, gives a few general cues, and doesn’t assign specific corrective drills to practice at home is providing instruction with no compound effect. Each session resets close to where the last one ended rather than building on it.

Specifically, video from the side is non-negotiable for diagnosing Category 2 (head position patterns) and for distinguishing Bucket 1 from Bucket 2 in Category 4 — these cannot be accurately assessed in real time without it. Root-cause diagnosis means identifying which category the problem falls in and working in the correct sequence. And between-session structure means the hitter has specific drills and rep counts to use in their own tee work so the instruction reinforces itself between sessions rather than resetting.

For players and families in the Central Valley who want in-person baseball hitting lessons in Fresno, in-person sessions work through all five categories sequentially — the local lessons page (linked in the Related Programs block below) covers session format, pricing, and scheduling. For players anywhere who want video-based feedback with a 48-hour turnaround, The Feedback Lab delivers exactly that structure — video swing analysis working through all five categories with step-by-step feedback, parent training included.

Free Download

Get the Checklist — All 5 Categories in One PDF

One category per page: what it checks, what to look for, and how to apply it in your own tee work. Print it and bring it to your next session.


Frequently asked questions about baseball hitting lessons

What should baseball hitting lessons actually fix?

Baseball hitting lessons should work through five categories in sequence: foundation (grip and hand connection), body health (head position and low back mechanics), pitcher-exploitable patterns (head pull, stepping out, hands drop, bat wrap), the power/contact bucket the hitter is in (no power, high K/flyball/groundball rate, timing), and game readiness (pitch recognition and in-game adjustments). Working the wrong category produces no results — diagnosis first, drills second.

Why does grip come first in baseball hitting lessons?

The bottom three fingers of the top hand (pinky, ring, middle) connect through the forearm flexors to the body’s rotational engine. When a hitter grips with the top of the hand — palm, index finger, thumb — the bat is isolated from rotation. Nearly every casting and bat drag problem is made worse by the wrong grip and improves when grip is corrected first. That’s why it’s Category 1.

What are pitcher-exploitable swing patterns?

Pitcher-exploitable patterns are swing flaws a pitching coach or scout identifies in 2–3 at-bats and builds an attack plan around: head pull (pitchers go off-speed away), stepping out (pitchers go away with breaking balls), dropping the hands (pitchers go high with velocity), and bat wrap (pitchers go inside hard). Fix these and the pitch mix thrown at your hitter changes because the attack points are gone.

What are the three head position problems in baseball hitting?

The three head position problems are yaw (head rotates away from the contact zone before contact — the hitter swings at where the ball was), pitch (the chin tilts up or down during the swing, distorting pitch-plane tracking), and roll (the head tilts laterally toward the front shoulder, disrupting depth perception). These are body health issues addressed before any mechanical power work because they compound physical wear and distort pitch tracking on every swing.

What are the three power and contact buckets in hitting?

Bucket 1 is no power — exit velocity is low relative to effort, almost always a rotational sequence (CLS) problem. Bucket 2 is high strikeout, fly ball, or ground ball rate — a barrel path and contact point problem. Bucket 3 is timing — good mechanics that don’t transfer to games. Bucket 1 and Bucket 2 have different root causes and different drill fixes. Applying Bucket 1 drills to a Bucket 2 problem produces harder ground balls instead of line drives.

How does pitch recognition training fit into baseball hitting lessons?

Pitch recognition is Category 5 — the game readiness layer that bridges tee mechanics into live at-bats. Tee work trains a fixed stimulus; games require anticipation and adjustment. Pitch recognition means reading arm angle, release point, and pitch shape before the ball reaches the hitter. It’s trainable through video study and at-bat planning, not something hitters are born with or without.

How many baseball hitting lessons does it take to fix a swing problem?

A Category 1 grip correction shows ball-flight results in 2–3 sessions with daily deliberate tee work. A deeply ingrained Category 3 pitcher-exploitable pattern reinforced over years of batting practice typically requires 8–12 sessions with structured drill work in between. The key variable is working the right category in the right order — starting at Category 5 before Category 1 is solid produces frustration, not improvement.


Five softball hitting drills. That’s all this post covers. But these aren’t generic tee work protocols or the same drills that have been recycled in hitting instruction for 30 years. Each one targets a specific mechanical problem — the kind that survives hundreds of reps of normal batting practice because batting practice doesn’t give hitters the right feedback to fix it.

Three of the five come from the Catapult Loading System and the Swing Smarter book. One addresses the unique physical reality of fastpitch — the rise ball — that baseball-derived swing instruction completely ignores. And the fifth is arguably the most underused diagnostic tool in all of hitting: using ball flight as real-time swing feedback.

Free Download

5 Softball Hitting Drills to Fix Your Swing — PDF

By Joey Myers — Creator of the Catapult Loading System · 100,000+ players trained

All 5 drills, setup diagrams, cue notes, and a 3-day practice schedule. Works off a single tee — no machine or partner required. Print it and bring it to the field.

Drill 1: What is the top hand three-finger pressure drill and why does it matter?

The top hand three-finger pressure drill establishes the connection between the spinal engine — the rotational core — and the hands and bat, so the swing is driven by the body instead of the arms. Most hitters grip the bat with the top part of the top hand: palm, index finger, and thumb. That grip pattern disconnects the swing from the body’s rotational source. The bottom three fingers — pinky, ring finger, and middle finger — connect directly to the forearm flexors, which run up the kinetic chain to the rotational engine of the swing.

When a hitter grips with the top of the hand, the swing is essentially an arm swing with the body along for the ride. When the pressure shifts to the bottom three fingers, the hands and bat are linked to how the body rotates. The barrel stays connected through contact instead of releasing early.

How to practice the drill

How to do it: Before any tee work, hold the bat in the top hand only. Consciously apply grip pressure with only the bottom three fingers — pinky, ring, middle. Feel how the grip connects into the forearm. Then take your normal grip with both hands, maintaining that bottom-three-finger pressure focus in the top hand. Take 10 tee swings with that cue as the single point of focus. The reference is simple: if you can feel the knob through the bottom of your top hand throughout the swing, the connection is there.

This drill is covered in depth in the Catapult Loading System. It’s also the recommended warm-up before any of the other softball hitting drills in this program — do it before picking up the overload bat or setting up the two-plate sequence. For more on how softball batting grip affects connection and power, that page breaks down the full grip framework.

Common mistake: Squeezing hard with the entire hand instead of emphasizing the bottom three fingers. Whole-hand death grip creates arm tension that works against the rotational chain. Light pressure in the right fingers beats heavy pressure in the wrong ones.

Drill 2: Why do fastpitch hitters need to practice swinging down through the zone?

Fastpitch hitters need a slightly downward barrel path through the zone because the rise ball — the defining pitch in fastpitch softball — moves upward as it approaches the plate, and a barrel that is rising or level cannot make square contact on a pitch that is also rising. The high tee drill trains this barrel path directly.

As a result, most baseball-derived swing instruction teaches hitters to match the plane of the pitch — which in baseball means swinging slightly upward because fastballs have mild downward movement. That instruction is transferred wholesale into softball coaching, where it actively hurts hitters facing rise balls. A hitter who swings upward at a rising pitch either pops it up (barrel gets under the ball) or misses entirely. A barrel moving slightly downward through the zone gives the hitter a chance to catch the ball at any point in the strike zone.

How to do it: Set the tee at shoulder height — letters or above. Use an overload bat (heavier than game bat) for this drill. The goal is to make clean contact on the high ball without the barrel rising to it — instead, feel the knob lead slightly, with the barrel working downward into the high contact point. Ten reps per session. The overload bat makes it harder to cheat the path and reinforces the proper barrel movement pattern.

For a complete breakdown of barrel path in fastpitch, see the fastpitch softball hitting mechanics page.

Pop-up diagnostic: If the high tee drill produces consistent pop-ups, the barrel is getting under the ball — which means it’s rising toward the contact point instead of working down into it. The fix is exaggerating the downward feel, not reducing it.

Drill 3: How does the overload/underload bat drill build real swing speed?

The overload/underload bat drill builds swing speed by using contrast between a heavier bat and a lighter bat to amplify the neuromuscular system’s speed output — a mechanism called post-activation potentiation. Five swings with a heavier bat prime the motor units involved in the swing to recruit more muscle fiber. Five swings with a lighter bat allow the nervous system to express force at a higher speed than it could before the overload set. Five swings with the regular bat follow, carrying the combined neural effect of both.

This is not a new concept in athletic training — sprinters have used contrast loading (resisted sprints followed by unresisted sprints) for decades, and the NSCA has documented contrast training effects across multiple sports. Applied to the swing, the mechanism is well-established. The bat weight difference matters: the overload bat should be no more than 20% heavier than the game bat, and the underload bat no more than 20% lighter. Outside that range, mechanics change to compensate and the drill loses its effectiveness.

How to do it: One round = 15 swings. Take 5 swings with the heavy bat (overload). Without resting, take 5 swings with the light bat (underload). Without resting, take 5 swings with your regular game bat. The no-rest protocol is intentional — the contrast effect depends on the nervous system being active from the overload set when the underload set begins. Two to three rounds per session is sufficient. More volume dilutes the neural effect.

For more on the research behind weighted bat training, see safe youth weighted bat training and overload/underload progressions.

Equipment note: A cut-down youth bat or a fungo bat works well as the underload option. For the overload, a donut weight on the game bat or a dedicated overload training bat both work. Avoid batting gloves on the underload bat — a lighter grip feel increases the swing speed effect.

All 5 drills are in the PDF — download it free and bring it to your next tee session.

Drill 4: How does the two-plate timing drill train you to hit different pitch speeds?

The two-plate timing drill trains pitch-speed adaptability by forcing the hitter to shift their contact point and commitment window within a single round of swings — mimicking what a varied pitching staff does across a full game at bat. Two home plates are set 3–5 feet apart. The hitter takes 2 swings at one plate, switches to the other and takes 2 swings, then returns to the first for a final 2 swings — 6 swings total per round.

The near plate requires an earlier contact point and a quicker decision. The far plate requires more patience — the hitter must wait longer before initiating the swing. Alternating between them over the course of a round trains the brain’s pitch-recognition and contact-point calculation systems to adjust automatically rather than rely on a fixed timing pattern built around one pitch speed.

In practice, most hitting practice is done at a fixed distance from the tee, which trains a fixed timing pattern. That fixed pattern works great until a pitcher changes speeds or a changeup is thrown — and then it falls apart completely. The two-plate drill is the fix for that.

How to do it: Set up two home plates, one at your normal tee position and one 3–5 feet in front of it (closer to the pitcher). Set a tee over each plate at your normal contact height. Take 2 swings at the back plate (normal timing), shift the tee to the front plate and take 2 swings (earlier contact, quicker reaction), shift back for 2 swings. Three rounds of 6 swings is a full session. The drill can also be done with a soft toss partner aiming at different distances.

Related: see the timing drills for hitting a softball breakdown for more plate-discipline and pitch-recognition work.

Drill 5: What is the ball-flight adjustment drill and why is straight flight the goal?

The ball-flight adjustment drill uses the ball’s trajectory off the bat as real-time swing feedback, with straight ball flight — the ball leaving the bat at the same angle and height it arrived — as the target. The objective of every swing in this drill is to eliminate all four bad-contact outcomes: groundballs, fly balls, hook spin, and slice spin. Making adjustments toward the middle is always the goal, every rep.

The diagnostic map: what each ball-flight outcome means

Here is the diagnostic map. Each bad-flight outcome tells you exactly what the barrel did:

  • Groundball — the barrel dropped below the center of the ball. On the next swing, contact the top half of the ball (swing slightly higher through the zone).
  • Fly ball / pop-up — the barrel rose above the center of the ball. On the next swing, contact the bottom half of the ball (drive through lower).
  • Hook spin (pull-side curve) — the barrel contacted too far to the inside of the ball, imparting left-to-right spin (for right-handed hitters). On the next swing, contact the outside half of the ball.
  • Slice spin (push-side curve) — the barrel contacted too far to the outside of the ball. On the next swing, contact the inside half of the ball.

Straight ball flight with slight backspin = the barrel hit the center of the ball = perfect contact. This is what the adjustment is always moving toward.

How to run the ball-flight adjustment drill

How to do it: Tee work, 10–15 swings per round. After each swing, evaluate the ball flight before it lands. Make one adjustment if needed — top half, bottom half, inside half, or outside half — and apply it on the very next rep. Do not make multiple adjustments at once. The drill trains the feedback loop: see the flight, identify the miss, adjust the barrel position, repeat. Over time, this self-correction becomes automatic. It’s more useful than any coach watching and calling corrections from outside the batter’s box, because the feedback is instant and direct.

Of all the softball hitting drills in this program, this one is the most self-sufficient — it requires no partner, no special equipment, and no video analysis. The ball tells you everything. It also pairs well with softball batting drills for power once contact quality is dialed in — because power without consistent center contact doesn’t show up in exit velocity the way it should.

Coaching note: This drill is extremely effective with players who hit a lot in BP but don’t make adjustments during games. The reason is usually that they’ve trained a fixed swing pattern without a feedback loop. Ball flight forces the loop open.

How often should you use these softball hitting drills?

Two to three drills per practice session is the ceiling. Each drill requires focused attention on a specific mechanical cue, and deliberate swing quality degrades after roughly 20–25 minutes of concentrated tee work. A better structure: treat Drill 1 (top hand pressure) as a daily pre-practice warm-up before any tee work. Then rotate through Drills 2–5 across different sessions.

The overload/underload drill (Drill 3) and the two-plate timing drill (Drill 4) pair well together in the same session — one trains swing speed, the other trains pitch-speed adaptability, and neither requires feedback-intensive concentration between reps. The ball-flight adjustment drill (Drill 5) and the high tee drill (Drill 2) are better done alone or as the primary focus of the session because both demand rep-by-rep evaluation.

For players 13 and older, three structured tee sessions per week using these softball hitting drills — each with 2–3 drills, 10–15 reps per drill — is a solid baseline. For younger players, two sessions per week with higher rest between rounds is better. The goal is quality of movement, not volume of swings. See the softball hitting tips for beginners page for a complete practice structure framework for newer players.

Free Download

Get the PDF — All 5 Drills on One Sheet

One page per drill. Setup instructions, coaching cues, and a 3-day practice schedule. Print it, bring it to the field.

Frequently asked questions about softball hitting drills

What are the best softball hitting drills for beginners?

The best softball hitting drills for beginners focus on connection and contact quality before adding speed or power. The top hand three-finger pressure drill establishes how the bat connects to the body’s rotational engine — without that connection, other drills don’t transfer well. The ball-flight adjustment drill is also excellent for beginners because it uses the ball’s flight path as instant feedback rather than requiring a coach to identify what went wrong.

How does the overload/underload bat drill improve bat speed?

The overload/underload bat drill improves bat speed through contrast training. Five swings with a heavier bat prime the neuromuscular system to recruit more muscle fiber. Five swings with a lighter bat then allow the nervous system to express force at higher speed than it could before the overload set. Five swings with the regular bat follow — carrying the combined neural effect of both. Done consistently, this produces measurable swing speed gains that transfer into competition.

Why do fastpitch softball hitters need to swing differently than baseball hitters?

Fastpitch softball hitters face the rise ball — a pitch with upward movement through the hitting zone. To make square contact on a rising pitch, the barrel must work slightly downward through the zone rather than level or upward. Baseball hitters facing predominantly downward-breaking pitches can swing more upward through the zone, but fastpitch hitters who do this will consistently pop up or miss rise balls entirely.

What is the two-plate timing drill in softball?

The two-plate timing drill uses two home plates spaced 3–5 feet apart to train reaction time for different pitch speeds. A hitter takes two swings at one plate, then switches to the second plate and takes two more swings, for a total of 6 swings per round. The near plate requires an earlier commitment and contact point; the far plate requires more patience. Alternating between them trains the brain to adjust contact point without conscious thought — which is exactly what happens against varied pitching in a game.

What does straight ball flight mean in softball hitting?

Straight ball flight means the ball leaves the bat at the same angle and height it arrived, with minimal side spin and slight backspin — a true, flat trajectory. It indicates perfect contact: the barrel found the center of the ball. Groundballs signal the barrel dropped below center. Fly balls signal the barrel rose above center. Hook spin means the bat contacted too far inside the ball. Slice spin means too far outside. Straight flight is the target every adjustment is made toward.

How many softball hitting drills should you do in one practice?

Two to three softball hitting drills per practice session is the right range for most players. Doing all five in one session creates cognitive overload — each drill requires focused attention on a specific mechanical cue, and quality degrades after about 20–25 minutes of deliberate swing work. Use Drill 1 as a daily warm-up, then rotate through Drills 2–5 across different practice days. The overload/underload drill and two-plate timing drill pair well in the same session.

Can softball hitting drills be done without a pitching machine or partner?

Yes — all five drills in this program can be done with just a batting tee, two home plates, and a bucket of balls. The top hand pressure drill and ball-flight adjustment drill work best off the tee. The high tee drill requires only a tee set at shoulder height. The overload/underload drill requires a heavier and lighter bat — no partner needed. The two-plate timing drill can also be done off the tee by setting it over each plate position alternately.


Most coaches go straight to mechanics — but if your hitter keeps stepping out, fear is almost always what needs to be fixed first.

By Joey Myers — D1 Baseball, Fresno State  |  Author, Catapult Loading System  |  28,000+ programs sold  |  20+ years of coaching

Stepping out — or “stepping in the bucket” — is a stride fault where the front foot lands open toward the pull side instead of toward the pitcher, immediately collapsing the swing’s loading position before the turn can begin. It’s one of the most common faults at every level from youth baseball through high school. You tell the hitter to step toward the pitcher. You put tape on the ground. You remind them at every at-bat. And the foot keeps landing in the same wrong spot. That’s the frustrating reality of stepping out in baseball when it’s fear-driven.

The reason most fixes don’t stick is that coaches are working on the symptom — the stride landing — while ignoring the cause. In over 20 years of coaching, the root cause of stepping out is fear of the ball in the vast majority of cases. And fear doesn’t respond to stride drills. That’s the core truth about stepping out in baseball: mechanics are the wrong starting point.

Here’s the three-step framework I actually use: address the fear first, check stride direction second, and reach for the RNT band drill only if the first two haven’t resolved it. In most cases, you never get to step three.

What Is Stepping Out in Baseball — and Why Does It Hurt the Swing?

Stepping out means the front foot lands open — toward third base for a right-handed hitter — rather than closed toward the pitcher. The term “stepping in the bucket” comes from an old baseball image: the hitter is stepping into an imaginary bucket placed next to the batter’s box, away from the plate.

The mechanical consequences are significant. When the foot lands open, three things break down immediately:

  • The barrel goes flat. An open landing triggers the hips and shoulders to rotate together rather than in sequence. When that happens, the hands disconnect from the torso and the barrel lags behind — the same movement pattern that causes bat drag and dropping the hands.
  • The Fight Position is missed. In the CLS framework, the Fight Position is the critical landing position — the loaded state the hitter needs to be in before the swing begins. An open front foot collapses that position before the turn can begin.
  • Outer plate coverage disappears. A hitter who steps out pulls away from the outer third of the plate with every swing. Outside pitches become automatic outs.

The swing can also look fine off a tee and fall apart completely against live pitching — which is one of the strongest signals that fear, not mechanics, is the actual driver. Recognizing this pattern is step one in diagnosing stepping out in baseball correctly.

Why does fear of the ball cause hitters to step out?

Fear of getting hit is a threat response — it’s the nervous system doing exactly what it’s supposed to do. When a hitter perceives the ball as a threat, the body moves away from it. That movement shows up as the front foot pulling away from the plate on the stride, landing open toward the pull side instead of toward the pitcher.

This response is automatic and fast — it happens before the conscious brain has time to apply any coaching cue. That’s why tape on the ground and “step toward the pitcher” reminders work in the cage (where there’s no threat) and evaporate in a game (where the threat is real). The fear response outpaces the cue every time. That’s the defining mechanic behind why stepping out in baseball resists cue-based fixes.

The easiest way to identify fear-driven stepping out: watch the hitter against different pitch types and locations. If the foot lands open more often on inside pitches, on 0-2 counts, or against harder throwers, the stepping out is situational — which means it’s fear. You can read more about the underlying cause in this post on fear of getting hit by the pitch.

A hitter whose foot lands open on every swing, regardless of pitch type or situation, has likely developed a stride habit — but even then, the fear that created the habit needs to be addressed before mechanics will hold. Sequence matters: fear first, mechanics second — always — when fixing stepping out in baseball.

Why do stride drills fix stepping out in the cage but not in games?

Stride drills produce correct landing positions in the cage because there’s no live threat — but in a game, the fear response fires before any conscious cue can reach the foot. The standard approach: tape a line on the ground, set up an obstacle toward third base, cue the hitter to step toward the pitcher. These tools address the landing position and can produce correct stride landings in a cage with no live pitching involved. That’s why stepping out in baseball doesn’t respond to cage-only fixes.

The problem is that in a game, the nervous system doesn’t care about the tape on the ground. When the threat response activates, the foot goes where the nervous system sends it. The mental approach to hitting and the physical mechanics are not separate systems — they’re wired together. Fix one without the other and the fix stays in the cage. This is the most important insight in fixing stepping out in baseball: the physical and neural systems must both be addressed.

Fear will never be fully eliminated — it’s not supposed to be. The goal is to shrink it. Make it smaller. Push it to the corner where it belongs so it stops running the stride. Fear management is the first step in any stepping out in baseball correction that actually sticks.

Want a one-page drill card you can take straight to the cage?

Download the free Stepping Out Fix Drill Card — the three-step framework (fear drill, stride direction, RNT band) condensed into a printable reference with drill setups, rep counts, and coaching cues.

Get the Free Drill Card →

What is the turning-away drill — and how do you use it to address fear of the ball?

The turning-away drill separates the survival response from the stride landing. Instead of fighting the fear response, it teaches the hitter to channel it correctly — rotating the body away from the threat rather than pulling the foot away from the plate.

Setup: A partner throws soft-toss or tennis balls at close range — close enough to feel like a real threat, not so close that there’s actual danger. The hitter’s only job is to turn the back shoulder away (presenting the back to the pitch) while keeping the front foot on its intended stride line.

Key coaching point: Do not shortcut by pulling the foot without the shoulder turn. The hitter must execute the full rotation away — the back of the jersey should be visible to the pitcher — while the front foot plants normally. If the hitter is yanking the foot and skipping the turn, reset and start again.

Progression: Start at low velocity and short distance. Build confidence with baby steps. Once the hitter is consistently turning away without pulling the foot, increase velocity or move to live toss. The goal is to build the self-confidence that the hitter can handle the threat without bailing out of the box.

See additional drills for fear of the ball to run alongside the turning-away progression for hitters who need a more graduated build-up.

How do you fix stride direction once fear is under control?

Once a hitter has worked through the fear drill and is no longer flinching or bailing, check the stride landing. Even after fear is resolved, the foot may still be landing open out of habit — the movement pattern was ingrained before the fear was addressed.

Target stride direction (from ZenoLink motion-capture research — zenolink.com): The front foot should land approximately 10 degrees closed toward the pitcher — not open, and not perfectly straight. The foot itself should point about 65 degrees open (between perpendicular to the plate and straight at the pitcher). Stride length should be roughly 3.75 times hip-center-to-hip-center, landing ball of foot to ball of foot.

The Goldilocks approach to stride direction: Don’t just cue “closer.” Instead, use variance. Have the hitter intentionally exaggerate stepping IN — past the target, toward the plate — so the body feels the contrast. Then let them find the middle on their own. This is the same principle used in the stride direction drill: the body self-organizes better when it experiences both extremes than when it receives a verbal correction aimed at the middle. Use stride landing mobility work if hip tightness is limiting how far the hitter can land closed.

Remember: The purpose of a stride is timing and directional force initiation — not power. A hitter doesn’t need a dramatic stride to hit with power. What matters is that the foot lands in the right place so the loading sequence can fire correctly. That stride direction fix is the second tool in the three-step stepping out in baseball correction sequence.

What is the RNT band drill for stepping out — and when should you actually use it?

The RNT (Reactive Neuromuscular Training) band drill for stepping out operates on the principle of “feeding the mistake.” Instead of cueing the hitter toward the correct position, you apply resistance that exaggerates the error — and the body corrects itself reflexively. RNT is the third and final step for persistent stepping out in baseball that hasn’t responded to fear work and stride cues.

Setup for the RNT band drill for stepping in the bucket:

  • Place a slip knot of resistance band around the front ankle.
  • Anchor the other end to a fence post or wall, positioned to pull the front ankle in the direction the hitter is stepping out (toward third base for a right-handed hitter).
  • Alternatively, a partner holds the other end and applies the pull manually.
  • The hitter takes normal stride reps — tee work, soft toss, or front toss.
  • The band pulls the foot in the wrong direction. The body reflexively plants the foot closed to resist the pull.

Run 10–15 reps per set. The correction often happens immediately — hitters are frequently surprised by how natural the closed landing feels once the band removes the conscious effort of fighting the habit.

When to use it: RNT is the third tool, not the first. If fear has been addressed through the turning-away drill and stride direction cues are showing improvement, RNT may not be needed at all. It’s most useful when the stride habit has been ingrained for years and the foot keeps returning to the old landing position even after fear is resolved. The RNT band is the final tool in the stepping out in baseball correction sequence for exactly this scenario.

How do you decide which stepping-out fix to reach for first?

The sequencing matters because the three tools target three different layers of the same problem. Using the right one out of order wastes practice time and can frustrate a hitter who’s working hard but still not changing. That frustration is the most common sign that stepping out in baseball hasn’t been addressed at the root cause.

Step 1 — Fear drill (almost always start here): If the stepping out is situational — worse on inside pitches, in tight counts, against better pitching — start with the turning-away drill. The nervous system is driving the fault. Address fear first.

Step 2 — Stride direction drill: Once the hitter is no longer bailing on inside pitches and can take the turning-away reps consistently, evaluate stride landing direction. If the foot is still open, use variance (exaggerate stepping in) to help the hitter self-organize toward the correct 10-degree closed target.

Step 3 — RNT band drill: If the stride habit isn’t responding to direction cues — if the foot keeps snapping back to the old landing spot even after fear is resolved — use the RNT band to let the body self-correct through reflex rather than conscious effort.

In most cases, the fix is in step one or two. The HPL Zepp swing mechanics experiment — using Diamond Kinetics sensor data — confirms that when the landing position is correct, the rest of the loading chain fires more efficiently — which means a clean stride landing has downstream benefits well beyond just “stepping toward the pitcher.” That’s why stepping out in baseball correction pays off across every area of swing performance.

Frequently Asked Questions: Fixing Stepping Out in Baseball

What causes stepping out (stepping in the bucket) in baseball?

Stepping out is almost always triggered by fear of the ball — the hitter’s nervous system moves the front foot away from an incoming pitch as a threat-avoidance response. Once fear is addressed, any remaining stride issue is corrected with stride direction drills or the RNT band drill. Coaches who skip fear and go straight to mechanics rarely get results that transfer to games. That’s the defining characteristic of stepping out in baseball: it’s a fear problem wearing a mechanics costume.

How do I know if my hitter is stepping out because of fear or a stride habit?

Watch whether the stepping out is consistent or situational. If the hitter steps out only on inside pitches, tight counts, or against harder throwers, that’s fear. If the stride lands open on every pitch regardless of location or situation, the habit may have become mechanical — but fear was usually the original cause, and it still needs to be addressed first. Chronic stepping out in baseball almost always has a fear history behind it, even when the hitter denies being afraid.

What is the turning-away drill for fear of the ball?

The turning-away drill trains the hitter to rotate the back shoulder away from an incoming pitch — presenting the back — while keeping the front foot on its intended stride line. A partner throws soft toss or tennis balls at close range. The hitter turns the body away, not the foot. Important: do not shortcut by pulling the foot without the turn. Start at low intensity and build as comfort grows.

What stride direction should the front foot land on when hitting?

The front foot should land approximately 10 degrees closed toward the pitcher — not straight forward or open toward the pull side. The stride foot should point about 65 degrees open. Stride length should be approximately 3.75 times hip-center-to-hip-center, landing ball of foot to ball of foot. These are the ranges ZenoLink found consistently across elite-level hitters using motion-capture data.

How do I set up the RNT band drill for stepping in the bucket?

Use a resistance band with a slip knot on the front ankle. Anchor the other end to a fence post or have a partner hold it, positioned to pull the front ankle in the direction the hitter is stepping out. The band feeds the mistake — pulling the foot outward — and the body reflexively corrects by planting the foot closed. Run 10–15 reps per set. Only use after the fear drill and stride direction cues have been tried first.

Can stepping out cause bat drag or a flat barrel?

Yes. When the front foot lands open, the hips and shoulders tend to rotate simultaneously instead of sequentially — which disconnects the hands from the torso and causes the barrel to lag behind, a form of bat drag. The hitter also loses the ability to cover the outer half of the plate. Fixing the stride landing often improves the barrel path, but both the stride and the loading sequence may need to be addressed.

Free Download

Get the Stepping Out Fix Drill Card

The 3-step framework — fear drill, stride direction, RNT band — in a printable one-page PDF. Baseball and softball. All levels.

39k+
Email Subscribers
20k+
Programs Downloaded
20+
Years Coaching
D1
College Athlete

Drills to Stop Dropping Hands in a Baseball or Softball Swing: The RNT Method + 3 Core Fixes

By Joey Myers | HittingPerformanceLab.com | Former D1 Baseball, Fresno State

These are the drills to stop dropping hands in a baseball swing. If you’ve been telling a hitter “keep your hands up” and the problem keeps coming back — it’s because that cue is trying to fight a load-phase movement pattern with a verbal reminder. Hands drop is specifically a stride fault: the hands sink from the back shoulder down to the waist or belly button during the stride load, and never come back up by foot strike. The cue doesn’t address what’s already set by landing.

The fix that works — backed by Reactive Neuromuscular Training research and confirmed with hitters from youth ball through professional levels — is the RNT Hands Drop Drill: feeding the mistake with resistance so the nervous system learns to correct itself. This post covers that drill, the scap load foundation that makes it stick, and the high-tee confirmation tool — plus the Finger Pressure and overload/underload progressions for when racing back elbow bat drag is layered on top. A free printable drill card PDF is at the end.

What the video above is showing you — and the one coaching detail most coaches miss

The video demonstrates the RNT drill exactly as it’s run in a coaching session: step on the band with the back foot (middle of the foot so it doesn’t snap back), hold the strap — not the handle — and resist the downward pull to keep the top-hand thumb at armpit level through the stride. It’s a get-to-landing drill only. No swing with the bands on. Five reps, feel the resistance, then five breaking-apart swings without the band.

One detail from the video that most coaches overlook: don’t change where the hitter normally starts their hands just because the band is pulling them down. If they normally start their hands up, keep them up. The band creates resistance from wherever the hands begin — it’s training the movement pattern, not the starting position. Changing the setup defeats the drill.

The other key point from the video is the grading framework for the breaking-apart swings: grade process, not performance. If the hitter crushes a ball but the hands dropped — that’s an F swing. If they swing and miss off the tee but the hands stayed at armpit level — that’s an A swing. This reframe is important because youth hitters instinctively chase ball contact. The drill only works if they’re focused on what their hands are doing, not where the ball goes. Telling them upfront how you’re grading them shifts the focus immediately.

3
Core Drills
2
Root Causes
+2
Progressive
0
Extra Equip.

Free Download

Get the Dropping Hands Fix Drill Card (Printable PDF)

All 3 core drills with step-by-step cues, the Finger Pressure progression, overload/underload protocol, and the 3-week plan — one printable card for the cage.

What Does “Dropping Hands” Mean in a Baseball Swing?

Hands drop is a load-phase fault — not a swing fault. It happens during the stride: the hands physically sink from their starting position near the back shoulder/armpit level down to the waist or belly button, and never come back up by stride landing. Where the hands are at foot strike is the diagnostic checkpoint. That’s the moment the drills to stop dropping hands in a baseball swing sequence targets.

What it is NOT: A hitch — like Barry Bonds or Josh Hamilton — is a controlled dip and return. The hands drop down and come back up before landing. A hitch may or may not be a problem depending on the hitter, but it is a different movement. Hands drop doesn’t come back up. That is the distinction.

On film: Shoot from the side or directly in front at 240fps (standard iPhone slow-mo). Look for a 2–4 frame downward movement of the hands from load initiation to foot strike. If the hands end up at or below the belly button at landing, that’s hands drop. The target position is at or near armpit / back-shoulder height.

The Geometry Problem: Imagine a right triangle — Side a = 3 inches, Side b = 4 inches, hypotenuse c = 5 inches. A hitter whose hands drop moves down then forward: 3 + 4 = 7 inches total path. A hitter whose hands move diagonally — down AND forward simultaneously — travels only 5 inches. That’s a 2-inch longer path to every pitch. At 85+ mph pitch speed, 2 extra inches of hand path is a significant timing deficit that compounds over every at-bat.

Because of that longer path, hitters compensate: the upper half over-rotates, the barrel casts early, the front shoulder flies open. The result is diminished power, more strikeouts, and more popups on elevated pitches. Fixing the hands at the load phase cleans up compensations downstream without having to address them directly.

What Causes Dropping Hands in a Baseball or Softball Swing — and Which Drills Stop It?

There are two primary root causes. Identifying which one — or which combination — applies to a specific hitter determines the starting drill.

Load phase vs. swing phase: The two root causes below produce hands drop during the stride load. A related but separate issue is barrel drop that happens during the swing (racing back elbow bat drag). If your hitter’s hands are staying up by landing but the barrel is still dropping through the contact zone, scroll to the Finger Pressure section below — that’s a swing-phase fault with a different fix. Also see the RNT band drill video for a dedicated demonstration.

Root Cause 1

Missing Scapula Load

The back shoulder blade doesn’t pinch inward during the stride load. Without that scapula pinch, the arm disconnects from the torso — and disconnected arms, under gravity, drift down. The scap load is the stability anchor that keeps the hands at armpit height through the stride. You can’t hold what isn’t connected.

Root Cause 2

Ingrained Neuromuscular Pattern

In many cases, hands drop is a deeply ingrained movement pattern — the body has learned to sink the hands during the stride and the nervous system executes it automatically without the hitter feeling it. This is why standard cues (“keep your hands up”) don’t fix it: you can’t consciously override a subconscious motor pattern with a verbal reminder during a 90mph pitch. This is precisely where Reactive Neuromuscular Training is uniquely effective — it feeds the mistake with resistance, forcing a reflexive correction that reprograms the pattern at the nervous system level.

Note: Some hitters also show Racing Back Elbow Bat Drag — the back elbow races past the hands during the swing, severing the connection to the turning torso. This is a swing-phase fault, often downstream of a missing scap load. If it persists after the core drills, Finger Pressure is the next intervention (see below).

3 Core Drills to Stop Dropping Hands in a Baseball Swing

DRILL 1

RNT Hands Drop Drill

Primary fix: load-phase hands drop  |  Equipment: light resistance band (Jaeger bands preferred)

What is RNT? Reactive Neuromuscular Training — developed by Dr. Gray Cook (Functional Movement Screen) — means “feeding the mistake.” You create resistance in the direction the fault is moving and the athlete’s nervous system reflexively corrects. It’s faster and more durable than cues because it operates below the conscious level. Dr. Cook: “When your subconscious and the subtle timing of your stabilizers create joint integrity… the prime movers have no choice but to perform better.”

Setup: Step on a light resistance band with the back foot at mid-foot (so it doesn’t snap back). Hold the strap — not the handle, handles are too thick to hold with the bat. Jaeger bands are preferred because they Velcro around the wrist, leaving both hands free to grip normally. The band pulls the hands down — feeding the mistake.

Execution: This is a get-to-landing drill only — not a swing drill. Stride to foot strike and resist the band pulling the hands down. The top-hand thumb should finish at armpit level every rep. Do 5 reps with the band, then remove it and take 5 breaking-apart swings: stride to landing, pause 1–2 seconds, then swing (toss or tee). The hitter should still feel the phantom resistance from the band.

Key Coaching Note — Process Over Performance

Tell the hitter: “I don’t care where the ball goes — I’m grading you on your process.” A solid hit with dropped hands = F swing. A swing-and-miss with hands at armpit = A swing. This mindset shift is what allows the neuromuscular reprogramming to hold.

DRILL 2

Scap Load / Scapula Pinch

Foundation: builds the load stability that lets the RNT fix hold  |  Equipment: none (wall optional)

Setup: Take your normal hitting stance. Optional: stand 6 inches from a wall with your back to it — this prevents over-rotation and forces an honest load position. Grip the bat at the handle.

Execution: During the load, pinch the back shoulder blade inward toward the spine. Feel the back elbow drop and stay connected to the side of the body. Hold 3 seconds. Reset. 3 sets of 10 reps. Run this before the RNT drill each session — the scap gives the hands a stable anchor, then the RNT trains them to hold it under load. The scap pinch must stay engaged at the start of the turn; it releases during rotation but must be present at load initiation.

Coaching Cue

“Pinch a pencil between your shoulder blades and don’t let it fall during the load.”

DRILL 3

High-Tee Drill

Confirmation: verifies the RNT fix is carrying through to the swing  |  Equipment: batting tee

Setup: Set the tee at shoulder-to-chest height. Position the ball directly over the front hip. Take your normal stance — don’t adjust your feet to compensate for the height.

Execution: Swing with full intent. If the hands dropped during the load, the barrel arrives below the ball — instant miss or bottom-of-tee contact. No interpretation needed. If the hitter is making clean contact on the high tee after the RNT drill, the fix is holding into the swing. 3 sets of 8 swings, run after the RNT session.

Coaching Cue

“If the barrel dips, you miss. The tee is the referee — it doesn’t lie.”

Print It for the Cage

Get the Free Dropping Hands Fix Drill Card PDF

All 3 core drills with cues, the Finger Pressure progression, overload/underload protocol, and the 3-week plan — one printable card for the cage.

Progressive Tools: Finger Pressure and Overload/Underload Training

Once the three core drills have cleaned up load-phase hands drop, some hitters still show barrel drop through the contact zone during the swing. This indicates a secondary swing-phase fault — Racing Back Elbow Bat Drag — where the back elbow races past the hands before impact, severing the connection between the hands, bat, and turning torso. Two progressive tools address this.

Finger Pressure

Finger Pressure is a grip technique: top hand — squeeze the bottom three fingers (pinky, ring, middle) at about 8 out of 10 force. The bottom hand holds a butterfly grip — not too tight, not too loose. Timing: start the squeeze when the front foot lifts and continue through impact and follow-through.

The science: per Thomas Myers’ Anatomy Trains, the Front Arm Fascial Line runs from the pinky, ring, and middle fingers — across the bottom of the forearm, triceps, and chest — into the turning torso. Squeezing those three fingers reconnects the hands and bat to the body’s rotational engine through the fascia system. Per strength coach Pavel Tsatsouline: there is a direct correlation between grip strength and overall body strength — and gymnasts who do dynamic grip work pound-for-pound outperform most athletes in upper body strength.

Case Studies

Jace (age 10): Racing back elbow, severe. Tried everything for 4–5 months. After two weeks of Finger Pressure — two sessions total — exit velocity jumped from 46 mph to a 55 mph high. Hit his first 180-foot home run at age 11.

Zack (8th grade, 6’4″): Racing back elbow, two years of trying everything. In one 30-minute session of Finger Pressure, the back elbow pattern disappeared. EV stabilized from a scattered 77 mph high to a consistent 79–83 mph range.

Practice protocol — 5-swing variance drill: Odd swings (1, 3, 5): correct Finger Pressure — top hand, bottom three, squeezed from foot pickup through impact. Even swings (2, 4): reverse — squeeze top two (thumb + pointer), relax bottom three. Ask the hitter if they felt a difference between odd and even. Listen to impact sound — correct Finger Pressure produces louder, crisper contact.

Overload and Underload Training

Overload (bat 10–20% heavier than game bat): Amplifies the Finger Pressure feel at contact. Poor connection — any residual racing back elbow — becomes immediately obvious through soft contact sound and missed balls. 5 reps overload, then 5 reps game bat. The contrast builds body awareness faster than any cue.

Underload (bat 10–20% lighter than game bat): Trains the corrected motor pattern at higher swing speed. The phantom-band feeling from the RNT drill transfers more easily under a lighter load — especially valuable for younger hitters building the habit for the first time. 5 reps underload, then 5 reps game bat.

How to Spot Dropping Hands on Video

Film from the side or directly in front of the hitter at 240fps. Pause at foot strike / stride landing — this is the diagnostic checkpoint for hands drop, not the contact position. The hands should be at or near the back-shoulder / armpit height at this frame. If they are at or below the belly button, that’s hands drop confirmed.

Count the frames from load initiation to foot strike. A 2–4 frame downward movement with no recovery before landing confirms the fault. If you see a dip and return before landing — hands drop down and come back up — that’s a hitch, not hands drop, and needs different handling.

Secondary check: at foot strike, note where the back elbow is relative to the hands. If the elbow is already past the hands before the hips fire — that’s Racing Back Elbow Bat Drag appearing as a swing-phase fault. Fix load-phase hands drop first with the RNT drill and scap load; add Finger Pressure in Week 3 if the back elbow pattern persists through the contact zone.

Softball Hitting Drills to Stop Dropping Hands

Dropping hands in a softball swing is the same load-phase fault as in baseball — the hands sink below the launch position during the stride before the front foot lands. The three core drills above apply directly to softball hitters without modification to the movement pattern. However, softball has two specific adjustments: the rise ball changes the pitch plane, and slappers have a different contact point. Here’s how each drill maps to the softball context.

Softball Drill #1: RNT Band Drill — No Changes Needed

The RNT drill for dropping hands in softball runs exactly the same as the baseball version. Step on the band with the back foot, hold the strap at the wrist of the top hand, and keep the top-hand thumb at armpit level through the stride. Five reps get-to-landing, then five breaking-apart swings without the band. The load-phase fault being trained — hands sinking before front foot contact — is biomechanically identical in softball. Jaeger bands work at all levels from 10U travel ball to college. This is the highest-leverage drill to stop dropping hands in a softball swing because it corrects the motor pattern at the source, not at contact.

Softball Drill #2: Scap Load — Same Mechanics, Rise Ball Context

The Scap Load drill is unchanged for softball hitters. Hold a light weight or resistance band handle at chest height, pinch the back shoulder blade inward and hold 3 seconds, then release — 3 sets of 10. Additionally, remind the softball hitter why it matters specifically to their game: a scapula that doesn’t load correctly lets the back arm disconnect from the torso, and when the arm disconnects the hands drop. On a rise ball — the most dangerous pitch in softball — a hands-drop means the barrel arrives below the pitch and the hitter either misses or rolls over weakly. A locked-in scap load is the structural fix that makes the barrel stay on the rise ball plane without a conscious adjustment.

Softball Drill #3: High-Tee Drill — Two Softball Adjustments

The High-Tee Drill needs two adjustments for softball hitters. First, set the tee 2–3 inches above chest height rather than shoulder height to account for the rise ball — softball hitters face more elevated pitches than baseball hitters, and the higher tee trains the barrel to arrive on the rise ball plane rather than dropping below it. Second, for slappers: position the tee 6 inches forward of normal contact to replicate the running-through-the-ball contact point. The slapper is still making contact, still needs the barrel on plane at that contact point, and still loses barrel height when the hands drop during the stride — the drill addresses it the same way, just at the slapper’s forward contact location. Run 3 sets of 8 reps. These are the most directly transferable softball hitting drills to stop dropping hands into game pitching.

Why Dropping Hands Is Especially Costly in Softball

In baseball, a hands-drop costs the hitter contact quality and inside-pitch coverage. In softball, it also costs the hitter the rise ball entirely. A rise ball that starts at the belt and finishes at the letters requires the barrel to arrive at the top of the zone — which is only possible if the hands stayed at launch height through the stride. A hitter who drops the hands during the stride has to compensate with the upper body to get back up, which slows the barrel, opens the front side early, and turns the rise ball into a pop-up or a miss. Therefore, fixing hands drop in a softball swing has a bigger payoff than in baseball: it doesn’t just clean up contact, it gives the hitter access to the most dominant pitch in the game.

3-Week Progression Plan

Don’t run all tools in the same session — address root causes in order. Here’s the recommended three-week implementation:

Week Focus Drills & Tools Volume
Week 1 Foundation & Awareness Scap Load (3×10) → RNT Drill (5 reps, get-to-landing only) 3–4 days/wk
Week 2 Transfer to Swing RNT (5 reps) → Breaking-apart swings (5) → High Tee (3×8) 3–4 days/wk
Week 3 Integration + Progressive All 3 drills + live soft toss; add Finger Pressure + overload/underload bat if racing back elbow present 3–4 days/wk

Frequently Asked Questions

What causes dropping hands in a baseball swing?

Two primary causes: (1) a missing scapula load during the stride — the back shoulder blade doesn’t pinch inward, the arm disconnects from the torso, and gravity pulls the hands down before landing; and (2) an ingrained neuromuscular pattern — the body has learned to sink the hands during the stride and executes it automatically. Standard cues can’t override a subconscious motor pattern, which is why the RNT drill (feeding the mistake with resistance) produces faster, more durable results than verbal instruction. Knowing which cause applies determines which of the drills to stop dropping hands in a baseball swing you start with.

How do you fix dropping hands in a baseball swing?

Use the three-drill sequence in order: Scap Load first (3×10, hold 3 seconds each rep) to build the stability anchor, then the RNT Hands Drop Drill (5 reps get-to-landing with a light resistance band, then 5 breaking-apart swings without) to reprogram the load-phase motor pattern, then the High-Tee Drill (3×8) to confirm the fix is carrying through to the swing. If racing back elbow bat drag persists into Week 3, add Finger Pressure (top hand bottom three fingers, butterfly grip bottom hand) and overload/underload bat training. Run them in that order for the complete drills to stop dropping hands in a baseball swing protocol.

What is the RNT drill for dropping hands?

RNT stands for Reactive Neuromuscular Training — a method from Dr. Gray Cook (FMS) that means “feeding the mistake.” For hands drop, the hitter steps on a light resistance band with the back foot and holds the strap (Jaeger bands preferred — they Velcro to the wrist). The band pulls the hands down, feeding the mistake. The hitter resists, keeping the top-hand thumb at armpit level through the stride. It’s a get-to-landing drill only, not a swing drill — 5 reps with the band, then 5 breaking-apart swings without it. Grade the hitter on process, not where the ball goes. The nervous system correction that results is faster and more durable than any cue-based approach. It anchors the drills to stop dropping hands in a baseball swing from the load phase forward.

How do you stop dropping hands when batting in softball?

All three core drills apply directly to softball — the load-phase fault is biomechanically identical. For the High-Tee Drill, set the tee 2–3 inches above chest height (higher than the baseball setup) to account for the rise ball. For slappers, position the tee 6 inches forward of normal contact to replicate the running-through-the-ball contact point while still training the correct hand position at stride landing. The RNT band drill setup is unchanged and works at all levels. All the drills to stop dropping hands in a baseball swing covered here apply to softball without modification.

What is Finger Pressure and how does it help with dropping hands?

Finger Pressure is a progressive tool for when racing back elbow bat drag — a swing-phase fault — persists after load-phase hands drop is corrected. The top hand squeezes the bottom three fingers (pinky, ring, middle) at 8/10 force from when the front foot lifts through impact. The bottom hand uses a butterfly grip. Per Thomas Myers’ Anatomy Trains, those three fingers connect through the Front Arm Fascial Line to the turning torso — squeezing them reconnects the bat to the body’s rotational engine. Documented results: resolved racing back elbow in two weeks (10yo hitter, EV 46→55 mph) and in one 30-minute session (8th-grader, EV 77→79-83 mph). Add Finger Pressure after the drills to stop dropping hands in a baseball swing cleans up the load phase.

What drills help with dropping hands in softball?

The three most effective softball hitting drills to stop dropping hands are the RNT Band Drill, the Scap Load, and the High-Tee Drill. The RNT Band Drill corrects the motor pattern at the load phase — the hitter steps on a resistance band and keeps the top-hand thumb at armpit level through the stride. The Scap Load builds the stability anchor that prevents the arm from disconnecting and pulling the hands down. The High-Tee Drill confirms the fix is carrying through to contact, with the tee set 2–3 inches above chest height for softball to train barrel height on the rise ball. Run them in that order for the fastest correction. All three drills for dropping hands in softball work at every level from youth travel ball to college.

How do you fix dropping hands when hitting softball if the hitter doesn’t drop until the swing starts?

If the hands stay up during the stride but drop at swing initiation, the fault is in the swing phase, not the load phase — which means the cause is different. The most common swing-initiation drop in softball is a racing back elbow: the back elbow fires down toward the hip before the hands move forward, which drags the barrel below the intended path. The fix is Finger Pressure — the top hand squeezes the bottom three fingers at 8/10 force from stride landing through contact. This reconnects the bat to the body’s rotational engine via the Front Arm Fascial Line and stops the elbow from racing ahead. Add Finger Pressure after confirming the load phase is clean with the RNT drill. It resolves most swing-initiation hands-drop patterns in 1–2 weeks when combined with the core drills to stop dropping hands in a softball swing.

References:

Myers, J. Swing Smarter: Science-Based Hitting Training Built to Understand How, Why & Reasoning Behind It. 2021 — Chapter 9: How ‘Feeding the Mistake’ Stops Hands Drop; Chapter 10: Connection: Finger Pressure Magic.

Cook G, Burton L. Functional Movement Screen. Reactive Neuromuscular Training principles.

Myers T. Anatomy Trains: Myofascial Meridians for Manual and Movement Therapists. 3rd ed. Elsevier, 2014.

Free — No Credit Card

Download the Dropping Hands Fix Drill Card PDF

All 3 core drills, the Finger Pressure progression, overload/underload protocol, and the 3-week plan — one printable card for the cage.

AI Coaching Course 2025: Youth Baseball & Softball Practice Plan + Off-Season & In-Season Workout Builder Fast

The AI Coaching Course 2025 is a game changer for youth baseball and softball parents and coaches who often feel overwhelmed. It tackles the chaos by simplifying practice organization, which usually consumes hours each week. With easy-to-use resources, it helps coaches manage varying skill levels without confusion. Plus, parent communication becomes a breeze with ready-made templates that keep everyone informed. Coaches can create tailored practice plans in under a minute, giving them more time to focus on player development instead of logistics. This tool not only enhances athlete performance but also reduces stress for busy coaches and parents alike, making practices more enjoyable overall.

Table of Contents

  1. Understanding the AI Coaching Course 2025
  2. Addressing Common Coaching Challenges
  3. Transforming Chaos into Order
  4. Key Features of the AI Coaching Course
  5. Creating Custom Practice Plans Fast
  6. Building Effective Workouts Year-Round
  7. Enhancing Parent Communication Efforts
  8. Tracking Athlete Progress Effectively
  9. Benefits of Using the AI Coaching Course
  10. Success Stories from Coaches and Parents
  11. Frequently Asked Questions

Understanding the AI Coaching Course 2025

The AI Coaching Course 2025 is crafted especially for busy youth baseball and softball coaches who juggle multiple responsibilities. Coaches often find themselves overwhelmed with the demands of practice planning, workout schedules, and parent communication. This course utilizes advanced AI to simplify these processes, allowing coaches to focus on what they love most: teaching the game. It effectively addresses common pain points such as the chaos of organizing practices. For example, a coach might spend hours each week figuring out how to plan a session that meets the diverse skill levels of their players. With this course, those lengthy hours are reduced to mere minutes. Coaches can create organized practice plans in less than a minute, freeing up time and energy to engage directly with athletes.

Furthermore, the course supports both in-season and off-season training, ensuring that athletes stay on track year-round. It offers easy-to-use templates that help coaches maintain a structured approach to workouts, which is crucial for athlete development. Without requiring any technical skills, the course provides solutions that streamline communication with parents, making it easier to keep them informed and engaged. By simplifying logistics and administrative tasks, the AI Coaching Course empowers coaches to allocate more time toward skill development, ultimately enhancing the overall experience for both coaches and athletes.

Addressing Common Coaching Challenges

Coaching youth baseball and softball comes with its share of challenges, often leaving coaches feeling overwhelmed. One major issue is the time-consuming nature of practice organization. Coaches may find themselves spending hours each week developing practice plans, which can take away from valuable coaching time. Additionally, tracking athlete progress is crucial, yet many coaches struggle to monitor their players’ growth effectively amidst their busy schedules.

Another common challenge is managing diverse skill levels within a single team. Coaches frequently face the task of ensuring that all athletes receive the appropriate level of training and engagement, which can be confusing and daunting. This complexity is compounded by the need for efficient communication with parents. Many coaches still rely on outdated methods that make keeping parents informed about schedules and player progress a cumbersome task.

Administrative duties can quickly pile up, leaving coaches feeling bogged down. Balancing the planning of practices with game strategies often leads to stress, especially when quick adjustments are necessary. Furthermore, limited resources for personalized training can hinder a coach’s ability to cater to individual athlete needs, making it challenging to keep everyone motivated year-round. Planning effective workouts can also be a source of confusion, as coaches need to ensure that their athletes are developing the right skills while maintaining their enthusiasm for the sport.

  • Time-consuming practice organization
  • Difficulty in tracking athlete progress
  • Managing diverse skill levels within a team
  • Inefficient parent communication methods
  • Overwhelming administrative tasks
  • Balancing practice planning with game strategies
  • Limited resources for personalized training
  • Struggles with keeping athletes motivated year-round
  • Confusion in planning effective workouts
  • Need for quick adjustments to practice plans

Transforming Chaos into Order

The AI Coaching Course simplifies the chaotic world of youth sports coaching. With structured templates, coaches can quickly plan practices, transforming hours of work into mere minutes. This not only saves time but also reduces the stress that comes with juggling schedules and athlete needs. Automated tools help streamline the process, allowing coaches to focus on what truly matters: athlete development. Clear guidelines for creating practices and workouts enhance clarity and ensure that everyone is on the same page. Coaches can easily track multiple athletes’ progress, making it simpler to provide tailored feedback. This system also fosters better communication with parents, easing the anxiety often felt around scheduling and updates. Flexibility is built-in, allowing adjustments to be made on the fly. Ultimately, this approach encourages a consistent training routine and supports a positive team culture, making the coaching experience more enjoyable for everyone involved.

Key Features of the AI Coaching Course

The AI Coaching Course 2025 offers several key features designed to make coaching easier and more effective. One standout feature is the customizable practice plan generator, which allows coaches to create tailored practice sessions in just a few clicks. This tool considers the team’s specific needs and skill levels, integrating relevant drills and game scenarios seamlessly.

Another significant aspect is the user-friendly interface. Coaches can navigate through the platform effortlessly, whether they are seasoned professionals or new to coaching. The integration of drills suited for various skill levels ensures that every athlete gets the appropriate challenge, fostering growth and confidence.

The course also includes resources for athlete conditioning and recovery, emphasizing the importance of maintaining physical health throughout the season. Coaches can access pre-written communication templates to keep parents informed and engaged, which helps in building strong relationships between coaches and families.

Progress tracking tools provide comprehensive feedback, allowing coaches to monitor individual athlete development over time. This feature is crucial for identifying areas for improvement and tailoring future practices accordingly. Additionally, there are templates for off-season and in-season workouts, ensuring that athletes stay on track year-round.

Finally, the course fosters a supportive community of coaches who share insights and best practices. This community aspect not only encourages collaboration but also enhances the overall coaching experience.

Feature Description
Practice Plan Generator Quickly generates customized practice plans tailored to the team’s needs, skill levels, and available equipment.
Off-Season & In-Season Workout Builder Provides templates for creating effective workout plans that maintain athlete development throughout the year.
Parent Communication Tools Offers ready-to-use message templates for communicating with parents, simplifying updates on practice schedules and player progress.
Athlete Performance Tracking Monitors progress and performance metrics, allowing coaches to provide targeted feedback and track athlete growth over time.

Creating Custom Practice Plans Fast

Creating custom practice plans has never been easier. With the AI Coaching Course, coaches can generate tailored practice plans in under 60 seconds, significantly cutting down on planning time. Each session is designed to meet the specific needs of the team, ensuring that skill development is a core focus. Coaches can also make adjustments based on athlete feedback, allowing for a more responsive approach to training. This flexibility helps coaches utilize available equipment efficiently, ensuring that no resources are wasted.

To keep athletes engaged, the course promotes a variety of drills and activities. This variety not only makes practices fun but also helps athletes develop a broader skill set. Coaches can include options for competitive scenarios, providing athletes with real-game experiences during practice. Furthermore, the AI tools assist in planning balanced workloads, so athletes are neither overworked nor under-challenged.

One of the biggest advantages of this system is how it alleviates the stress of last-minute planning. Coaches can feel confident knowing they have a solid plan ready to go, which allows them to focus on fostering creativity in practice design. By streamlining the practice planning process, the AI Coaching Course empowers coaches to spend more time developing their athletes and less time worrying about logistics.

Building Effective Workouts Year-Round

Creating effective workouts year-round is crucial for young athletes in baseball and softball. The AI Coaching Course 2025 provides structured workout templates tailored to keep athletes engaged and developing, regardless of the season. During the off-season, these templates focus on maintaining skills, ensuring that players do not lose their edge while away from the field. For instance, incorporating drills that emphasize hand-eye coordination and agility can keep skills sharp, even when practice time is limited.

In-season workouts offer a different challenge, as athletes need to balance skill maintenance with recovery. The course includes recovery strategies that help athletes recharge, reducing the risk of injury and burnout. This might involve lighter workout days or specific recovery sessions that focus on flexibility and strength, allowing players to perform at their best during games.

Additionally, the course provides guidance on conditioning tailored for different sports, recognizing that baseball and softball demand unique physical requirements. By integrating strength and conditioning principles, athletes build resilience and flexibility, crucial traits for long-term success. With easy adaptation of workouts, coaches can modify plans based on individual athlete needs, ensuring everyone stays challenged and engaged.

Ultimately, the course emphasizes continuous athlete development, supporting both physical and mental growth. By fostering an environment where athletes can thrive year-round, coaches help young players not only improve in their sport but also develop a lifelong love for physical activity.

Enhancing Parent Communication Efforts

Effective communication with parents is crucial in youth sports. The AI Coaching Course 2025 streamlines updates on practice schedules, making it easier for coaches to keep parents informed. By utilizing automated communication tools, coaches can send timely reminders and updates, reducing misunderstandings related to schedules. This transparency fosters a collaborative environment where parents feel included in their child’s development. For instance, ready-to-use templates for regular progress reports allow coaches to share insights on player performance, encouraging parental involvement. Quick responses to parent inquiries help build positive relationships, ensuring parents stay engaged and informed. Overall, these tools not only enhance communication but also promote a supportive atmosphere that benefits the entire team.

Tracking Athlete Progress Effectively

Tracking athlete progress effectively is essential for fostering growth and development within youth baseball and softball teams. By monitoring performance metrics over time, coaches can provide targeted feedback that highlights areas for improvement. This data-driven approach allows coaches to set specific goals for each athlete, paving the way for individualized development plans that cater to unique strengths and weaknesses.

Empowering athletes to take ownership of their training is another significant advantage of effective progress tracking. When players see their own development patterns and can compare their progress with teammates, it encourages accountability and a sense of competition. For example, if one athlete notices they have improved their batting average while another has not, it can motivate both to focus on their training.

Moreover, using data to inform coaching strategies promotes a culture of continuous improvement. Coaches can adjust practices and drills based on what the metrics reveal, ensuring that every session is relevant and effective. Whether it’s emphasizing speed, agility, or technique, the insights gained from tracking progress can lead to better skill development across the board.

Benefits of Using the AI Coaching Course

The AI Coaching Course offers numerous advantages that can significantly enhance the coaching experience. One of the most notable benefits is the time saved in practice planning. Coaches can create tailored practice plans in under 60 seconds, freeing up valuable time that can be redirected towards skill development and athlete support. Improved communication with parents is another key advantage, as pre-written templates facilitate clear and consistent updates, fostering better relationships and reducing misunderstandings.

The personalized training plans provided by the course lead to enhanced athlete development. By catering to individual needs, athletes are more engaged and motivated to improve. This targeted approach not only boosts performance but also increases retention rates, ensuring that young players remain committed to their teams. Additionally, the course helps reduce administrative stress for coaches, allowing them to focus on what they love most: coaching.

Moreover, the AI Coaching Course encourages better organization within coaching staff, creating a cohesive unit that works together more efficiently. This organization fosters a more engaging environment for athletes, where they feel supported and valued. The course also promotes ongoing learning and adaptation, equipping coaches with tools to continuously improve their methods. Lastly, users gain access to a supportive coaching community, sharing experiences and insights that further enhance their coaching journey. With proven success rates reported by existing users, the benefits of the AI Coaching Course are clear and impactful.

Success Stories from Coaches and Parents

The AI Coaching Course 2025 has made a significant impact on the lives of many coaches and parents, creating success stories that highlight its effectiveness. Coaches report improved team performance metrics, showcasing how streamlined practice planning leads to better athlete outcomes. Parents have shared positive feedback about enhanced communication, noting that they feel more connected and informed about their child’s progress. This course has not only increased athlete engagement but also satisfaction, as young players enjoy a more structured and supportive environment.

Many coaches have transformed their experiences, feeling supported and confident in their roles. They have expressed gratitude for the time saved in planning, allowing them to focus on what truly matters, developing athletes’ skills. For instance, one coach shared that by using the practice plan generator, they reduced preparation time significantly, enabling them to spend more quality time coaching on the field.

Additionally, case studies illustrate successful athlete development, with numerous examples of players improving their skills and performance. One parent highlighted how their child went from struggling with fundamentals to becoming a key player on the team, crediting the tailored workouts provided by the course. The evidence of enhanced team dynamics is clear, as coaches notice better collaboration and morale among players.

Overall, the course has become a trusted resource, creating a supportive network for coaches and parents alike. The testimonials reflect a shared belief that this program not only improves the effectiveness of practices but also fosters a community where young athletes can thrive.

Frequently Asked Questions

What is the main focus of the AI Coaching Course for youth baseball and softball?

The AI Coaching Course aims to provide a structured practice plan and personalized workout builder for young athletes to improve their skills both during the season and in the off-season.

How does the workout builder adapt to different skill levels?

The workout builder is designed to cater to various skill levels, allowing coaches to customize workouts based on individual player’s abilities and needs.

Can this course help with both baseball and softball practices?

Yes, the course is suitable for both baseball and softball, offering relevant drills and practice strategies for each sport.

What kind of resources are included in the AI Coaching Course?

The course includes practice plans, workout templates, instructional videos, and tips for coaching young athletes effectively.

Is the course appropriate for beginners in youth baseball or softball?

Absolutely, the course is structured to help beginners learn fundamental skills while also providing advanced strategies for more experienced players.

The AI Coaching Course 2025 offers youth baseball and softball coaches and parents a streamlined approach to managing practices and workouts. By using AI tools, coaches can generate custom practice plans in under 60 seconds, build effective year-round workout regimes, and enhance communication with parents. This course addresses common coaching challenges like organization and time management, making the process easier and more efficient. Proven successful by over 28,000 users, it empowers coaches to focus on athlete development rather than administrative tasks.

MLB Playoff-Proven 2-Zone Tee Drill & Pitch Selection Training for Youth Hitters' Quality At-Bats

Stop Obsessing Over Batting Average: Smarter Youth Hitting Metrics for Real Progress

If your weekend ends with staring at a .210 batting average and wondering whether your hitter is “falling behind,” this post is for you. Batting average feels simple and decisive—but for youth baseball and softball it’s a noisy, incomplete snapshot. In this episode of the Swing Smarter Hitting Training Podcast, Joey Myers explains why average can mislead parents and coaches, and what to use instead so you actually measure growth and build confident, game-ready hitters. Apply the frameworks below and you’ll coach calmer, train smarter, and see the kind of progress that lasts beyond a lucky bloop single.

Why Batting Average Misleads Parents (and Can Hurt Development)

  • Binary math, not development. Average only counts hit vs. out. A smoked lineout and a flared single are treated as opposites even though one reflects superior swing quality.

  • Tiny samples, big mood swings. Youth seasons and tournaments are short. A couple of hard-hit balls at gloves can tank average and trigger bad mid-season “fixes.”

  • Confidence tax. When kids (and adults) overreact to average, they start pressing, chasing, and changing swings—exactly the behaviors that stall development.

Bottom line: Average is an outcome metric. Youth development thrives on process metrics.


What to Track Instead (Simple, Objective, and Game-Useful)

1) Quality Contact Percentage

How often did your hitter barrel/center the ball with a strong trajectory—regardless of result? Track hard line drives and well-struck fly balls as “quality.” Reward the process, not the luck.

Why it matters: It predicts future hits better than average and reinforces repeatable movement patterns (great for smaller, later-maturing athletes).

2) Pitch Selection Success

Did your hitter swing at strikes they can drive and lay off marginal pitches? Think green zone (damage), yellow zone (borderline/manage), red zone (take).

Why it matters: Better swing decisions = better count leverage, better contact, and less chase. As sports psychologist Dr. Bhrett McCabe would say, control the controllables—your decisions and approach.

3) Competitive At-Bats (C-ABs)

Did they battle with two strikes, extend the pitch count, put tough pitches in play, move runners, or punish mistakes?

Why it matters: C-ABs wear down pitchers, elevate the lineup, and build a hitter’s self-image around resilience and execution—not just outcomes.


A Coaching Framework You Can Run This Week: The Two-Zone Tee Game

Goal: Build decision-making, trajectory control, and confidence—fast.

Setup (5–7 minutes):

  • Tee set belt-high, middle-in or middle-away.

  • Mark two front-of-plate contact zones on the ground: Green (best launch window) and Yellow (borderline).

  • Use a notebook or notes app.

Round 1 – Green Zone (10 swings):

  • Cue: “Line drives through the L-screen.”

  • Score 1 point for loud line drives or well-struck loft.

  • Note feel cues (e.g., “top hand firm, bottom hand relaxed,” “ground-up explode”).

Round 2 – Yellow Zone (10 swings):

  • Cue: “Decide fast—manage or pass.”

  • If you’d take it in a game: no swing, +1 for discipline.

  • If you’d swing: +1 for controlled contact (not sell-out power).

Why this works: You’re rehearsing approach, not just contact. Over time, your notes reveal trends in quality contact %, selection success, and two-strike compete—the same core metrics that drive sustainable improvement.


Mindset That Protects Confidence (and Keeps Kids in the Game)

When the stat sheet bites, remember: your athlete can’t control whether a laser finds leather. They can control their plan, their swing decisions, and how they compete. Or as Marcus Aurelius put it, “You have power over your mind—not outside events.” Model that perspective as a parent or coach and you’ll shield your hitter from the emotional whiplash of short-term stats while reinforcing habits that win over a season, not an inning.


Real-World Snapshot (What Progress Actually Looks Like)

  • Case: 12U hitter with a .180 average midseason.

    • Quality-contact % doubled vs. previous season

    • Exit velocity up ~4 mph

    • Chase rate down; more swings in the green zone

    • Late-season surge as the “luck” caught up to the process
      Lesson: Development was happening long before average turned north.


Quick-Hit Takeaways for Parents & Coaches

  • Replace “What was the average?” with “How many quality contacts did we have?”

  • Chart greens vs. yellows (swing decisions) for 2 weeks—you’ll spot patterns fast.

  • Count Competitive At-Bats after games; praise the fight, not just the hit.

  • Use the Two-Zone Tee Game 3–4x/week for 5–7 minutes. Consistency beats volume.

  • Protect identity: validate approach and effort first; outcomes second.


Internal Linking Suggestions (keep readers in your ecosystem)


Listen to the Full Episode

Ready to see what really moves the needle for your hitter? Listen to the full episode here

If this helped reframe how you read stats, share it with a coach or parent who needs a calmer, smarter lens. And if you want a simple plan to run at home this week, start with Swing Shift—turn quality-contact reps and better decisions into confidence that shows up on game day.

Every parent and coach knows the feeling. Your hitter was mashing last week, and now they can’t seem to buy a hit. A hitting slump doesn’t mean your kid lost their ability overnight — it means they’ve lost the in-game adjustment system that separates hitters who perform in practice from hitters who perform when it counts. The good news: slumps have a root cause, and once you identify it, the fix is faster than you think. This post breaks down the four swing adjustments that end a hitting slump from the inside out, starting with your free drill guide at the end.

→ Want the printable version? Grab The 4-Adjustment Slump Buster PDF — free, no fluff, just the four fixes.

What Is a Hitting Slump and What Actually Causes It?

A hitting slump is a multi-game stretch of poor contact that stems from one of three root causes: a mechanical breakdown in the swing, a timing disruption, or a mental block at the plate. Most coaches and parents try to solve all three at once — which is why most slumps drag on longer than they should.

Here’s how to tell them apart. A mechanical slump shows up as consistent misses in the same direction — always pop-ups, always weak grounders to the pull side, always rolled over. A timing slump shows up as late swings on fastballs or early outs on off-speed pitches. A mental slump is trickier: the hitter has the mechanics, they have the timing, but they’re pressing. They’re thinking at the plate instead of reacting.

The four adjustments below address all three root causes — because they’re the real-time diagnostic tools elite hitters use in the box during a game, not after it. According to sports performance research from the American Psychological Association, performance breakdowns under competitive pressure almost always involve a combination of cognitive overload and physical misalignment — which is exactly what these adjustments counteract.

If timing and pitch recognition are the primary culprit, the pitch recognition and swing timing guide covers that angle in depth. And if your hitter is carrying the mental weight of a slump into each at-bat, the resources on confidence drills under pressure are a good starting point — as is knowing what to say after a rough game.

What Are the 4 In-Game Swing Adjustments That End a Hitting Slump?

The four adjustments — ball half contact, field-side contact, pitch-plane swing direction, and two-plate timing — give hitters a real-time diagnostic tool they can apply in the batter’s box, not in the cage afterward. These are the first four modules of the RocketHitting Formula, a system built specifically for hitters who look great in practice but can’t transfer it to games.

Each adjustment answers one question your hitter should be asking themselves in real-time during a hitting slump. Taken together, they create a feedback loop that shortcuts the slump before it compounds into a confidence crisis. Think of them as four dials — most hitters in a slump have one or two of them turned the wrong direction without knowing it.

Adjustment #1: Are You Hitting the Top or Bottom Half of the Ball?

This adjustment is made after contact — not before. The hitter reads the ball flight from the previous swing, identifies where the barrel made contact on the ball, and self-corrects on the next swing. It’s a feedback loop, not a pre-pitch plan.

The goal is always barrel-center-to-ball-center contact — hitting the equator of the ball with the center of the barrel to produce a roughly 10-degree launch angle and consistent line drives. Most hitters in a hitting slump have lost awareness of where the barrel is actually making contact. This adjustment restores that awareness one swing at a time.

The read is simple. Pop-up? The barrel came in under the equator — adjust the next swing to come through more level. Weak grounder or roll-over? The barrel came over the top — let the ball get slightly deeper and stay through it. Line drive? Center contact — don’t change a thing. The adjustment happens on the next pitch, not before the current one.

The drill: tee work with a small marker (piece of tape or a dot) on the ball’s equator. After each swing, verbalize “top,” “bottom,” or “center” based on where you made contact. Then correct on the next rep. The goal is building the read, not volume.

Adjustment #2: Are You Hitting the Inside or Outside Half of the Ball?

Like Adjustment #1, this read happens after contact is made — not before. The hitter reads the spin and carry off the bat from the previous swing and adjusts the contact point on the next one. It is not determined by which pitch zone you’re hunting.

The goal is backspin — the ball flight that carries to the warning track instead of dying in the outfield. Hook spin and slice spin kill carry. When a hitter is in a hitting slump and the ball keeps dying short, the contact point on the ball is usually the culprit. One adjustment to the next swing often fixes it immediately.

Here’s the read. Ball hooks and dies? The barrel contacted the wrong half for that pitch — shift the contact point on the next swing. Ball fades and loses carry? Same diagnosis, opposite direction. Ball carries with backspin? Correct contact — maintain it. The correction is always to the next pitch, based on what just happened.

Issues like bat drag often compound this problem by delaying the barrel’s arrival to the contact zone and pulling hitters into faulty contact points. Worth ruling out if this adjustment isn’t producing results after several at-bats.

Adjustment #3: Swing Up or Down — When Should Your Hitter Change Their Swing Plane?

Unlike the first two adjustments, swing plane isn’t determined by post-contact feedback — it’s determined by reading the pitcher. Before and during the at-bat, the hitter observes the pitcher’s tendencies and patterns, then sets their swing plane to match what the pitcher is actually doing.

The goal is to match the swing plane to the pitch’s natural trajectory. A pitcher who consistently works low in the zone is delivering pitches that drop through the hitting zone — a slightly upward swing plane meets that ball on its natural angle. A pitcher who elevates and works up in the zone delivers pitches coming in on a flatter trajectory — a downward swing path drives through that ball with authority.

This is pattern recognition, not guessing. Watch the pitcher warm up. Watch how they pitch the hitters before yours. Do they live low and away? Swing up. Do they like to elevate? Swing down. The adjustment is informed and intentional — not a blind pre-game decision made without watching the pitcher first.

“Always swing level” ignores the pitcher entirely. It produces the same swing plane against a groundball pitcher living at the knees as it does against a strikeout pitcher working up in the zone — and that’s exactly why it fails. The mental approach at the plate that ends slumps is an informed one, built on observation.

Adjustment #4: The Two-Plate Timing Drill That Resets Game Timing Fast

Like Adjustment #3, timing isn’t adjusted blindly — it’s based on reading the pitcher. Before the at-bat, observe the pitcher’s velocity, off-speed offerings, and whether they mix speeds aggressively. That observation tells you which timing scenario to prepare for. The two-plate drill trains your ability to execute that specific adjustment.

If you’re facing a finesse pitcher or a pitcher with a sharp breaking ball they lean on heavily, the ball travels deeper into the zone before crossing the plate — you need to wait longer, stay back, and let the ball come to you. If you’re facing a hard thrower with limited off-speed, you need a quicker trigger and an earlier contact point. And if the pitcher mixes speeds aggressively mid-at-bat, you need the flexibility to shift between both within a single at-bat.

That’s exactly what the two-plate drill builds. Place two home plates side by side, about a foot apart. A coach throws underhand lob pitches in a homerun derby format — soft, easy-to-track. The hitter starts on the back plate for two swings (simulating a slower pitcher or off-speed timing), steps to the front plate for two swings (faster pitcher, quicker trigger), then returns to the back plate for two more — six swings total.

The goal isn’t hitting home runs. The goal is the plate switch — training rapid adaptation between timing windows, which is the same skill the pitcher forced you to develop by watching them. Pair this with the hitting timing drills and batting timing drills in the HPL library for a full timing reset sequence.

Free Drill Guide

The 4-Adjustment Slump Buster

All four in-game swing adjustments in one printable PDF. Use it in the dugout, at practice, or in the car on the way to the game.

Get the Free PDF →

No account needed — instant download

If timing or pitch recognition is driving the slump, the GameSense quiz diagnoses which training layer is causing the cage-to-game gap in 60 seconds. → Take the free Game Transfer Quiz

“Exit velocities are up, averages are up, power is up. Three girls going D1, six at D2, two at JUCOs. I credit the HPL approach for proving the science and providing convincing evidence.”

Ronny Weber — Baseball & Softball Coach

“After just 1–2 lessons, my son Ethan was hitting the ball harder and further. We still use what Joey teaches today. His detailed analysis and style are unmatched.”

Simon Chan — Baseball Parent, Los Angeles, CA

Common Questions About Fixing a Hitting Slump

How long does a hitting slump usually last?

A hitting slump typically lasts 3 to 14 games at the youth level. The length depends almost entirely on whether the root cause — mechanical, timing, or mental — is correctly identified early. Most slumps that drag past two weeks are being treated with the wrong solution, usually more volume of the same batting practice rather than a targeted adjustment.

Should I take my hitter out of the lineup during a slump?

Pulling a hitter from the lineup during a hitting slump should be a last resort, not a first response. Game at-bats provide the live timing and pressure reps that batting practice cannot replicate. A better approach: adjust what they’re doing in the box using the four adjustments above, and give the fix a 2–3 game window before making lineup decisions.

Is more batting practice the answer during a hitting slump?

More batting practice during a hitting slump often makes things worse if the underlying adjustment isn’t in place yet. High volume off a machine at one speed trains a single reaction loop, not the flexible timing that live pitching demands. First identify the root cause using the four adjustments, then add reps once you know what you’re training.

What’s the difference between a hitting slump and a mechanical flaw?

A mechanical flaw is a structural problem in the swing that shows up consistently in every at-bat — bat drag, dropping hands, a collapsing back side. A hitting slump is usually a temporary breakdown in one or more of the four adjustments that causes a flaw to surface under game pressure. Fix the adjustment first; if the flaw persists in the cage with no pressure, then address mechanics directly.

Can a hitting slump be purely mental?

Yes — a hitting slump can be driven entirely by the mental approach at the plate even when mechanics and timing are sound. Pressing, over-thinking, trying to pull pitches to impress scouts or parents, and fear of strikeouts all change swing decisions in ways that mimic mechanical slumps on the stat sheet. The four adjustments help here because they give hitters a process to focus on rather than an outcome, which naturally reduces the cognitive overload driving the mental block.

What should parents say to a hitter who is struggling in a slump?

The single most effective thing a parent can say during a hitting slump is something process-focused rather than outcome-focused — “I noticed you stayed back on that off-speed pitch” rather than “why didn’t you hit that?” Research on mental approach at the plate consistently shows that athlete confidence is fragile under evaluative pressure from parents. Focus on what they did right in each at-bat, not the result.

How do the 4 swing adjustments help end a hitting slump faster than traditional drills?

Traditional drills fix swing mechanics in isolation — they’re great for building patterns but slow to transfer under game pressure. The four adjustments work differently: they give hitters real-time decisions to make in the box during a live at-bat, which builds the adaptive response that ends a hitting slump in games rather than just in the cage. They’re the core of the RocketHitting Formula, a complete system for hitters who perform well in practice but struggle to transfer it to games.

Free Drill Guide

The 4-Adjustment Slump Buster

4 in-game swing adjustments — printable, coach-ready, and built to end a hitting slump before it becomes a confidence problem.

Get the Free PDF →

No account needed — instant download


Best Hitting Drills for 8-Year-Olds (2025): Fix Swing Flaws Fast with This MLB-Trusted Youth Baseball System—At-Home, Step-by-Step, and Built for Game-Day Confidence

Is Your 8-Year-Old Too Young for Swing Mechanics? The Hidden Truth Every Baseball Parent Must Know

Ever watched your young athlete freeze at the plate and thought, “Should I fix their swing… or just let them play?” If that sounds familiar, you’re not alone—and this episode of the Swing Smarter Hitting Training Podcast delivers the science-backed clarity you’ve been craving.

In today’s youth baseball landscape, it’s easy to fall into the “perfect swing trap,” where mechanical precision is pushed far too early. But here’s the truth: dialing in mechanics before your child’s body and mind are ready could be doing more harm than good.

Let’s break down why—and what you should be doing instead.


Why Mechanics Too Early Could Backfire (And What to Focus on Instead)

Youth baseball swing mechanics, especially for ages 7–9, are often misunderstood. This episode explores why that’s a critical age where the wrong approach can lead to:

  • Burnout

  • Injury risk

  • A loss of love for the game

Here are the biggest takeaways parents and coaches need to know:


🧠 Key Insights from the Episode

✅ The Nervous System Is Still Developing
At ages 7–9, kids are still learning how to move—literally. Their neuromuscular systems are forming motor patterns for throwing, catching, running, and balance. Overloading them with mechanical cues short-circuits this process.

✅ Let Curiosity Lead, Not Correction
One of the most powerful moments came from an 8-year-old asking, “How do I hit it harder?” That organic question opened the door for a single, simple cue—”squish the bug”—leading to deeper engagement and improvement.

✅ Mini Games Beat Mechanics Every Time
Fun, movement-rich games like soft toss into a bucket or wiffle ball golf teach rhythm, contact, and control—without overwhelming instruction.

✅ MLB Players Didn’t Specialize Early
Most pros played multiple sports growing up. Why? It builds movement variety, coordination, and injury resistance—something science now backs fully.

✅ Avoid Robotic Coaching
Quoting Stoic philosopher Epictetus: “Don’t explain your philosophy. Embody it.” You don’t need to be a swing guru—just foster an environment where your child wants to improve.


🎯 Actionable Tips for Parents & Coaches

Here’s what to do instead of overcorrecting early mechanics:

  • Play contact-focused mini games: Promote bat-to-ball awareness with a plastic bat and wiffle balls on a string.

  • Use rhythm drills: Add music. Have your child toe tap or bounce in time with the beat—then turn and hit.

  • Celebrate effort, not results: Say things like “Nice turn!” or “That was explosive!” to build confidence.

  • Introduce one cue at a time—only when asked.

  • Focus on exploration over early perfection.


🔗 Related Content & Resources

For more youth development insights:


🎧 Listen to the Full Podcast Episode Here

👉 Click to Listen Now

If you’re a baseball or softball parent asking, “Should I be fixing my kid’s swing now or just let them have fun?” —this episode is your wake-up call.


🚀 Bonus: Want a Proven, Simple Way to Help Your Young Hitter?

Check out our Detect & Correct Hitting Blueprint — now 50% OFF in our flash sale!
It’s built for busy parents and coaches who want fast, science-backed drills that work without overwhelming young players.

👉 Get 50% OFF Now →


Final Thought:

Don’t rush it. Let your kid fall in love with hitting first. Mechanics will come when they’re ready. But passion? That starts in the backyard, not the batter’s box.


If you found this helpful, be sure to share it with another baseball or softball parent, subscribe to the podcast, and check out our latest development programs at HittingPerformanceLab.com.

Stay smart. Swing smarter. ⚾

Are Baseball Hitting Lessons Worth It? How to Fix Youth Swing Mechanics & Build Game-Day Confidence at Home

Ever feel like you’re stuck on a loop? You pay $60 a week for hitting lessons. Your kid works hard in the cage. The coach gives a thumbs up. But come game day? Strike three. Again.

You’re not alone—and it’s not your fault.

In this game-changing episode of the Swing Smarter Hitting Training Podcast, Joey Myers from HittingPerformanceLab.com lays out the hard truths about why traditional hitting lessons often don’t translate to real results—and what you can do to finally break the cycle and develop a confident, game-ready hitter who performs under pressure.

🧠 The Problem: Hitting Lessons That Don’t Stick

Let’s face it: Baseball and softball parents across Reddit and Facebook are asking the same question…

“Are hitting lessons really worth it?”

And based on the groundhog day results many of us are seeing? That answer is fuzzy—until now.

Joey breaks it down with no fluff and all facts. The problem isn’t always the lesson itself. The real issue is what happens between them. Without a system in place for follow-through and feedback, lessons turn into expensive band-aids instead of real solutions.

🔑 3 Truth Bombs Every Parent Needs to Know Before Paying for the Next Lesson

1. The Real Work Happens Between Lessons

“The lesson is the prescription. The real progress happens when your kid takes the medicine—consistently.”

A single lesson a week is like going to the gym once and expecting abs. Unless your child is working on their drills between sessions, improvement will plateau. Look for a coach (or system) that gives 1–2 clear focus drills your kid can do at home.

2. Not All Coaches Are Created Equal

“There’s a difference between a coach and a glorified rep counter.”

Is your hitting coach giving vague encouragement like “swing harder”? Or are they spotting patterns, explaining why a drill matters, and engaging your child in their development? A great coach creates thinkers at the plate, not just repeaters in the cage.

3. If It Doesn’t Show Up on Game Day, It Doesn’t Count

“Your kid might be a cage All-Star… but are they a game-time performer?”

Drawing from Dr. Bhrett McCabe’s contextual interference principle, Joey explains that hitting practice must include variable pitch speeds, unpredictable timing, and real-world chaos. Otherwise, your hitter will freeze when it counts.

🔁 Game Day Transfer Starts with Daily Intentional Reps

One of the biggest takeaways? It’s not about doing more—it’s about doing what matters.

A daily 5-minute mirror drill or a focused round of dry swings can do more than an hour of mindless cage work. Joey even breaks down a simple weekly ROI checklist to help you evaluate if your current coach—or system—is actually delivering results.

🚀 How to Make Lessons Count (Even Without Weekly Coaching)

Don’t have $60/week to spare on lessons that might not work?

That’s exactly why Joey built The Feedback Lab—a fully online hitting lesson system that delivers:

  • Personalized swing breakdowns

  • Weekly custom drills

  • Clear, consistent feedback

  • No more guesswork. No wasted reps.

Perfect for busy families who want game-day results without the stress of travel, scheduling, or spending thousands.

🎯 Quick Internal Links for More Resources:


✅ Listen Now – Turn Cage Swings into Clutch Hits

If you’ve ever driven away from a lesson thinking, “We’re doing everything right… why isn’t it working?”—this episode is for you.

🎧 Click here to listen now.

Let’s stop burning cash—and start building confident, clutch hitters who show up when it matters.  If you’re in the Fresno area, [here’s what in-person lessons with Joey look like →]