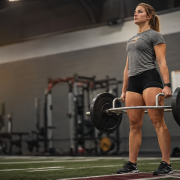
39k+
Email Subscribers
20k+
Programs Downloaded
20+
Years Coaching
D1
College Athlete

The season doesn’t have to mean stopping. Here’s the maintenance program that works around your daughter’s game schedule — no gym, 35 minutes, twice a week.

By Joey Myers — D1 Baseball, Fresno State | Author, Catapult Loading System | NASM-CES · IYCA Youth Fitness Specialist | 20+ years of coaching

This free youth softball in-season workout is built around a problem most softball families run into by mid-spring: the off-season training routine stops when the season starts, and by summer tournament season the athlete has lost the athletic gains she spent the whole winter building. A youth softball player doesn’t need to stop training during the season. She needs to train less — with the right structure.

This youth softball in-season workout PDF is not a hitting drill guide or a conditioning circuit. Practice handles the softball skills. This program handles the athletic development that supports those skills: leg power for explosive first steps, upper body pulling for arm durability across a high-throw-count season, core stability for rotational power at the plate and in the field, and a structured arm care circuit to protect the shoulder and elbow. It runs 2 days per week, takes 35–40 minutes per session, and requires nothing beyond bodyweight and a resistance band.

8
Weeks
2
Days/Week
35
Min Max
8–12
Ages

“Minimum of 10-mph was added to exit velocity. What you say/teach works.”

— Jared Rehm, 12U Softball & Varsity Softball Coach

Download the free 8-week in-season program now — arm care, Day A and Day B workouts, scheduling guide, and tracking log all in one printable PDF.

Free. No credit card. Instant download.

Why Does a Youth Softball Player Need a Workout Program During the Season?

A youth softball player needs a structured workout program during the season because athletic development doesn’t stop when games start — and neither does the risk of losing the gains she built in the winter. Without any structured training during a 3–4 month season, an 8–12 year old can lose meaningful ground in leg power, upper body strength, and core stability. Furthermore, those losses compound: by late summer tournament season, the athlete who stopped training in March is a different athlete athletically than the one who played through February’s off-season program.

Additionally, in-season is one of the highest-risk periods for overuse injuries in youth softball players. The reason is straightforward: throwing and pitching volume goes up sharply once the season begins, but the arm care work that was part of off-season training often stops completely. Therefore, this youth softball in-season workout keeps that arm care work active — not at the volume of the off-season, but consistently enough to support the shoulder through a full game and pitching schedule.

Specifically, the goal of in-season training for a youth softball player is not improvement — it’s maintenance. Holding the athletic capacity already built, managing fatigue appropriately given the game schedule, and protecting the throwing and pitching arm are three different jobs from off-season development. This program is designed for exactly those three jobs.

How Is an In-Season Youth Softball Workout Different from an Off-Season Program?

An in-season youth softball workout differs from an off-season program in volume, frequency, and goal. In the off-season, the job is development — building new athletic capacity over a 12-week block. In-season, the job is maintenance — protecting what exists while the athlete’s energy and recovery capacity primarily go to games, practice, and competition travel.

Specifically, this program runs 2 days per week instead of 3, keeps sessions at 35 minutes instead of 45–60, and uses bodyweight and resistance bands only rather than progressive external loading. Additionally, there are no phases in this program — it uses the same session structure across all 8 weeks, because adding progression during the in-season period would compete with the recovery a young athlete needs between games.

For context: the 12-week youth softball off-season workout program runs 3 days per week with progressive strength phases designed to peak athletic capacity. This 8-week in-season program holds that peak stable through the games that matter most.

How Is This 8-Week Youth Softball In-Season Workout Structured?

This youth softball in-season workout runs two sessions per week — Day A and Day B — on non-consecutive days with no lifting the day before or after a game. Each session follows the same five-block structure every time.

Block 1 — Arm Care Circuit (8 min)

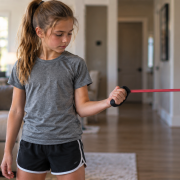
Resistance band forward fly, reverse fly, external rotation, internal rotation (10 reps each arm), and band pull-aparts (2×15). This block runs first, every session, before any athletic work. At ages 8–12, this is habit formation — teaching the body to systematically prepare the shoulder and elbow before any throwing or athletic loading begins. Youth softball pitchers especially benefit from this routine, as windmill pitching places high rotational demand on the internal rotators throughout the season.

Block 2 — Movement Prep (5 min)

High knees, lateral shuffles, arm circles, hip circles, and jumping jacks. Elevates heart rate and activates the hips and glutes before strength work begins. No equipment needed.

Block 3 — Athletic Power (5 min)

Day A: Broad jumps (2×4). Day B: Lateral bounds (2×4 each side). Two sets only, with full rest between. Power work comes first in the strength training order — before fatigue from the strength block compromises the quality of explosive effort.

Block 4 — Bodyweight Strength (15 min)

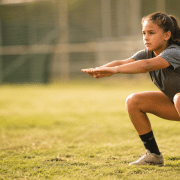
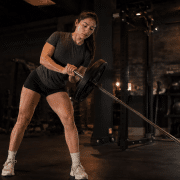
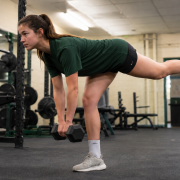
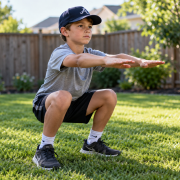
Day A: Bodyweight squat (3×12), push-up (3×8–10), lateral lunge (2×10 each), dead bug (2×6 each side), single-leg balance hold (2×20 sec each). Day B: Glute bridge (3×12), resistance band row (3×12), split squat (2×8 each leg), plank (2×25 sec), band pull-aparts (2×15). 5 exercises per day, 60-second rest between sets.

Block 5 — Recovery Stretch (3 min)

Day A: Hip flexor stretch (30 sec each), doorway pec stretch (30 sec), child’s pose (30 sec). Day B: Cross-body shoulder stretch (30 sec each), hamstring stretch (30 sec each), deep squat hold (30 sec). Reduces next-day soreness and protects shoulder range of motion for pitchers.

What Equipment Does This Youth Softball In-Season Workout Require?

This youth softball in-season workout requires only a resistance band set and open floor space. Every exercise runs on bodyweight or resistance bands — no barbell, no dumbbells, no gym membership, no training facility. The arm care circuit, the power block, the strength block, and the recovery stretches all run in a backyard, a living room, or a hotel room during a tournament travel weekend.

Specifically, one light-to-medium resistance band set (available for $15–$20 at any sporting goods store) covers every band exercise in the program. If bands aren’t available for a session, external and internal rotation exercises substitute with a lightweight water bottle held at the side. The band row substitutes with a towel looped around a doorknob. This program requires nothing proprietary — no specialized softball training equipment, no facility access.

Why Only 2 Days Per Week for Youth Softball Players In-Season?

Two days per week is the correct lifting frequency for a youth softball player in-season because a young athlete already carries a high weekly workload once the game schedule starts. Specifically, a typical 8–12 year old during travel ball or league season has 2–3 practices, multiple games, and roughly 6–8 hours of organized softball activity per week. Adding a third lifting day doesn’t accelerate development — it competes with the recovery the athlete needs between competitive efforts.

Additionally, this is especially relevant for youth softball pitchers. Windmill pitching places significant repetitive load on the shoulder and elbow, and the total weekly pitching volume during a competitive season already represents a meaningful training stress. Two sessions per week in this youth softball in-season workout is enough to maintain the physical capacity built in the off-season without adding recovery burden on top of the pitching workload.

For athletes who are not currently in-season and want to build rather than maintain, the 12-week youth softball off-season workout program runs three days per week with progression across three distinct phases.

What Does the Arm Care Circuit Include in Each Youth Softball Session?

The arm care circuit in this youth softball in-season workout includes resistance band forward fly, reverse fly, external rotation, internal rotation (10 reps each arm), band pull-aparts (2 sets of 15), and a prone Y hold (2 sets of 8). It runs at the start of every session — both Day A and Day B — and takes 8 minutes. For the complete protocol and exercise rationale, see the youth arm care program used by top travel coaches.

Specifically, for youth softball pitchers ages 8–12, the arm care circuit targets the external rotators and scapular stabilizers — muscles that are consistently underdeveloped relative to the internal rotators that windmill pitching loads heavily. Furthermore, research on overhead youth athletes consistently shows that pre-activity shoulder preparation significantly reduces in-season injury rates. The arm care circuit is the highest-value 8 minutes in the entire program for young softball pitchers.

For additional resources on youth pitcher arm health and recovery, the VeloRESET Arm Lab newsletter covers arm fatigue signs, workload management, and return-to-throw timing as a free weekly resource for parents and coaches.

When the tournament schedule changes, this PDF can’t change with it.

Double-header weekends, rainout makeups, or a week where your daughter pitches in every game all change what training she can realistically handle. ByldrIQ builds the training plan around whatever the week actually looks like — game schedule, pitching load, available days, and session time ceiling. The PDF gets her started. ByldrIQ keeps the plan matched to real life.

See How ByldrIQ Works →

When Should a Youth Softball Player Do These Workouts During a Game Week?

A youth softball player should schedule this youth softball in-season workout on days that do not fall directly before or after a game. The day before a game should be rest or light movement only — strength training fatigue lingers 24–36 hours and will show up as reduced first-step quickness and a slower arm the next day. Similarly, the day after a game is a recovery day: the athlete’s body is still clearing the physiological cost of competition.

For a player with games on Tuesday and Saturday, Monday/Thursday or Wednesday/Friday scheduling keeps the lifting sessions away from game impact windows. Specifically, the scheduling guide included in the PDF maps out a full 8-week sample calendar showing how to slot Day A and Day B around a typical youth softball game schedule, including tournament weekends.

Additionally, if a week includes three or more games — a tournament weekend, for example — skip the lifting sessions that week entirely. In-season training is maintenance. One skipped training week during a heavy competition stretch is the correct decision, not a problem to solve by squeezing sessions in.

What Results Should Parents Expect from an In-Season Youth Softball Workout?

Parents should expect maintenance results from a youth softball in-season workout — not new athletic gains. A player who runs this program alongside her regular game and practice schedule should finish the season at or above the athletic level she started it. First-step quickness in the field stays sharp. Throwing arm durability holds through the full schedule. The strength built in the off-season doesn’t erode by the last tournament weekend.

What parents should not expect is significant size or strength increases during the in-season period — this program is not designed to build new capacity, and attempting to do so would compete with competitive performance. Furthermore, for youth softball pitchers specifically, the consistent arm care habit established through these sessions is the highest-value outcome of the entire 8 weeks. Young pitchers who learn to prepare the arm systematically before activity carry that habit into years of increasingly competitive play.

For the youth softball player ready to develop beyond maintenance, the college softball strength and conditioning program shows where the athletic development track leads as athletes advance — and the fastpitch softball hitting mechanics resource covers the skill side that this program’s physical foundation is built to support.

“When Josh’s oblique started giving him trouble from the pitching and hitting load, Joey gave him a specific set of exercises and it was completely gone in under two weeks. What I appreciate most is not being in a guessing game.”

— George R., Josh’s dad  ·  pitcher & middle infield, high school freshman

Download the Free 8-Week Youth Softball In-Season Workout PDF

Arm care every session. No gym. Fits around your game schedule. Ages 8–12.

Free. No credit card. Instant PDF delivery.

Frequently Asked Questions About the Youth Softball In-Season Workout PDF

What age is this youth softball in-season workout designed for?

This program is designed for youth softball players ages 8–12. All exercises are bodyweight or light resistance band-based — no barbell loading and no equipment a young athlete can’t find at home. Athletes younger than 8 benefit most from unstructured movement and play. Players 13 and older should progress to a more structured strength development program with external loading.

Can my daughter do this workout the day before a game?

No — avoid lifting the day before any game or pitching appearance. Strength work produces muscular fatigue that takes 24–36 hours to clear. Lifting the day before a game means the athlete starts competing with compromised leg power, reduced arm speed, and slower reaction time in the field. Reserve the day before games for rest, light movement, or the recovery stretches from Block 5 only.

Does this program replace softball practice?

No. This youth softball in-season workout is a separate athletic development session done on non-practice days. Practice handles softball skills — hitting mechanics, fielding, pitching, baserunning. This program handles the physical foundation that supports those skills: leg power, pulling capacity, core stability, and arm health. The two tracks run on different days and serve completely different purposes.

What exercises are in the youth softball in-season workout?

Day A includes broad jumps, bodyweight squats, push-ups, lateral lunges, dead bugs, and single-leg balance holds. Day B includes lateral bounds, glute bridges, resistance band rows, split squats, planks, and band pull-aparts. Both days open with the 8-minute arm care circuit (band forward fly, reverse fly, external rotation, internal rotation, pull-aparts) and close with a 3-minute recovery stretch. All exercises are in the PDF with form cues and substitutions.

Is this program appropriate for youth softball pitchers?

Yes — and the arm care circuit at the start of every session is specifically designed with windmill pitchers in mind. The external rotation, reverse fly, and pull-apart work target the muscles that stabilize the shoulder under windmill pitching load. These are the muscles most youth pitchers underwork relative to the heavy internal rotation demand of the pitching motion. Running this circuit every training session is the most important maintenance work a young pitcher can do during the season.

Can a youth baseball player use this softball program?

The exercises apply equally to youth baseball players at ages 8–12 — the bodyweight strength, power, and arm care work is sport-agnostic at this age. However, the youth baseball in-season workout PDF uses baseball-specific language and scheduling notes that most parents and coaches of baseball players find easier to follow.

What if we miss a session during a tournament week?

Skip the sessions that week and pick up where the program left off the following week. Do not try to combine two sessions in a single day to make up for missed workouts — that doubles training load on an athlete who just played three games in two days. In-season training is maintenance. Missing one or even two sessions during a heavy tournament stretch has no meaningful impact on the 8-week outcome. Consistency across the full season matters far more than perfect attendance.

References:
1. Faigenbaum AD, et al. Youth resistance training: updated position statement paper from the National Strength and Conditioning Association. Journal of Strength and Conditioning Research. 2009.
2. Werner SL, et al. Biomechanics of the elbow during windmill softball pitching. American Journal of Sports Medicine. 2006.
39k+
Email Subscribers
20k+
Programs Downloaded
20+
Years Coaching
D1
College Athlete

The season doesn’t have to mean stopping. Here’s the maintenance program that works around your kid’s game schedule — no gym, 35 minutes, twice a week.

By Joey Myers — D1 Baseball, Fresno State | Author, Catapult Loading System | NASM-CES · IYCA Youth Fitness Specialist | 20+ years of coaching

This free youth baseball in-season workout is built around a problem most parents run into by late April: the off-season program stops because the season started, and by July the athlete has lost ground on everything they built in the winter. A youth baseball player doesn’t need to stop training during the season. They need to train less — with the right structure.

This youth baseball in-season workout PDF is not a practice plan. Practice handles the skills. This program handles the athletic development that supports those skills: leg strength for first-step explosiveness, upper body pulling for arm durability, core stability for rotational power, and arm care to protect the shoulder and elbow during a high-throw-count season. It runs 2 days per week, takes 35–40 minutes per session, and requires nothing beyond bodyweight and a resistance band.

8
Weeks
2
Days/Week
35
Min Max
8–12
Ages

“I was in the gym 6 days a week on top of practices and games. By midseason my knee was breaking down — patellar tendinitis. Joey looked at what I was actually doing and the answer wasn’t more treatment, it was less volume. We cut to 4 days a week. The tendinitis cleared up.”

— Drake Davis, 1B/OF  ·  Fresno City College  ·  .381 AVG, 12 HR, 53 RBI  ·  2025 Freshman of the Year

Download the free 8-week in-season program now — arm care, Day A and Day B workouts, scheduling guide, and tracking log all in one printable PDF.

Free. No credit card. Instant download.

Why Does a Youth Baseball Player Need a Workout Program During the Season?

A youth baseball player needs a structured workout program during the season because physical development doesn’t pause when games start — and neither does the risk of falling behind athletically. Specifically, without any structured training during a 3–4 month season, an 8–12 year old can lose meaningful gains in leg strength, upper body pulling capacity, and core stability that took an entire off-season to build.

Furthermore, in-season is actually the highest-risk period for overuse injuries in youth baseball. The reason is simple: throwing volume goes up, but the arm care work that was part of the off-season program often stops entirely. Therefore, this youth baseball in-season workout keeps that arm care work active — not at off-season volume, but consistently enough to support the shoulder and elbow through a full game schedule.

Additionally, the goal of in-season training for a youth player is not improvement — it’s maintenance. Specifically, the program is designed to hold the athletic capacity already built, manage fatigue appropriately, and protect the arm. Those are three very different jobs than off-season training, and they require a different program structure.

How Is an In-Season Youth Baseball Workout Different from an Off-Season Program?

An in-season youth baseball workout differs from an off-season program in volume, frequency, and goal. In the off-season, the goal is development — adding new athletic capacity over 12 weeks through progressive loading. In-season, the goal is maintenance — protecting what already exists while the athlete’s main energy goes to games, practice, and recovery from both.

Specifically, this in-season program runs 2 days per week instead of 3. Session length drops from 45–60 minutes to 35 minutes. Loading stays at bodyweight and light resistance bands rather than adding dumbbells or barbells. Additionally, no phases exist in this program — it uses the same session structure throughout all 8 weeks because progression would compete with in-season recovery demands.

For comparison, the 12-week youth baseball off-season workout program builds toward peak athletic output. This 8-week in-season program keeps that peak stable through the games that matter.

How Is This 8-Week Youth Baseball In-Season Program Structured?

This youth baseball in-season workout runs two sessions per week — Day A and Day B — on non-consecutive days with no lifting the day before or after a game. Each session follows the same five-block structure regardless of which day it is.

Block 1 — Arm Care Circuit (8 min)

Resistance band forward fly, reverse fly, external rotation, internal rotation (10 reps each arm), and band pull-aparts (2×15). This block runs first, every session, before any athletic work begins. At ages 8–12, this is habit formation — teaching the body to warm the arm up systematically before throwing or lifting.

Block 2 — Movement Prep (5 min)

High knees, lateral shuffles, arm circles, hip circles, and jumping jacks. Elevates heart rate and activates the hips before the strength work. No equipment required.

Block 3 — Athletic Power (5 min)

Day A: Broad jumps (2×4). Day B: Lateral bounds (2×4 each side). Two sets, full rest between. Power work comes before fatigue accumulates from the strength block — this is the correct sequencing for youth athletes.

Block 4 — Bodyweight Strength (15 min)

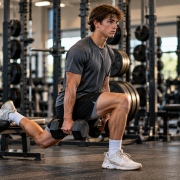
Day A: Bodyweight squat (3×12), push-up (3×8–10), lateral lunge (2×10 each), dead bug (2×6 each side), single-leg balance hold (2×20 sec each). Day B: Glute bridge (3×12), resistance band row (3×12), split squat (2×8 each leg), plank (2×25 sec), band pull-aparts (2×15). 5 exercises, 60-second rest between sets.

Block 5 — Recovery Stretch (3 min)

Day A: Hip flexor stretch (30 sec each), doorway pec stretch (30 sec), child’s pose (30 sec). Day B: Cross-body shoulder stretch (30 sec each), hamstring stretch (30 sec each), deep squat hold (30 sec). Reduces next-day soreness and protects range of motion.

What Equipment Does This Youth Baseball In-Season Workout Require?

This youth baseball in-season workout requires a resistance band set and open floor space. That’s the entire equipment list. Every exercise in the program runs on bodyweight or resistance bands — no barbell, no dumbbells, no gym membership required. The arm care circuit, the power block, the strength block, and the recovery stretches all work in a backyard, a living room, or a hotel room during a travel ball weekend.

Specifically, one set of light-to-medium resistance bands (the kind that cost $15–$20 at any sporting goods store) covers all band exercises in the program. If bands aren’t available, the external and internal rotation exercises can be substituted with a lightweight water bottle held at the side. The band row substitutes with a towel looped around a doorknob. This program requires none of the proprietary equipment that most online youth training programs assume a family has.

Why Only 2 Days Per Week for Youth Baseball Players In-Season?

Two days per week is the correct lifting frequency for a youth baseball player in-season because the athlete’s total weekly workload is already high. Specifically, a typical 8–12 year old during travel ball or league season has 2–3 practices, 1–2 games, and roughly 6–8 hours of baseball activity each week. Adding a 3rd lifting day on top of that schedule doesn’t increase athletic development — it increases fatigue and injury risk.

Additionally, Driveline Baseball’s workload research on youth pitchers is relevant here: the primary driver of arm injury in youth players is not single-session intensity but accumulated weekly load. For a youth player already carrying a full game and practice schedule, the priority of a training session shifts from “build more” to “maintain and protect.” Two days per week in this youth baseball in-season workout achieves that goal without competing with the recovery the athlete needs between games.

For athletes not currently in-season — or those who want to build rather than maintain — the 12-week youth baseball workout program uses 3 days per week with progressive loading across three phases.

What Does the Arm Care Circuit Include in Each Youth Baseball Session?

The arm care circuit in this youth baseball in-season workout includes resistance band forward fly, reverse fly, external rotation, internal rotation (10 reps each arm), band pull-aparts (2 sets of 15), and a prone Y hold (2 sets of 8). The circuit runs at the start of every session — both Day A and Day B — and takes 8 minutes. For a deeper look at each exercise and why it matters for youth throwers, the youth baseball arm care program covers the full protocol used by top travel coaches.

Specifically, at ages 8–12, the purpose of arm care is not injury rehabilitation — it’s habit formation and foundation building. Young throwing athletes consistently develop internal rotation strength faster than the stabilizing external rotators can keep pace. Furthermore, research on youth overhead athletes confirms that shoulder and elbow injury rates are significantly higher in players who do not perform pre-activity shoulder preparation. The 8-minute arm care circuit addresses that gap before every training session.

For deeper coverage of youth pitcher arm health, the VeloRESET Arm Lab newsletter covers arm fatigue signs, return-to-throw timing, and age-appropriate workload management as a free weekly resource for parents.

When the season schedule shifts, this PDF can’t shift with it.

Back-to-back tournament weekends, rainout makeup games, or a week off from travel ball all change what the athlete can actually do. ByldrIQ rebuilds the youth player’s training plan around whatever the week actually looks like — season phase, game schedule, available days, and session time ceiling. The PDF gets them started. ByldrIQ keeps the plan matched to real life.

See How ByldrIQ Works →

When Should a Youth Baseball Player Do These Workouts During a Game Week?

A youth baseball player should schedule this youth baseball in-season workout on days that do not fall immediately before or after a game. Specifically, the day before a game should be reserved for rest or light movement only — heavy legs the day before throwing off a mound or running bases compounds fatigue and increases error risk. Similarly, the day after a game is a recovery day, not a training day, because the athlete’s body is still clearing the metabolic byproducts from the previous day’s competition.

For a player with games on Tuesday and Saturday, a Monday/Thursday or Wednesday/Friday lifting schedule keeps the training sessions away from both days before and days after competition. Therefore, the scheduling guide in the PDF maps out a full 8-week sample calendar showing how to slot Day A and Day B around a typical youth baseball game schedule.

Additionally, if a week has three games due to a tournament, skip the lifting sessions entirely that week. In-season training is maintenance — missing a session during a heavy game week is the correct decision, not a failure.

What Results Should Parents Expect from an In-Season Youth Baseball Workout?

Parents should expect maintenance results from a youth baseball in-season workout — not new athletic gains. Specifically, a player who runs this 8-week program alongside their regular game and practice schedule should finish the season at or above the athletic level they started it. First-step quickness stays sharp. Throwing arm durability holds through the full schedule. The strength built in the off-season doesn’t disappear by the last game.

What parents should not expect is significant size or strength increases during the in-season period. Additionally, the arm care habit established by running these sessions consistently is the highest-value outcome of the program for 8–12 year olds — learning to warm up the arm systematically before throwing is a habit that compounds over years of play. For athletes ready to build on that foundation, the HS baseball off-season workout PDF is the next-level progression when they reach high school.

“When Josh’s oblique started giving him trouble from the pitching and hitting load, Joey gave him a specific set of exercises and it was completely gone in under two weeks. What I appreciate most is not being in a guessing game.”

— George R., Josh’s dad  ·  pitcher & middle infield, high school freshman

Download the Free 8-Week Youth Baseball In-Season Workout PDF

Arm care every session. No gym. Fits around your game schedule. Ages 8–12.

Free. No credit card. Instant PDF delivery.

Frequently Asked Questions About the Youth Baseball In-Season Workout PDF

What age is this youth baseball in-season workout appropriate for?

This program is designed for youth baseball players ages 8–12. Specifically, all exercises are bodyweight or light resistance band-based — no barbell loading, no Olympic lifting, and no equipment a youth player couldn’t find at home. Athletes younger than 8 should focus on movement play rather than structured training. Players 13 and older should progress to the 12-week youth baseball workout or a high school program.

Can my child do this workout the day before a game?

No — avoid lifting the day before any game or bullpen session. The strength block in this program creates muscular fatigue that takes 24–36 hours to clear. Lifting the day before a game means the athlete starts competing with compromised leg power and a less responsive throwing arm. Use the day before games for rest, light movement, or the stretching sequences from Block 5 only.

Does this program replace practice?

No. This youth baseball in-season workout is a separate athletic development session done outside of team practice. Practice handles baseball skills — throwing mechanics, fielding, hitting, and base running. This program handles the physical foundation that supports those skills: leg strength, pulling capacity, core stability, and arm care. The two tracks run on different days and serve different purposes.

What exercises are in the youth baseball in-season workout?

Day A includes broad jumps, bodyweight squats, push-ups, lateral lunges, dead bugs, and single-leg balance holds. Day B includes lateral bounds, glute bridges, resistance band rows, split squats, planks, and band pull-aparts. Both days open with the 8-minute arm care circuit (band forward fly, reverse fly, external rotation, internal rotation, pull-aparts) and close with a 3-minute recovery stretch. All exercises are listed in the PDF with form cues and substitutions.

How long does each session take?

Each session runs 35–40 minutes including the arm care circuit, movement prep, power block, strength block, and recovery stretches. The arm care circuit (8 min) and movement prep (5 min) account for 13 of those minutes — so the actual strength work is 15–17 minutes. Keeping sessions under 40 minutes is a hard design constraint. Adding exercises or sets beyond what’s listed pushes into the recovery window the athlete needs for games.

Can a youth softball player use this baseball program?

The exercises in this program apply equally to youth softball players — the bodyweight strength, power, and arm care work is sport-agnostic at ages 8–12. However, the youth softball in-season workout PDF uses sport-specific language and scheduling notes tailored to a softball game and practice calendar, which most parents and players find easier to follow.

What if my kid misses a session during the season?

Skip it and pick up where the program left off. Do not try to combine two sessions in one day to make up for a missed workout — that doubles the training load exactly when the athlete is already carrying game fatigue. In-season training is maintenance. Missing one session in an 8-week program has no meaningful impact on the outcome. Consistency over the full 8 weeks matters far more than perfect attendance.

References:
1. Faigenbaum AD, et al. Youth resistance training: updated position statement paper from the National Strength and Conditioning Association. Journal of Strength and Conditioning Research. 2009.
2. Fleisig GS, et al. Risk of serious injury for young baseball pitchers: a 10-year prospective study. American Journal of Sports Medicine. 2011.

39k+
Email Subscribers
20k+
Programs Downloaded
20+
Years Coaching
D1
College Athlete

Everything on the mound traces back to what happens in the weight room — here’s the program that doesn’t require a facility your pitcher doesn’t have.

By Joey Myers — D1 Baseball, Fresno State | Author, Catapult Loading System | NASM-CES · IYCA Youth Fitness Specialist | 20+ years of coaching

This free baseball pitcher workout program PDF is built for one specific problem: most pitcher strength programs assume equipment, supervision, and scheduling flexibility that HS and youth pitchers don’t have. Driveline’s free pitching PDF requires PlyoCare balls, weighted baseballs, and a PULSE sensor. TopVelocity’s PDF is built around Olympic lifting platforms and biomechanics coaching. Those are excellent resources — for pitchers who already train at a facility equipped for them.

This free baseball pitcher workout program PDF is different. It covers the off-field strength side of pitching: the weight room work that supports what happens on the mound. It requires a barbell or trap bar, dumbbells, and resistance bands. It runs 3 days per week — leaving room for your existing throwing program and recovery. Arm care is built into every session, not treated as an afterthought. And it works whether the pitcher is off-season, heading into pre-season, or managing a lighter summer schedule.

12
Weeks
3
Days/Week
3
Phases
60
Min Max

“I was in the gym 6 days a week on top of practices and games. By midseason my knee was breaking down — patellar tendinitis. Joey looked at what I was actually doing and the answer wasn’t more treatment, it was less volume. We cut to 4 days a week. The tendinitis cleared up.”

— Drake Davis, 1B/OF  ·  Fresno City College  ·  .381 AVG, 12 HR, 53 RBI  ·  2025 Freshman of the Year

Download the complete 12-week program now — printable PDF with every warm-up, arm care exercise, set, rep, and substitution mapped out across all three phases.

Free. No credit card. Instant download.

Why Don’t Most Baseball Pitcher Workout Programs Work for High School and Youth Athletes?

Most baseball pitcher workout programs don’t work for HS and youth athletes because they’re built for elite facilities and athletes who have already spent years in a structured weight room. The gap is real. Driveline’s free pitching PDF (one of the best resources available) explicitly states its program is designed for “biologically mature” athletes 14 and older — and it still requires proprietary PlyoCare balls, weighted baseballs, and a PULSE sensor for arm speed tracking. TopVelocity’s 3X program uses undulated periodization with Olympic lifting variations that require both a lifting platform and a qualified coach to teach the movement.

Furthermore, neither program directly addresses the scheduling reality of a HS pitcher: 2–3 team practice days per week, throwing off a bullpen mound 1–2 times weekly, a game on the weekend, and a shared weight room with limited open hours. A program that adds a 6-day-per-week throwing + lifting schedule onto that doesn’t reduce injury risk — it raises it.

Therefore, this baseball pitcher workout program PDF was designed around what the pitcher actually has. Three lifting days. Equipment found in any HS or commercial weight room. Arm care embedded so it doesn’t get skipped. A total weekly workload that complements a throwing program rather than competing with it.

What Is the Difference Between a Pitcher Workout Program and a General Baseball Program?

A pitcher-specific workout program differs from a general baseball strength program in three key ways: exercise selection, weekly volume structure, and arm care integration. Specifically, pitchers need more unilateral leg work (single-leg strength to support the drive leg and landing leg separately), more posterior shoulder and scapular stabilization, and a training frequency and total volume that accounts for the arm stress they already carry from throwing.

For example, the bilateral back squat is the foundation of many general baseball programs. For pitchers, split squats and single-leg Romanian deadlifts earn more volume because pitching is a single-leg rotational movement — the drive leg must generate and transfer force through one foot at a time. Similarly, horizontal pressing volume is reduced compared to pulling volume because a pitcher’s posterior cuff and scapular retractors are consistently under-developed relative to their internal rotators from throwing.

Additionally, arm care in a pitcher workout is not three sets of band external rotation tacked onto the end of the workout. In this program, it’s a structured 8-minute arm care circuit at the start of every session and a 5-minute recovery circuit at the end — the same priority level as the main lift, not optional cooldown work.

How Is This 12-Week Pitcher Workout Program Structured?

This baseball pitcher workout program PDF uses linear periodization across three phases. Linear periodization means loads increase progressively each week while rep ranges decrease — the most beginner-friendly and self-programmable strength model available. Specifically, each phase has one clear goal, and you don’t need a coach adjusting your loads each session to run it correctly.

Phase 1 (Weeks 1–4): Foundation & Arm Health

Intensity 65–72% 1RM  |  3×10–12 reps  |  45–55 min sessions

Phase 1 establishes the movement patterns that Phases 2 and 3 build on. You’ll learn the trap bar hinge, the split squat, and the landmine press — all pitcher-friendly movement patterns that load the body without the shoulder impingement risk of traditional barbell pressing. Arm care volume is highest in Phase 1 because this is when pitchers most commonly return to training with unaddressed shoulder tightness or rotator cuff fatigue from the previous season.

Research published in the Journal of Shoulder and Elbow Surgery confirms that off-season shoulder strengthening specifically targeting the rotator cuff and scapular stabilizers reduces in-season arm injury rates in overhead throwing athletes.1 Phase 1 is where that foundation is built.

Phase 2 (Weeks 5–8): Strength Development

Intensity 73–82% 1RM  |  3×6–8 reps  |  50–60 min sessions

Phase 2 increases load across all primary movement patterns. The trap bar deadlift load increases, split squat volume moves to heavier dumbbell loading, and the landmine press transitions from a learning tool to a strength driver. Arm care volume remains consistent — it does not get dropped to add more main-lift sets. Most pitchers who carry strength gains from Phase 2 into a throwing ramp-up period report better arm durability and more consistent velocity compared to athletes who only throw in the off-season without structured lifting.

Phase 3 (Weeks 9–12): Power & Pre-Season Prep

Intensity 80–88% 1RM  |  3×4–6 reps  |  50–60 min sessions

Phase 3 shifts the emphasis from pure strength toward explosive power expression. Specifically, medicine ball rotational throws replace one of the warm-up sets each day, and the main lifts shift emphasis toward intentional concentric speed. This power phase aligns with the pre-season throwing ramp-up period — the weight room work peaks before the throwing program demands most of the pitcher’s recovery capacity during the season.

What Equipment Does a Pitcher Need for This Workout Program?

This baseball pitcher workout program PDF requires a trap bar or barbell, a pair of adjustable dumbbells or a dumbbell set, a resistance band set, and a pull-up bar or cable row machine. Every exercise in the program has a listed substitution so the program works whether the pitcher is training at a fully-equipped commercial gym, a HS weight room with limited equipment, or at home with dumbbells and resistance bands only.

Specifically, the trap bar deadlift — the primary posterior chain movement — can be substituted with a barbell Romanian deadlift, a hex dumbbell deadlift, or a cable pull-through if no trap bar is available. The landmine press can be substituted with a half-kneeling single-arm dumbbell press. The inverted row substitutes as a band pull-apart progression if no low bar or suspension trainer is accessible. This program requires none of that: no PlyoCare balls, no weighted baseballs, no PULSE arm speed sensor. It uses what you already have access to.

Why Does a Pitcher Workout Program Run Only 3 Days Per Week?

Three days per week is the correct lifting frequency for pitchers who are also running a throwing program because it leaves adequate recovery capacity for both. A pitcher throwing 2–3 times per week off a mound and lifting 3 days per week has 6 days of structured work. With one full rest day, that weekly schedule is already at the upper boundary of what most HS athletes can recover from effectively without accumulated fatigue compounding into arm injury risk.

Additionally, the Driveline research on weekly workload in HS pitchers is worth noting here: the biggest risk factor for arm injury is not individual session intensity — it’s acute-to-chronic workload ratio. Adding lifting days beyond 3 per week doesn’t increase strength gains proportionally; it reduces recovery quality. Therefore, 3 lifting days is not a shortcut — it is the optimal frequency for a pitcher who is also throwing.

For pitchers who are not currently running a throwing program during a true off-season, the program can be run 4 days per week by adding a fourth session using the Phase 1 volume and exercise selection for the entire 12 weeks. However, most HS pitchers are throwing year-round at some level, and 3 days is the design baseline.

When the schedule changes, this PDF can’t change with it.

Pre-season starts, practice volume jumps, or game weekends push your training days around. ByldrIQ rebuilds the pitcher’s training plan around what the week actually looks like — season phase, team workload, available days, session time ceiling, and equipment access. The PDF gets you started. ByldrIQ keeps the program matched to real life.

See How ByldrIQ Works →

What Arm Care Exercises Are in a Pitcher’s Workout Program?

The arm care circuit in this baseball pitcher workout program PDF runs at the start of every session (pre-lift) and at the end (post-lift recovery). The exercises are: J-band forward fly, J-band reverse fly, J-band internal rotation, J-band external rotation, J-band bicep curls, J-band tricep extensions, band pull-aparts, face pulls, and prone T holds. The complete pre-lift arm care circuit takes 8 minutes. The post-lift recovery circuit takes 5 minutes.

Specifically, this arm care structure follows the same framework described in research on overhead athlete maintenance: external rotators and scapular retractors in pitchers are consistently weaker than internal rotators because the throwing motion develops internal rotation strength far faster than the stabilizing muscles can keep pace.2 The arm care circuit in this program specifically targets that imbalance — every session, before the main lift begins.

For pitchers looking for a more comprehensive arm care and recovery protocol, the VeloRESET Arm Lab newsletter covers pitching arm health from a parent-friendly perspective — arm fatigue signs, recovery protocols, and when to back off versus push through — as a free weekly resource.

How Does This Pitcher Workout Program Work Alongside a Throwing Program?

This baseball pitcher workout program PDF is designed to complement a throwing program, not replace it. The weight room work and the throwing program are separate tracks. Specifically, this program does not include a throwing schedule, pitch counts, long toss progressions, or bullpen protocols. Those belong to the pitcher’s coach, sports medicine provider, or a dedicated throwing program.

The coordination rule is simple: do not lift on the day before a bullpen or a start, and do not lift on the day after a start. For a pitcher who throws bullpens on Tuesday and pitches games on Saturday, a Mon/Wed/Fri lifting schedule keeps the weight room and the mound from competing for the same recovery window. If the schedule shifts, adjust accordingly.

Additionally, this program pairs well with the 12-week HS baseball off-season workout for position players on the same team — the programming philosophy is consistent, which means a pitcher and a shortstop on the same team can train on the same schedule without one program undermining the other’s recovery.

What Are the Most Important Strength Exercises for Pitchers?

The most important strength exercises for pitchers develop posterior chain power, unilateral leg strength, rotational core stability, and shoulder durability. Specifically, the five exercises that appear in every phase of this program are: (1) the trap bar deadlift or Romanian deadlift, (2) the DB split squat, (3) the landmine press, (4) the inverted row or neutral-grip pull-up, and (5) the Pallof press.

Here’s why each one earns its place. The trap bar deadlift trains the same hip hinge and leg drive mechanics that power the pitching delivery — the drive leg push-off and hip extension pattern are identical. The DB split squat trains the landing leg independently, which is the asymmetry pitchers most need to address. The landmine press develops shoulder stability and rotational pressing strength without the impingement risk of overhead pressing. The inverted row targets the scapular retractors and posterior cuff — the muscles that decelerate the arm after ball release and are most at risk in throwing athletes. The Pallof press builds anti-rotation core stability, which is the core demand of pitching: not flexion and extension, but resisting unwanted rotation while producing intended rotation at the right moment.

These five movements appear in every phase because they address the five most common physical gaps in HS pitchers: limited posterior chain power, unilateral leg strength asymmetry, weak scapular retractors, inadequate shoulder durability, and underdeveloped rotational core stability. For more on baseball pitching training fundamentals, see the full pitching training resource page on HPL.

Download the Free 12-Week Pitcher Workout PDF

Arm care included every session. No proprietary equipment. Works with your existing throwing program.

Free. No credit card. Instant PDF delivery.

Frequently Asked Questions About the Baseball Pitcher Workout Program PDF

What age is this baseball pitcher workout program appropriate for?

This baseball pitcher workout program PDF is designed for pitchers ages 13 and older who have at least one year of basic weight room experience. Specifically, the program assumes the pitcher can perform a bodyweight squat, a dumbbell Romanian deadlift, and a push-up with acceptable form before adding load. Pitchers younger than 13 or those with no weight room experience should start with a youth baseball workout program before transitioning to this program.

Does this pitcher workout program replace a throwing program?

No — this baseball pitcher workout program PDF covers the off-field strength side of pitching only. It does not include a throwing schedule, bullpen protocol, long toss progression, or pitch count guidelines. Pair this program with your pitching coach’s throwing protocol or a dedicated arm care and throwing program. The two tracks run simultaneously — they are not alternatives.

Can a pitcher use this program during the season?

Yes, with modifications. During the in-season period, reduce lifting volume to 2 sessions per week and use Phase 1 exercise selection and loading (65–72% 1RM). The goal in-season is to maintain — not build — the strength developed in the off-season. Do not lift the day before or after a start or bullpen session. The arm care circuits at the start and end of each session remain the same regardless of season phase.

What does the arm care circuit include in each pitcher workout session?

Each session opens with an 8-minute pre-lift arm care circuit: J-band forward fly, reverse fly, internal rotation, external rotation, bicep curls, and tricep extensions (10 reps each), followed by band pull-aparts (2 sets of 15). Each session closes with a 5-minute post-lift recovery circuit: prone T holds, face pulls, and band pull-aparts. The arm care is not optional — it is part of the session time estimate, not additional time on top of it.

How long does each pitcher workout session take?

Each session runs 45–60 minutes including the arm care circuits. Phase 1 sessions average closer to 45 minutes because loading is lighter and rest periods are shorter. Phase 3 sessions may reach 60 minutes because heavier loads require longer rest intervals between sets. The 60-minute ceiling is a hard design constraint — the program does not add volume that pushes sessions past one hour.

Does this program work for softball pitchers?

The strength training structure in this program works for fastpitch softball pitchers as well as baseball pitchers. The hip hinge, unilateral leg strength, and rotational core exercises are directly applicable regardless of sport. However, the arm care circuit is calibrated for overhead throwing mechanics — softball pitchers using an underhand delivery may want to modify the external rotation emphasis and consult with their pitching coach on which arm care exercises are most applicable to their delivery pattern.

What if a pitcher doesn’t have access to a trap bar?

Every exercise in this baseball pitcher workout program PDF includes a listed substitution. Specifically, the trap bar deadlift substitutes with a barbell Romanian deadlift, a hex dumbbell deadlift, or a kettlebell deadlift depending on available equipment. The program was designed around the constraint that most HS weight rooms and commercial gyms have dumbbells, resistance bands, and either a barbell or trap bar — but not always a full complement of specialty equipment. All substitutions are listed directly in the PDF workout tables.

References:
1. Forthomme B, et al. Scapular muscle-strengthening program for overhead throwing athletes. Journal of Shoulder and Elbow Surgery. 2013.
2. Wilk KE, et al. The relationship between glenohumeral internal rotation deficit and injury in professional baseball pitchers. American Journal of Sports Medicine. 2011.


Free 12-Week PDF Included

Your daughter plays 4 days a week — but nobody’s ever given her a training plan built for a body that’s still growing.

This free youth softball workout plan is built for girls ages 10–14. Three days per week, 30–40 minutes, no gym membership required. Build the athleticism, bat speed, and arm strength her game needs — without overloading a body that’s still developing.

39k+
Email Subscribers
20k+
Programs Downloaded
20+
Years Coaching
D1
College Athlete

By Joey Myers — D1 Baseball, Fresno State  |  Author, Catapult Loading System  |  NASM-CES · IYCA Youth Fitness Specialist  |  20+ years of coaching

Quick Answer

A youth softball workout plan for girls ages 10–14 should run 3 days per week, 30–40 minutes per session, built around bodyweight strength, rotational power, agility, and arm care. The 12-week structure in this post follows three 4-week phases: Athletic Foundation (Weeks 1–4), Power Development (Weeks 5–8), and Sport Speed (Weeks 9–12). No gym membership required — most exercises need only a resistance band, a light medicine ball, and open space.

Why does a youth softball workout plan need to be different from high school programs?

A youth softball workout plan for girls ages 10–14 is different because the body is still in development. Growth plates — the cartilage zones at the ends of long bones — remain open throughout early adolescence. Excessive load through those plates before they close creates injury risk that doesn’t show up in high school lifting programs because those programs were designed for more mature physiology.

That doesn’t mean youth players shouldn’t train hard. It means the training stimulus needs to match where they are. At ages 10–14, the highest-return investment is movement quality, not max load. A player who develops excellent squat mechanics, rotational core strength, and throwing mechanics by age 13 will outperform a player who was rushed into barbell training at 11 by the time they reach high school.

Compared to a high school softball off-season program, a youth program uses shorter sessions (30–40 min vs. 45–60 min), fewer working sets per exercise, longer rest intervals, and prioritizes coordination and balance work that older athletes can bypass. The focus shifts from loading to learning.

What should a youth softball workout plan include?

A well-designed youth softball workout plan covers five training categories. Each one addresses a different athletic capacity that matters for game performance — and the balance between them is what separates an effective program from just running laps and doing push-ups.

1. Lower body strength and power. Squats, split squats, and lunges build the hip and leg strength that drives acceleration, first-step quickness, and the rotational ground force that transfers into every swing. At the youth level, bodyweight and goblet squat variations are sufficient for the first 8 weeks.

2. Rotational core training. The swing is a rotational movement — the core connects the lower body force to the upper body. Medicine ball rotational throws, band-resisted twists, and Pallof press variations build the core stiffness and rotational speed that show up in bat speed and throwing velocity.

3. Upper body pushing and pulling. Push-up progressions, band pull-aparts, and bent-over rows build the shoulder stability, scapular strength, and arm-path control that protect against overuse and support clean mechanics. These also address the overhead demands of pitching and fielding.

4. Speed and agility work. Cone drills, lateral shuffles, and acceleration sprints develop the first-step quickness and body control that separate average defenders from good ones. This category is also the most fun for youth athletes — and fun increases adherence.

5. Arm care. A simple 5-minute daily band routine before every throwing session — similar to the J-Band arm care routine used by travel coaches — protects the rotator cuff and posterior shoulder capsule across a full season. Youth players who skip this are building toward the shoulder problems that show up at 15 or 16.

How many days per week should a 10–14 year old softball player train?

Three days per week is the evidence-supported target for youth softball training. This frequency produces measurable improvements in strength, speed, and athletic performance while leaving enough recovery space between sessions and practice days. A girl who trains 3 days and practices 4 more is effectively training 7 days a week — recovery happens on rest days, and there have to be some.

The sessions should be spread across the week with at least one recovery day between each. Monday / Wednesday / Friday or Saturday is the most practical schedule for players who have practice Tuesday and Thursday. The program’s arm care component gets added before every throwing session regardless of the schedule — that’s a daily habit, not a training day obligation.

Four or more training sessions per week is not only unnecessary at this age — it frequently pushes youth athletes into overtraining patterns. When a player starts showing poor practice performance, irritability, or loss of motivation, added volume is almost never the answer.

What are the best exercises for a youth softball workout plan?

The best exercises for youth softball players are movements that build sport-specific athletic capacity without requiring a gym or advanced equipment. Below are the top exercises by category — these are the backbone of the 12-week program included in this post.

Scroll right on mobile to see full table →

Category Top Exercises Why It Matters
Lower Body Bodyweight squat, goblet squat, reverse lunge, lateral step-up Drive force production and first-step speed
Rotational Core Med ball rotational throw, Pallof press, dead bug, bird dog Connects lower body force to bat speed
Upper Body Push-up progressions, band pull-apart, bent-over row, face pull Shoulder stability and throwing mechanics
Speed / Agility Cone shuffle, lateral bound, sprint starts, box jump (Phase 2+) First-step quickness and body control
Arm Care Band external rotation, band scarecrow, sleeper stretch, prone Y-T Protects the rotator cuff and posterior capsule

Notice what’s not on this list: barbell back squat, bench press, and Olympic lifts. These movements require years of technical development and adult-level load tolerance. They belong in a college softball strength and conditioning program — not a youth training block.

How does a youth softball workout plan affect hitting power?

Training affects hitting power through two distinct channels: the muscular channel and the neuromuscular channel. Most coaches focus only on the first one — getting stronger — but at the youth level the second one matters more. The neuromuscular channel is about teaching the nervous system to fire the right muscles in the right sequence at the right speed. That’s bat speed training, and it can improve dramatically at ages 10–14 without adding any weight at all.

Research on softball hitting power for youth players consistently shows that bat speed is more trainable at this age than most coaches expect — not through heavy resistance, but through overspeed bat swings, rotational med ball throws, and hip hinge patterns that train the kinetic chain. A player who develops clean rotational mechanics by age 13 carries that pattern into every level of play.

The muscular channel contributes too — particularly hip and glute strength, which determines how much ground force gets transferred into the swing. But even here, the goal at the youth level is movement pattern quality. A player with a technically perfect goblet squat and single-leg RDL will transfer more force into the swing than a player who can barbell squat twice her bodyweight with sloppy mechanics.

Free Download

Get the Full 12-Week Youth Softball Workout Plan PDF

3 phases · 3 days/week · 30–40 min sessions · Bodyweight-first, no gym required · Arm care routine included. Print it or save to your phone.

The 12-Week Youth Softball Workout Plan: Phase Overview

The full program is organized into three 4-week phases, each building on the previous one. The complete exercise-by-exercise breakdown with sets, reps, rest periods, and coaching cues is in the PDF — here’s what each phase accomplishes.

Weeks 1–4
Athletic Foundation

Bodyweight squats, lunge matrix, push-up progressions, core stability, agility ladder. Emphasis on movement quality and building the habit of training. 2–3 sets per exercise.

Weeks 5–8
Power Development

Goblet squats (light DB/KB), med ball rotational throws, band-resisted push-ups, lateral bounds, box step-ups. Intensity increases. 3 sets. Load introduced where mechanics are solid.

Weeks 9–12
Sport Speed

Split squats, sprint mechanics, med ball slam, overspeed bat swings, reactive agility drills. Power output at speed. Highest intensity phase — prepares for in-season performance.

Weekly Structure: Day A / Day B / Day C

Each week follows the same three-session structure across all 12 weeks — the exercises and loads progress, but the pattern stays consistent. Consistency in scheduling is what allows the nervous system to adapt.

Session Focus Example Day Duration
Day A Lower body + Core Monday 35–40 min
Day B Upper body + Rotational power Wednesday 30–35 min
Day C Speed, agility + Bat speed Friday or Saturday 30–35 min

Plus: 5 minutes of fastpitch-specific arm care drills before every throwing session — practice days included. This is not optional and does not count as a training session. It’s injury prevention, and it should become as automatic as putting on cleats.

The programming principles in this plan align with the National Strength and Conditioning Association (NSCA) youth resistance training guidelines, which recommend 3-day-per-week programs for pre-adolescent and early adolescent athletes, with emphasis on technique-first progression before external load.

Free Download

Get the Full 12-Week Youth Softball Workout Plan PDF

Printable. Mobile-friendly. No gym required. Enter your email and I’ll send the PDF directly to your inbox.

Frequently Asked Questions

What age should girls start a softball workout plan?

Girls can begin a structured plan as early as ages 8–9 with bodyweight movements, balance drills, and coordination games. Ages 10–14 are the ideal window for a more formal 3-day program. The key is load — at this age, movement quality matters far more than how much weight is being lifted. External resistance should only be added once proper form is consistent.

Can youth softball players lift weights?

Yes — the American Academy of Pediatrics confirms that properly supervised resistance training is safe and beneficial for athletes ages 8 and older. Start with bodyweight, build movement competency over 4–6 weeks, then introduce light external resistance like bands or light dumbbells. Heavy barbell training is not appropriate until growth plates close, typically ages 16–18.

How long should a youth softball workout be?

For girls ages 10–14, sessions should run 30–40 minutes, three days per week. Sessions longer than 45 minutes at this age typically indicate too much rest time, unfocused programming, or an adult-volume program that wasn’t scaled for youth athletes.

What exercises improve batting power for youth softball players?

The highest-return exercises are rotational medicine ball throws, goblet squats, split squats, push-up progressions, and lateral band walks. These develop the hip rotation, core stiffness, and upper body linkage that drive softball hitting mechanics. Overspeed bat swings with a lighter bat 2–3 times per week also develop bat speed neuromuscular patterns directly.

Should youth softball players do arm care exercises?

Yes — arm care is essential even at the youth level. A simple 5-minute band routine before every throwing session protects the rotator cuff, posterior shoulder capsule, and elbow. Skipping it during the youth years is a leading contributor to shoulder and elbow problems in high school.

How is a youth softball workout plan different from a high school program?

Youth programs emphasize movement foundations — coordination, balance, body control, and basic strength patterns — over maximum load. High school programs introduce heavier resistance and more complex periodization because the athlete’s physiology can handle it. Youth programs also use shorter sessions, fewer total sets, and more rest between efforts.

What does a 3-day youth softball workout week look like?

Day A is lower body and core, Day B is upper body and rotational power, Day C is speed, agility, and bat speed. Separate each session by at least one rest day. The most practical schedule: Monday (Day A), Wednesday (Day B), Friday or Saturday (Day C). The program in this article follows exactly this structure across 3 four-week phases.

4
Weeks
3
Days / Week
20 Min
Per Session
Free
PDF Download

By Joey Myers  |  HittingPerformanceLab.com

Most college softball players fall into one of two in-season training traps: they keep lifting at off-season volume and accumulate fatigue that erodes performance by late conference play, or they stop training entirely and watch four months of speed and strength gains disappear before playoffs. Neither works. A purpose-built softball in-season workout program PDF solves this by maintaining the mechanical patterns and strength base at the minimum effective dose — without producing soreness that costs you in Friday’s game.

Specifically, this free softball in-season workout program is built on David Weck’s spinal engine framework: 3 days per week, 20 minutes per session, with exercises selected specifically to preserve the rotational mechanics and sprint patterns that in-season fatigue erodes first. grab the free program PDF here if you want to go straight to the program.

What does a softball in-season workout program need to do differently than off-season training?

A softball in-season workout program has one primary job off-season training doesn’t: maintain what was built without creating the accumulated fatigue that degrades game-day performance. That requires three deliberate shifts in how training is designed.

First, volume drops significantly. In-season strength work runs at 40–60% of off-season volume — two focused sessions per week instead of four or five. Research on strength maintenance confirms that frequency and intensity preserve gains; volume is the variable to reduce. A college softball player in the middle of a 60-game schedule cannot recover from three heavy lower-body sessions per week alongside 3–4 practices and games. The program has to fit inside the recovery budget that already exists.

Second, exercise selection shifts away from high-DOMS movements. Back squats, heavy barbell Romanian deadlifts, and high-rep eccentric work all produce significant muscle soreness — which is fine in October but damaging in April. This softball in-season workout program PDF replaces those movements with trap bar variations, split squats at moderate loads, and the WeckMethod lateral landmine: exercises that maintain strength and movement quality with far less next-day soreness.

Third, the mechanical pattern layer stays non-negotiable. Most in-season programs drop the speed mechanics work entirely — the HOF drills, the pulsing arm swing, the spinal engine activation work — because it doesn’t feel like “real” lifting. That’s exactly backward. The movement pattern is what drives faster sprint times and sharper rotational power. Losing the pattern is more costly than losing a few pounds on the bar.

Why do college softball players lose speed and power mid-season despite staying active?

College softball players lose speed and power mid-season for two overlapping reasons: cumulative fatigue suppressing the nervous system, and loss of the mechanical patterns that produce elite athletic output in the first place.

Specifically, the fatigue piece is straightforward. A player who is competing 3–4 times per week, practicing on off-days, and training at full off-season volume is running a chronic caloric and recovery deficit. By Week 6 of conference play, the nervous system is operating below baseline. Sprint speed drops 0.1–0.3 seconds on the 60-yard dash. First-step quickness degrades. Bat speed decreases at the end of a long game or long week. None of this is a fitness problem. It’s a recovery management problem.

However, the mechanical pattern piece is less obvious but equally real. David Weck at WeckMethod.com has identified that athletic movement patterns — specifically the spinal engine mechanics that drive sprint speed and rotational power — degrade without deliberate reinforcement. A player who stops doing HOF drills and arm pulse work in-season may still be running and hitting every day, but the pattern is drifting. The spinal engine disengages under fatigue unless it is periodically re-cued. By late season, many players are running slower and swinging less explosively not because they’re weaker, but because their mechanical pattern has slipped. This is what the college softball strength and conditioning program structure needs to protect first.

How does the spinal engine stay active through a full college softball season?

The spinal engine stays active through pattern maintenance, not volume. Two targeted sessions per week — one centered on lateral flexion training (the WeckMethod lateral landmine), one on sprint mechanics reinforcement (Wall HOF drill, arm pulse work) — is enough to keep the system calibrated through a full 60-game season.

Specifically, the spinal engine concept, developed from biomedical engineer Serge Gracovetsky’s research, establishes that locomotion is generated primarily through the spine’s lateral flexion and rotation — not just leg drive. The spine coils and uncoils with each stride, amplifying ground reaction force and increasing stride length. David Weck’s WeckMethod training system applies this directly: exercises that train lateral spinal flexion (the landmine side-bend) and reinforce the rotational counter-pattern (the arm pulse) maintain the spinal engine’s contribution to both speed and rotational power.

Why this matters mid-season: A player whose spinal engine stays engaged all season doesn’t just run faster — she swings with more thoracic counter-rotation at landing, which means more rotational power at contact. The same 20-minute session that maintains her base speed is simultaneously maintaining her bat speed and rotational output. That’s the efficiency of pattern-first training.

As a result, this pattern maintenance shows up in late-season performance. Players who follow a spinal engine maintenance protocol through a full season report that their sprint times don’t decline after Week 8 of conference play — and in many cases improve, because accumulated game repetitions reinforce the pattern their training has been dialing in all spring. The softball in-season workout program PDF is structured to produce exactly that outcome.

What is the Head Over Foot technique and why does it apply to softball base running and power?

Head Over Foot (HOF) is a WeckMethod speed principle: at ground contact during a sprint, the athlete’s head should be positioned directly over the striking foot. This alignment creates the optimal mechanical relationship for ground force transfer up through the kinetic chain — the reaction force travels vertically through the skeleton rather than being deflected by misalignment at the hip or trunk.

For college softball, HOF is most critical during the first three strides out of the batter’s box and out of the outfield starting position. A player running with the head slightly behind the foot — the most common pattern — creates a braking force on every stride. HOF eliminates that brake. When the head is over the foot at contact, the ground reaction force propels the player forward rather than redirecting energy upward and backward. In a sport where first-step quickness on a 60-foot base path determines safe calls and scoring opportunities, a 0.1-second improvement in the first three strides is a meaningful competitive advantage.

HOF also applies directly to the swing. At stride landing, the head-over-front-foot position creates the same force transfer relationship for rotational power that it creates for sprint speed. A hitter who lands with her head over her front foot and her spine in lateral tilt toward the pitcher is loading the spinal engine correctly. The counter-rotation from that position drives the swing with more power than a stride pattern that leaves the head and trunk behind the foot at landing. Understanding fastpitch softball hitting mechanics becomes much clearer once a player can feel the HOF position she already uses when sprinting.

In practice, the Wall Acceleration Drill teaches HOF most efficiently: lean into a wall at 45 degrees, maintain a straight line from ankle to ear, and drive the knees up alternately while keeping the head over the contact point. This 5-minute drill, included in every session of this softball in-season workout program PDF, is the fastest way to dial in the pattern before practice or a game.

How does the WeckMethod lateral landmine build rotational power without beating up in-season athletes?

The WeckMethod lateral landmine is David Weck’s signature adaptation of the standard landmine exercise: instead of a press or a traditional rotation, the athlete stands perpendicular to the barbell and performs a controlled lateral side bend — hinging the spine toward the bar, then driving back upright through the lateral spinal musculature. This is not a rotation. It is pure lateral flexion, which is the specific movement Gracovetsky identified as the primary driver of the spinal engine.

For a softball player in-season, the lateral landmine has three direct applications that justify its place as the cornerstone exercise of this program. First, it maintains the lateral spine oscillation that drives sprint mechanics — the same side-to-side spinal motion you see in elite base runners’ trunks when they hit full speed. Second, it trains the shoulder-to-hip separation at swing landing: the lateral tilt of the spine at the moment of hip rotation is what creates the torque differential that generates bat speed. Third, it develops the lateral trunk stability that keeps the throwing arm’s release point consistent across a long season — an often-overlooked contributor to throwing accuracy and arm health.

Why it works for in-season use specifically: Unlike a back squat or heavy RDL, the lateral landmine does not fatigue the rotator cuff, doesn’t require significant CNS recovery, and does not produce the quad and hamstring soreness that impairs running mechanics the next day. It can be trained at moderate intensity twice per week through an entire conference season without accumulating the wear that forces de-load weeks. That’s rare in a strength exercise with direct transfer to three different softball movement patterns.

To set it up: anchor a barbell in a landmine attachment or a corner. Stand with the bar at hip height to your right side, feet shoulder-width apart. Grip the end of the bar with both hands. Hinge laterally toward the bar, keeping the spine long and the movement pure lateral flexion — not a squat, not a rotation. Drive back upright through the lateral musculature on the opposite side. For softball players, the loading side should match the throwing-arm side on Set A, opposite on Set B. Start at 2×8 each side and progress conservatively — the movement is more demanding than it looks once you find the full range of lateral flexion.

What does the 4-week college softball in-season workout program look like?

The 4-week program follows a reset — maintain — preserve — sharpen structure. Week 1 re-establishes movement patterns at low load. Week 2 holds strength at moderate intensity. Week 3 adds explosive output to keep fast-twitch fibers sharp. Week 4 transitions to pre-game activation as the primary tool, with a single full-body maintenance session.

Scroll to see full table →

Week Phase Speed / Pattern Focus Strength Focus
Week 1 Reset Wall HOF drill, marching arm pulse, 10-yd HOF run x3 Lateral landmine 2×8 each side, goblet squat 2×8, band pull-apart 2×15
Week 2 Maintain A-skip with arm pulse, first-step reactive drill 5x, 15-yd HOF run x4 Lateral landmine 2×10 (add load), split squat 2×6, Pallof press 2×12
Week 3 Preserve Bound drill 3x each side, crossover start x5, 20-yd HOF full-effort x3 Lateral landmine 2×6 (heavier, explosive), hex bar jump 2×4, trap bar DL 2×4
Week 4 Sharpen Pre-game activation circuit (8 min): wall drill, hip hinge, lateral landmine light, 15-yd sprint x2 1 maintenance session/wk: full-body, light-moderate, 20 min, no DOMS movements

Additionally, each session runs 20 minutes. The program is designed to slot into non-game days and does not require a full weight room — Weeks 1–2 need a landmine attachment and a resistance band. Week 3 adds a medicine ball. Week 4 can be run with bodyweight and a single light plate. The full exercise order, coaching cues, sets, and reps are in the downloadable softball in-season workout program PDF. Players who want to extend this into a longer training block can pair it with the 12-week off-season lifting program for a full annual-cycle training system.

What strength exercises belong in a college softball conditioning program during the season?

In-season softball strength work should prioritize four categories: lateral spinal training, hip-dominant lower body, rotational core stability, and pulling patterns for shoulder health. Every exercise selected for this college softball in-season workout meets two criteria: it has direct transfer to sprint speed or swing power, and it can be trained at moderate intensity without creating soreness that impairs next-game performance.

WeckMethod Lateral Landmine ★ (Primary Exercise)

The cornerstone exercise of this program. Two sets per session, alternating loading side. Progress conservatively — 2×8 in Week 1 to 2×6 heavy in Week 3. The lateral spinal flexion this develops is the single most important mechanical pattern to maintain through a long season, as it drives both sprint and swing output. If you only do one exercise from this program, make it this one.

Hip-Dominant Lower Body

First, the trap bar deadlift (preferred over back squat for reduced spinal compression), Bulgarian split squat at moderate loads (6 reps per side maximum in-season), and DB Romanian deadlifts for posterior chain maintenance. These movements preserve the hip extension strength that drives sprint acceleration and the drive phase of the swing without the quad soreness that back squats produce.

Rotational Core Stability

Additionally, Pallof press variations and anti-rotation holds train the core to resist rotation under load — the exact demand of every swing, every throw, and every deceleration move on the field. Med ball rotational wall toss (8 reps, light ball) is included in Weeks 2–3 to maintain the explosive rotational output that is the first thing to dull when in-season athletes stop training. Improving fastpitch softball hitting power during the season comes almost entirely from maintaining this rotational pattern, not from adding new technique.

Pulling Patterns (Arm Health)

Finally, band pull-aparts (2×15, every session) and face pulls counterbalance the anterior shoulder dominance that high-volume throwing creates across a long season. If your pitcher is running this program, pair it with the J-Band arm care routine for a complete system. The parallel baseball version of this program — the college baseball in-season workout program PDF — uses the same pulling protocol.

What Athletes Say About WeckMethod Speed Training

“The ProPulse® Speed Trainers help me generate greater ground force through my swing and improve the overall timing of my body’s weight shift.”

Justin James — 2017 World Long Drive Champion

“I use the RMT® Club every chance I get to warm-up and strengthen my body. I can feel how it carries over from training to the field.”

Austin Barnes — L.A. Dodgers 2020 World Series Champion

“ProPulse® Speed Trainers help connect my strength training with my sport, increasing speed and fluidity between those two things.”

Jordan Burroughs — 4x Team USA Wrestling Olympic Gold Medalist

Free Download

Softball In-Season Workout Program PDF

4-week in-season plan built on WeckMethod spinal engine mechanics.
Lateral landmine, HOF drills, strength maintenance. Free. Printable.

Download Free Softball In-Season PDF →

Frequently Asked Questions — Softball In-Season Workout Program PDF

How many days per week should college softball players lift in-season?

In short, college softball players should lift 2 days per week in-season, with a third day dedicated to movement pattern activation (HOF drills, arm pulse work, pre-game circuit). Research on strength maintenance consistently shows that two sessions per week at moderate-to-high intensity is sufficient to preserve off-season gains through a full 60-game season. This softball in-season workout program PDF is structured around that principle. The critical variable is not frequency — it is selecting exercises that don’t create soreness on game days.

What is the WeckMethod lateral landmine and how do you set it up?

The WeckMethod lateral landmine is a lateral side-bend landmine exercise developed by David Weck that trains the spine’s lateral flexion — the primary driver of the spinal engine in sprint and rotational movement. To set it up: anchor a barbell in a landmine attachment (or brace it in a corner). Stand perpendicular to the bar with feet shoulder-width, grip the end of the bar with both hands at hip height, and perform a controlled lateral hinge toward the bar — keeping the movement pure lateral flexion, not rotation or squat. Drive back upright through the lateral musculature. Start at 2×8 each side with light load and add weight conservatively over the 4-week program.

Can this softball in-season workout program be done without a full weight room?

Yes. Weeks 1 and 2 require a landmine attachment (or a barbell braced in a corner) and a resistance band. Week 3 adds a medicine ball and light dumbbells or kettlebells for trap bar deadlift alternatives. Week 4 is primarily bodyweight-based with one light plate for the lateral landmine. The full program can be completed in a hotel gym, a small team weight room, or a dugout area with minimal equipment.

How does this softball in-season workout PDF differ from the off-season program?

In contrast, the off-season program builds new strength and speed capacity — higher volume, heavier loads, 4–5 days per week. This softball in-season workout program PDF maintains what was built at the minimum effective dose: 3 days per week, 20-minute sessions, exercises selected specifically to avoid DOMS while preserving the movement patterns that drive speed and rotational power. The WeckMethod framework is the same in both phases; the loading parameters are deliberately reduced to fit inside the recovery budget of an active college season.

What does the Head Over Foot drill look like in a softball pre-game warmup?

In a softball pre-game context, the HOF drill runs 5 minutes: start with the Wall Acceleration Drill (2 minutes — lean at 45 degrees, drive knees alternately), then 3 rounds of marching arm pulse across 10 yards, then 2 rounds of 15-yard HOF acceleration runs at 80% effort. The goal is not warm-up volume — it is pattern activation. By the time the player steps into the box or takes her fielding position, the spinal engine is cued and the first-step mechanics are dialed in.

Does this program work for both position players and pitchers?

Yes, with one modification for pitchers. The lateral landmine is particularly valuable for pitchers because the lateral spinal flexion it trains directly supports drive-phase mechanics and follow-through stability. However, pitchers should skip the rotational med ball wall toss in Weeks 2–3 and replace it with additional band pull-aparts and face pulls to protect posterior shoulder health during high throwing volume. Pair this program with a dedicated arm care routine for pitchers in full-season use.

How does the spinal engine connect to softball swing power?

Specifically, the spinal engine produces swing power through the same coiling and uncoiling pattern that drives sprint speed. At stride landing, the spine’s lateral tilt toward the pitcher — combined with thoracic counter-rotation — stores elastic energy in the trunk. When the hips fire, the spine uncoils from that loaded position and delivers that stored energy into the arms and bat. A player whose spinal engine is actively maintained in-season retains this loading capacity through late conference play. A player whose spinal engine has drifted due to lack of maintenance produces a flatter, less explosive swing that relies more on arm strength — which fatigues over a long season — than on the spinal engine, which does not.

Free Download

Get the Free Softball In-Season Workout Program PDF

Enter your email and get the full 4-week in-season program instantly.

Get the Free Softball In-Season PDF →

References: Gracovetsky S. The Spinal Engine. Springer-Verlag, 1988.  |  WeckMethod.com — Speed and Movement Training Resources.  |  Ralston GW, et al. “The Effect of Weekly Set Volume on Strength Gain.” Journal of Strength and Conditioning Research. 2017;31(8):2219-2230.  |  Nimphius S, et al. “Change of direction deficit: a more isolated measure of change of direction performance than total 505 time.” Journal of Strength and Conditioning Research. 2016;30(11):3024-3032.


4
Weeks
3
Days / Week
25 Min
Per Session
Free
PDF Download

By Joey Myers  |  HittingPerformanceLab.com

Most baseball players who want to get faster do the same things: ladder drills, cone work, sprint intervals, maybe some box jumps. They work hard. They get marginally faster — and then they plateau. The reason isn’t effort. It’s that traditional baseball speed training never addresses the mechanical pattern that actually generates sprint velocity. This free baseball conditioning program PDF fixes that by building the four-week plan around the spinal engine — the system your body already has for producing speed, that almost no baseball program teaches.

The PDF includes the full baseball conditioning program with speed mechanics drills, baseball-specific strength work, and a pre-game activation routine. Download the free baseball conditioning program PDF here if you want to skip straight to the program.

What does a baseball conditioning program PDF need to include that most don’t?

A complete baseball conditioning program PDF needs four components most programs omit: speed mechanics instruction, baseball-specific strength progressions, rotational power transfer work, and a pre-game activation routine that primes the nervous system instead of fatiguing it.

Most conditioning programs available online for baseball players are adapted from generic athletic performance templates. They include sprints, cone drills, agility ladders, and some variation of lower-body strength work. None of that is wrong — but it’s incomplete. The missing piece is the speed mechanics layer: the biomechanical instruction that teaches the body how to move faster, not just how to move harder.

The difference matters because baseball speed is not the same as track speed. A baseball player’s sprint context is almost always 60–90 feet, starting from a static or low-momentum position, often with a directional read (first step toward the ball, first step off first base). The conditioning program has to train that pattern — short bursts, first-step quickness, direction changes — not just top-end velocity. The baseball agility training principles that carry over to the game are built on first-step mechanics, not finish-line speed.

This baseball conditioning program PDF addresses all four components in a 4-week, 3-days-per-week structure that fits a pre-season or in-season training window without competing with practice volume.

Why do baseball players plateau on speed despite training hard?

Baseball players plateau on speed because they are training effort without training pattern. Ladder drills and sprint repeats improve conditioning and agility coordination, but they do not teach the neuromuscular pattern that produces elite sprint velocity — the sequencing of the spine, hips, and arms that the body uses to generate locomotion.

Think of it this way: a player who can run a 6.9-second 60-yard dash and does six weeks of sprint intervals will run a better-conditioned 6.9. The same player who learns the correct mechanical pattern during those six weeks may run a 6.5 — not because they got stronger, but because they stopped fighting their own body.

This is what David Weck at WeckMethod.com has identified and systematized over two decades of movement research: most athletes run with mechanics that work against the body’s natural speed-generation system. The correction isn’t more conditioning. It’s pattern-first training — teaching the spinal engine to fire correctly before layering in speed and strength work.

What is the spinal engine and how does it apply to baseball speed?

The spinal engine is the biomechanical system by which the spine generates locomotion through lateral flexion and rotation — not just the legs. The concept originates in the research of biomedical engineer Serge Gracovetsky, who demonstrated that walking and running are driven primarily by spinal mechanics, with the legs acting as the output of the system rather than its source. David Weck’s WeckMethod training system applies spinal engine principles specifically to speed and power development in athletic movement.

For baseball players, the spinal engine has two direct applications. First: sprint speed. When the spine engages correctly during the running stride, it amplifies force transfer from the ground through the kinetic chain — the player covers ground with less effort per stride. Second: rotational power. The same coiling and uncoiling of the spine that drives elite sprint mechanics is the identical pattern that powers the baseball swing at the highest level. Learning one reinforces the other.

Why this matters for your baseball conditioning program: Most players who are labeled “not naturally fast” are actually fast — their spinal engine is just not engaged. They are running with a pattern that bypasses the most powerful force-generation system in the body. The drills in this baseball conditioning program PDF are designed to turn that system on, not around it.

The practical difference is visible in a player’s stride. An athlete running with a disengaged spinal engine looks stiff through the torso — the trunk is locked, the arms swing across the body, and the stride length is limited by hip flexor mobility alone. An athlete running with an engaged spinal engine has visible counter-rotation through the torso, a longer natural stride, and significantly less upper-body tension. For reference, watch elite outfielders and base stealers at the major-league level. The trunk involvement is not an accident.

What is the Head Over Foot technique and why does it matter for baseball players?

Head Over Foot (HOF) is a WeckMethod speed principle that states at ground contact, the athlete’s head should be positioned directly over the striking foot. This alignment creates the optimal mechanical relationship for force transfer from the ground up through the kinetic chain — the ground reaction force travels vertically through the skeleton rather than being deflected by misalignment at the hip or trunk.

Most athletes run with the head slightly behind the foot at ground contact — a common pattern that creates a braking force on every stride. The player is simultaneously pushing forward and braking. HOF eliminates the brake. When the head is over the foot, the ground reaction force propels the athlete forward rather than redirecting energy upward and backward.

For baseball-specific speed, HOF is most critical during the first three strides of any burst — the acceleration window that determines whether a player beats a throw, catches a ball, or gets a good jump on a steal. A player who understands HOF and practices the pattern has an immediate mechanical advantage in every first-step situation on the field, even before any strength or conditioning improvement takes effect.

The drill that teaches HOF most efficiently is the Wall Acceleration Drill: the player leans into a wall at roughly 45 degrees, maintaining a straight line from ankle to ear, and drives the knees up alternately while keeping the head directly over the contact point. This reinforces the head-over-foot position at ground contact before the player ever runs full speed. The baseball speed increase research consistently points to ground contact mechanics as the primary differentiator between fast and faster athletes.

The connection between the arm swing and baseball sprint speed that coaches rarely teach

The arm swing drives the spinal engine. This is one of the most important and least-taught concepts in baseball speed development — and it’s the direct bridge between sprint mechanics and swing mechanics.

David Weck’s WeckMethod system teaches a specific arm action called pulsing — a deliberate pulse or flick at the end of each arm swing that amplifies the rotational signal sent to the spine. Most athletes swing their arms across the body or in a straight forward-back path. Both patterns suppress the spinal engine by limiting the rotational input the arm swing delivers to the torso. The pulsing pattern — where the hand drives back and slightly across at the end of the backswing — activates the counter-rotation through the thoracic spine that generates stride power.

For baseball players, this has a second application: the pulsing arm action trains the same counter-rotation pattern that stores elastic energy in the swing at stride landing. Players who learn the pulsing pattern for speed often report that their swing feels more loaded and less forced — because the thoracic counter-rotation they’re using to run is the same movement they need at the top of their swing sequence. The bat speed drills that produce the biggest results are the ones built on this same rotational chain.

This cross-application is why the conditioning program works as both a speed program and a swing power program. The movement patterns are not separate skills — they are the same spinal engine expressed in two different athletic contexts. A player who learns to run with the spinal engine and arm pulse will find their rotational power in the batter’s box improving alongside their 60-yard dash time. Understanding baseball hitting drills for power becomes much more intuitive once the athlete can feel the rotational chain already working in their sprint.

What does the 4-week baseball conditioning program look like?

The 4-week baseball conditioning program in the PDF follows a pattern → load → integrate → activate structure. Week 1 teaches the mechanics. Week 2 loads them under resistance. Week 3 applies them to multi-directional baseball movement. Week 4 condenses everything into a pre-game and in-season maintenance format.

Scroll to see full table →

Week Phase Speed Focus Strength Focus
Week 1 Pattern HOF wall drill, marching pulse, A-skip with arm pulse Goblet squat, RDL, Pallof press — 2 sets, pattern focus
Week 2 Load Resisted sprints (band), bound drills, HOF acceleration runs 20 yd Split squat, trap bar deadlift, rotational med ball — 3 sets
Week 3 Integrate First-step reads, crossover start, 60-yd full effort with HOF cue Hex bar jump, lateral band work, anti-rotation press — 3 sets
Week 4 Activate Pre-game activation circuit (8 min), reactive first-step drill In-season maintenance: 1 session/wk, full-body, 20 min

Each session runs 20–25 minutes. The program is designed to run alongside practice — it is not a replacement for hitting or pitching work, and it does not require a weight room. Weeks 1–2 need only a resistance band. Week 3 adds a medicine ball. Week 4 requires no equipment at all.

The full session breakdown — exercise order, sets, reps, coaching cues, and WeckMethod speed drill descriptions — is in the baseball conditioning program PDF. The 12-week off-season baseball workout plan extends these same principles into a longer training block for players who want a full off-season program.

What strength exercises belong in a baseball conditioning program?

Baseball conditioning programs should prioritize hip-dominant lower body strength, rotational core stability, and pulling patterns — not the pushing and bench-heavy templates borrowed from football or general fitness. The strength component of this baseball strength and conditioning program PDF selects exercises that directly transfer to the movements baseball demands.

The four strength categories in the program:

Hip-dominant lower body: Trap bar deadlifts, Romanian deadlifts, and Bulgarian split squats build the posterior chain strength that powers both sprint acceleration and the drive phase of the swing. These are preferred over back squats in a baseball context because they train hip extension without the spinal compression that accumulates over a long season.

Rotational core: Pallof press variations, anti-rotation holds, and rotational medicine ball throws train the core to resist and produce rotation — the exact demand of every swing and every throw. The strength training component intentionally excludes crunches and sit-ups, which train flexion in a sport that demands rotational stability.

Pulling patterns: Band pull-aparts, face pulls, and rows counterbalance the anterior dominance that throwing creates over time and support the posterior shoulder health that arm care programs address separately. If your pitcher is also running this program, pair it with the J-Band arm care program for a complete system.

Explosive output: Hex bar jumps, broad jumps, and medicine ball scoop throws train the rate of force development — how fast strength becomes speed at the moment it’s needed. A player can be very strong and still be slow if their nervous system hasn’t been trained to express that strength quickly. The athletic performance training research is consistent: rate of force development, not raw strength, is what separates fast baseball players from strong ones.

What Athletes Say About WeckMethod Speed Training

“The ProPulse® Speed Trainers help me generate greater ground force through my swing and improve the overall timing of my body’s weight shift.”

Justin James — 2017 World Long Drive Champion

“I use the RMT® Club every chance I get to warm-up and strengthen my body. I can feel how it carries over from training to the field.”

Austin Barnes — L.A. Dodgers 2020 World Series Champion

“ProPulse® Speed Trainers help connect my strength training with my sport, increasing speed and fluidity between those two things.”

Jordan Burroughs — 4x Team USA Wrestling Olympic Gold Medalist

Free Download

Baseball Conditioning Program PDF

4-week speed and strength plan built on David Weck’s spinal engine mechanics.
HOF technique, pulsing arm drills, strength progressions. Free. Printable.

Download Free Baseball Conditioning PDF →

Frequently Asked Questions — Baseball Conditioning Program PDF

What is the best baseball conditioning program PDF for high school players?

The best baseball conditioning program PDF for high school players combines speed mechanics instruction with baseball-specific strength work in a format that fits alongside a practice schedule. The program should address first-step quickness, sprint acceleration, rotational core strength, and hip-dominant lower body strength — not just generic agility drills. This free PDF is structured specifically for high school and college players with three 25-minute sessions per week over four weeks.

How does the spinal engine improve baseball speed?

The spinal engine improves baseball speed by engaging the spine as an active force generator in the running stride rather than a passive torso. When the spine coils and uncoils correctly during each stride — through lateral flexion and thoracic rotation — it amplifies ground reaction force and increases stride length without requiring additional muscular effort. Most players who learn spinal engine mechanics improve their 60-yard dash time by 0.2–0.4 seconds without any change in strength or conditioning volume, simply from running with a more efficient pattern.

What is Head Over Foot and how do you teach it to baseball players?

Head Over Foot (HOF) is a WeckMethod speed principle that positions the athlete’s head directly over the striking foot at ground contact, creating optimal force transfer up the kinetic chain. To teach it to baseball players, start with the Wall Acceleration Drill: player leans into a wall at 45 degrees, holds a straight line from ankle to ear, and drives the knees up alternately. This reinforces the HOF position before adding full-speed sprinting. Once the player can feel the difference between HOF and the broken position at the wall, they transfer it to short acceleration runs of 10–20 yards.

Can this baseball speed training PDF be used in-season?

Yes — the program is designed to run alongside practice without competing with throwing or hitting volume. Sessions are 20–25 minutes and use no barbell movements that create excessive soreness or recovery demand. Week 4 specifically transitions into an in-season maintenance format: one session per week that preserves the speed mechanics and strength gains made in Weeks 1–3 through a full spring or fall season.

What equipment does this baseball conditioning program require?

Weeks 1 and 2 require a resistance band only. Week 3 adds a medicine ball (6–10 lbs). Week 4 requires no equipment — the pre-game activation circuit is designed to be done in a dugout, parking lot, or anywhere on the field. The strength progressions can be done with dumbbells, a trap bar, or kettlebells; no barbell or rack is required.

How is this different from other baseball speed training programs?

Most baseball speed programs teach athletes to run faster by running more. This program teaches athletes to run faster by running differently — using the spinal engine mechanics David Weck has developed and validated at WeckMethod.com. The drills in Weeks 1–2 specifically address the mechanical patterns most athletes are missing, before speed and strength volume is layered on in Weeks 3–4. Players who have plateaued on 60-yard dash time despite consistent training typically see the largest improvements from this approach.

Does this baseball conditioning program work for pitchers?

Yes. Pitchers benefit from the spinal engine and HOF training because the same thoracic counter-rotation that drives sprint speed is the rotational pattern that generates velocity in the delivery. The strength component — hip-dominant lower body work and rotational core stability — directly supports drive-phase power and deceleration load management. This baseball conditioning program PDF includes pitcher-friendly progressions, and the arm care pairing (J-Band work) is recommended for pitchers alongside this conditioning program for a complete training system.

Free Download

Get the Free Baseball Conditioning Program PDF

Enter your email and get the full 4-week speed + strength program instantly.

Get the Free Baseball Conditioning PDF →

References: Gracovetsky S. The Spinal Engine. Springer-Verlag, 1988.  |  WeckMethod.com — Speed and Movement Training Resources.  |  Cronin J, Hansen K. “Strength and power predictors of sports speed.” Journal of Strength and Conditioning Research. 2005;19(2):349-357.  |  Nimphius S, et al. “Change of direction deficit: a more isolated measure of change of direction performance than total 505 time.” Journal of Strength and Conditioning Research. 2016;30(11):3024-3032.


20k+
Programs Downloaded
20+
Years Coaching
D1
College Athlete

Baseball Mobility Program PDF: Free 4-Week Hip and T-Spine Plan That Unlocks Rotational Power

By Joey Myers | HittingPerformanceLab.com | Former D1 Baseball, Fresno State

This free baseball mobility program PDF gives you a structured 4-week plan — three sessions per week, 15–25 minutes each — targeting the hip, thoracic spine, and ankle restrictions that cap rotational power and cause arm injuries in baseball players at every level.

Most coaches spend months working on mechanics when the real limiter is range of motion. A hitter who can’t internally rotate the back hip can’t load the Catapult Loading System correctly. A pitcher who can’t extend through the thoracic spine is compensating at the elbow. The baseball mobility program PDF solves those problems upstream — before the mechanical coaching even starts.

The PDF includes the full 4-week program, video cue descriptions, and a pre-game activation routine you can do in under 8 minutes. Download the free baseball mobility program PDF here if you want to skip straight to the program.

What is a baseball mobility program — and why does it directly affect bat speed and arm health?

A baseball mobility program is a structured sequence of joint-specific range-of-motion drills designed to remove the physical restrictions that prevent proper mechanical execution in both hitting and pitching. It is not a warmup. It is not static stretching. It is targeted work on the three joints that most commonly limit baseball performance: the hip, the thoracic spine (T-spine), and the ankle.

According to the Zepp data from 200+ controlled swings published on HPL, hip rotation speed is the primary driver of bat speed at impact. A hitter who can’t achieve full hip internal rotation during the load phase physically cannot generate the ground-force reaction that drives the Catapult Loading System. The mobility restriction becomes a power ceiling no amount of strength training can overcome.

For pitchers, the stakes are injury. Glenohumeral internal rotation deficit (GIRD) — the loss of internal rotation range on the throwing arm — is directly correlated with UCL stress and labral injuries. A baseball mobility program addresses GIRD proactively, before the elbow starts compensating. That’s the difference between a 4-week mobility plan and a 12-month Tommy John recovery.

What are the best baseball hip mobility exercises for hitters?

The best baseball hip mobility exercises for hitters target internal rotation of the back hip and external rotation of the front hip — the specific ranges the CLS load sequence requires. These five drills form the hitter block in the baseball mobility program PDF.

Exercise Target Sets x Reps
90/90 Hip Switch Back hip IR + Front hip ER 3 x 5/side
Hip CARs (Controlled Articular Rotations) Full hip joint range — active 2 x 5/side
Spiderman Lunge + T-Spine Rotation Hip flexor, adductor, T-spine 2 x 6/side
Lateral Band Walks Hip abductors + gluteus medius 3 x 15 yards
Hip Airplane Hip IR/ER, single-leg stability 3 x 8/side

The 90/90 Hip Switch is the cornerstone of the baseball mobility program PDF hitter block because it trains internal and external rotation simultaneously in the position closest to the hitting load phase. Two minutes of this drill before batting practice consistently produces measurable improvements in back hip load depth by Week 3 of the program.

The Hip Airplane is the most underused baseball hip mobility exercise on this list. Research on back hip rotation and power output consistently shows that single-leg hip stability — not just raw range of motion — determines how much of the mobility actually transfers to the swing. The Airplane builds both simultaneously.

What hip mobility exercises work best for pitchers — and how do they prevent elbow injuries?

Pitcher-specific baseball hip mobility exercises focus on posterior hip and hip flexor range — the two restrictions most directly linked to arm stress during the delivery. When the lead hip can’t clear through drive phase, the trunk stalls, the throwing arm over-rotates, and deceleration force concentrates at the UCL instead of the larger hip and trunk musculature. These three drills address that pattern.

Posterior Hip Stretch (Figure-4): Lie on your back, cross the throwing-arm-side ankle over the opposite knee, flex the bottom knee to 90°, and hold for 45 seconds. This targets posterior hip capsule tightness — the most common mobility restriction in pitchers over 14. Three sets per side before any throwing session. The baseball mobility program PDF includes a modified standing version for pre-game use when a floor isn’t available.

Hip Flexor Stretch with T-Spine Rotation: From a half-kneeling position, back knee down, front knee at 90°, drive the hips forward until you feel tension in the front of the back hip. Then rotate the same-side arm overhead — this opens the T-spine simultaneously. How to stretch hip flexors correctly — including the baseball-specific version of this stretch — is covered in detail in the HPL library. Hold 30 seconds, 3 sets per side.

Sleeper Stretch (GIRD Correction): Lie on the throwing-arm side with the shoulder at 90° of abduction. Use the opposite hand to press the throwing-hand wrist toward the floor. Hold 30 seconds, release, 3 sets. This addresses GIRD directly. According to the J-Band arm care research, correcting GIRD proactively is more effective than post-injury rehab for preventing UCL stress in adolescent pitchers.

What does thoracic spine mobility have to do with baseball power — and what does the program include for it?

The thoracic spine is responsible for the counter-rotation that stores elastic energy in the torso during the load phase of the swing. A restricted T-spine limits how much counter-rotation a hitter can achieve before the foot lands — which directly caps the spring-uncoiling effect that produces exit velocity. Counter-rotation at stride landing is where elastic power is stored; T-spine mobility determines how much can be stored.

The T-spine block in the baseball mobility program PDF includes three drills run as a circuit:

Quadruped T-Spine Rotation (10 reps/side, 3 sets): On hands and knees, place one hand behind the ear, rotate the elbow toward the sky as far as possible. The key coaching cue: “show the numbers on your jersey to the wall.” This is the foundational T-spine drill in the baseball mobility program PDF because it isolates thoracic rotation without lumbar compensation.

Open Book Stretch (10 reps/side, 3 sets): Lie on your side, knees stacked at 90°, arms extended forward. Slowly rotate the top arm to the opposite side, following with the eyes. This produces the greatest passive T-spine rotation range and is especially effective for pitchers who develop asymmetrical rotation from years of one-sided throwing.

Foam Roller T-Spine Extension (30 sec per segment, 3 segments): Place the roller perpendicular to the spine at the mid-back. Let the upper back extend over the roller for 30 seconds, then move the roller one segment up the spine and repeat. Works three T-spine segments per session. See the full HPL mobility exercise library for video cue descriptions of all three drills.

How do you structure a 4-week baseball mobility program that actually transfers to the field?

The baseball mobility program PDF uses a three-day-per-week structure — not because three days is optimal for general mobility, but because it fits inside a realistic in-season or pre-season baseball schedule without competing for recovery resources. Each session is 15–25 minutes. The four-week progression builds from passive range of motion into active stability and game-transfer patterns.

Week Phase Focus Session Length
Week 1 Assess & Open Passive range — hip, T-spine, ankle baseline 15 min
Week 2 Load & Control Active range — CARs, Hip Airplane, single-leg work 20 min
Week 3 Integrate Loaded patterns — band walks, med ball rotation prep 22 min
Week 4 Activate Pre-game routine — 8-min version of the full program 25 min (full) / 8 min (pre-game)

The Week 4 pre-game activation routine is the part most athletes use permanently after completing the full baseball mobility program PDF. It hits the three highest-leverage mobility patterns — back hip IR, T-spine rotation, and shoulder posterior capsule — in under 8 minutes, making it practical for a dugout or bullpen before a game starts. The complete pre-game sequence is included on a separate page of the printable PDF.

Free Download

Get the Baseball Mobility Program PDF

Full 4-week program, pre-game 8-minute activation routine, and exercise cue card — one printable PDF for the field.

Download Free Baseball Mobility PDF →

Free. Instant PDF. No spam — unsubscribe anytime.

What does the free baseball mobility program PDF include?

The baseball mobility program PDF is a printable, field-ready document — formatted to fit one or two printed pages so it can go in a bat bag or be posted in a weight room. It includes:

The 4-week program template — all three sessions per week, organized by phase, with sets, reps, and hold times for every drill. Week 1 through Week 4 on a single table.

Exercise cue descriptions — plain-language coaching cues for every drill in the baseball mobility program PDF, including common errors and what to watch for in a player who’s compensating.

The 8-minute pre-game activation sequence — a condensed version of the full program designed to be completed before warmup throws. Includes pitcher-specific and hitter-specific variations on a single page.

A baseline assessment checklist — three quick self-tests that tell you which mobility restriction is your primary limiter before you start the baseball mobility program PDF. Takes under 3 minutes and saves weeks of working on the wrong restriction.

The in-season maintenance schedule — a one-day-per-week protocol for keeping mobility gains through a full spring or fall season without adding to the training load. The baseball mobility program PDF is built for long-term use, not just a one-time fix.

Frequently Asked Questions: Baseball Mobility Program PDF

How often should baseball players do mobility work?

Three sessions per week is the minimum effective dose during the off-season, and one to two sessions per week is sufficient to maintain gains in-season. The baseball mobility program PDF is built around a three-day-per-week structure that fits within a standard training or practice schedule without competing for recovery. Pre-game activation (8 minutes) can be done on game days without affecting performance — in fact, it consistently improves it by priming hip rotation speed before the first at-bat.

Can youth baseball players (under 14) use this mobility program?

Yes — every drill in the baseball mobility program PDF is appropriate for athletes 10 and older. Youth players benefit most from the hip CARs and T-spine rotation work because these movement patterns imprint most effectively during the developmental window before 14. The only modification for younger athletes: reduce hold times on passive stretches to 20–30 seconds and focus on body awareness over depth of range.

What’s the difference between baseball mobility work and a standard warmup?

A standard baseball warmup raises core temperature and prepares the nervous system for activity. A baseball mobility program targets specific joint restrictions — the places where range of motion is limited and that limitation is measurably reducing power output or increasing injury risk. Warmup is daily; mobility work is progressive. A baseball mobility program PDF used consistently over 4 weeks produces structural range-of-motion improvements a warmup alone never achieves.

How long does it take to see improvement in hip mobility for baseball?

Most athletes notice improved hip rotation during batting practice within the first two weeks of consistent work. Measurable range-of-motion gains — verified with a goniometer or baseline self-test — typically appear by Week 3. The baseball mobility program PDF includes a retest protocol at the end of Week 4 so you can quantify the improvement. Full structural adaptation takes 8–12 weeks of consistent practice; the 4-week program is Phase 1 of that process.

Does the baseball mobility program PDF include exercises for pitchers specifically?

Yes. The baseball mobility program PDF includes a dedicated pitcher track with the Posterior Hip Stretch (Figure-4), Hip Flexor Stretch with T-Spine Rotation, Sleeper Stretch (GIRD correction), and a throwing-arm shoulder posterior capsule sequence. These are clearly marked in the PDF as the pitcher protocol. Position players can use the hitter track only; pitchers should run both tracks for comprehensive arm health and delivery efficiency.

Is this baseball mobility program PDF different from static stretching?

Significantly different. Static stretching before activity is contraindicated for power sports — it temporarily reduces fast-twitch fiber recruitment and can reduce bat speed by 3–5% if done immediately before hitting. The baseball mobility program PDF uses controlled articular rotations (CARs), dynamic loaded stretches, and active stability work — none of which suppress power output. Static stretching is reserved for post-practice recovery sessions only, and those protocols are included in the PDF’s Week 4 recovery section.

What equipment does the baseball mobility program PDF require?

Most drills in the baseball mobility program PDF require no equipment — just floor space. Weeks 2 and 3 add a light resistance band (Jaeger bands or a standard therapy band work) and a foam roller for the T-spine extension circuit. Weeks 3–4 optionally add a light medicine ball for the rotational integration patterns. Total equipment cost: under $30 if you don’t own any of these yet. Every exercise has a no-equipment substitution listed in the PDF for players without access.

Download the Baseball Mobility Program PDF — Free

4-week program + 8-minute pre-game activation + pitcher track — all in one printable PDF.

Get the Free Baseball Mobility PDF →

Free. Instant PDF. No spam — unsubscribe anytime.

References

Myers J. Swing Smarter. 2021 — Chapter 7: Mobility as the Missing Variable in Power Development.

Wilk KE, et al. Glenohumeral internal rotation deficit: Pathologic or adaptive? J Orthop Sports Phys Ther. 2015;45(3):136–48.

Dillman CJ, Fleisig GS, Andrews JR. Biomechanics of pitching with emphasis upon shoulder kinematics. J Orthop Sports Phys Ther. 1993;18(2):402–8.


Most High School Softball Players Lose Their Off-season Strength Gains By Mid-April — Not Because Of Slumps, But Because Nobody Gave Them An In-Season Plan

By Joey Myers — D1 Baseball, Fresno State  |  Author, Catapult Loading System  |  NASM-CES · IYCA Youth Fitness Specialist  |  20+ years of coaching

Your daughter worked all winter. She lifted twice a week, built her hip strength, improved her rotational power, and came into the season hitting the ball harder than she ever had. Then the season started. Practice every day, games two or three times a week, school in between. The weight room fell off. By April, something was different — less pop, slower swing, arm that felt heavier late in games. That’s the gap this high school softball in-season strength training plan is designed to close.

This is the detraining pattern that plays out for the majority of high school softball players every spring. It’s not a mechanical problem. It’s not a confidence problem. It’s a training structure problem — and it has a straightforward solution. A structured high school softball in-season strength training program is that solution.

Two strength sessions per week, 30 minutes each, structured around the game schedule — that’s the difference between players who finish the season hitting the same as they started it and those who quietly fade. Here’s what that program looks like, why it works, and how to fit it into a week that’s already full. (Download the free PDF here if you’d rather skip straight to the program.)

What is in-season strength training for high school softball players?

In-season strength training for high school softball is a reduced-volume resistance program — typically two sessions per week — designed to preserve the power and arm health built during the off-season without accumulating the fatigue that degrades game performance. It is not an off-season program run during the season. It is a maintenance program. That distinction is the core philosophy of high school softball in-season strength training.

The structure is fundamentally different from off-season training in three ways. Volume is lower — about 30% fewer sets per session. Intensity stays the same — the movements are still done with purpose, not as going through the motions. And the scheduling is organized around the game calendar, not around a linear progression. You’re not trying to get stronger during the season. You’re trying to stay as strong as you were when it started. That’s the goal of high school softball in-season strength training done right.

If your daughter completed the 12-week HS softball off-season lifting program before the season, in-season S&C is what protects that investment. Without it, research on detraining consistently shows that strength and power gains begin declining within two to three weeks of stopping resistance training. That’s the science behind the minimum effective dose in high school softball in-season strength training.

Why do high school softball players fall apart physically mid-season — and why isn’t it about mechanics?

The decline usually starts quietly. A coach notices the barrel isn’t getting through the zone as cleanly. Fly balls that were clearing the outfield in February are dying at the warning track by May. The player feels it too — something’s different — but can’t explain it. Coaches often default to a mechanics check. Parents wonder if it’s a mental thing. Both are usually wrong.

What’s actually happening is detraining. Fast-twitch muscle fibers — the ones responsible for bat speed and explosive first steps — are the first to decline when resistance training stops. They’re also the last to come back. A hitter can look mechanically identical in April compared to February and still have meaningfully less bat speed, because the neuromuscular system that fires those fast-twitch fibers has gone quiet from lack of training stimulus.

The good news is that preventing it requires far less than building it did. Two sessions per week — one lower body and core, one upper body and rotational — is enough. The fastpitch softball hitting mechanics stay intact when the physical capacity to execute them is maintained. That’s the case for high school softball in-season strength training: physical capacity drives mechanics, not the other way around.

The players who finish the season performing at or above their opening-day level are almost always the ones who kept the training consistent, even at low volume. The players who fade are typically the ones who stopped entirely when the schedule got busy — which is understandable, but costly.

How many days per week should high school softball players lift during the season?

Two days per week is the evidence-based target for in-season strength maintenance in high school athletes. Research on maintenance training consistently shows that two sessions per week with reduced volume but maintained intensity is sufficient to preserve off-season gains for the duration of a 12–16 week season. That research is the foundation of every high school softball in-season strength training template in this post.

One session per week produces some maintenance but is not optimal — especially as the season lengthens past 8 weeks. Three or more sessions per week risks accumulating residual fatigue that compromises game-day performance, which defeats the purpose entirely. Two is the number. It’s also realistic in a schedule that includes daily practice, 2–3 games per week, and school. That’s what separates a sustainable high school softball in-season strength training plan from one that collapses by mid-April.

The same 2-day-per-week framework applies to the HS baseball in-season workout program — the principle is consistent across sports at the high school level. Two sessions, 30 minutes each, organized around the game schedule. That structure is what makes high school softball in-season strength training realistic through a full spring season.

Get the full program built on 5 proven training frameworks — free PDF

The updated PDF integrates Poliquin maintenance periodization (2 sets, Eccentric–Pause–Concentric tempo), Weck rotational pattern warm-up drills, Starrett pre-session tissue quality protocols, Chek primal movement standards, and the complete VeloRESET arm readiness system — J-Band protocol, daily 0–10 soreness check, and season-long throw count tracker. Session A (lower/core) + Session B (upper/rotational) + weekly schedule templates. Fastpitch softball. Free, instant download.

Get the Free S&C Program →

Why is arm care the most overlooked part of HS softball in-season training?

Arm care gets less attention than it deserves at the high school softball level, largely because softball throwing is perceived as lower-risk than baseball throwing. That perception is wrong. High school softball seasons involve substantial cumulative throwing volume — practice warm-ups, infield/outfield routines, game repetitions, and bullpen work for pitchers — and the rotator cuff and posterior shoulder capsule absorb deceleration forces on every throw.

The most protective habit a high school softball player can build is the J-Band arm care protocol performed before every throwing session. J-Bands, developed by Jaeger Sports, are used at every level from high school through the professional ranks specifically because the resistance band exercises address the rotator cuff and posterior capsule patterns that accumulate stress over a full season. It takes 5 minutes. It is done before the arm is warm — not as a cool-down. The sequence runs: arm circles, internal rotation, external rotation, horizontal abduction, and trunk rotation with band resistance. Two sets of 10 reps for each exercise, no rest between them.

The critical rule: do the J-Band sequence on heavy throwing days specifically. Coaches and parents often think of arm care as something for “extra” training days when there’s more time. The reality is the opposite — the days with the most throwing are exactly the days it matters most and is most often skipped.

Pitchers and catchers should add 2×10 pronation/supination with a light dumbbell (2–3 lb) after the J-Band sequence on any day with extended pitching or catching volume. This addresses the medial elbow stress that accumulates specifically in those positions over a full high school season.

What exercises should be in a high school softball in-season S&C program?

The in-season program splits into two sessions: Day A targets the lower body and core (the power source for bat speed and base running), and Day B targets the upper body and rotational system (the driver of exit velocity and throwing arm health). Both sessions are 30–35 minutes with a 5-minute dynamic warm-up included.

Day A — Lower Body & Core runs 7 exercises at moderate load (70–80% of off-season working weight): goblet squat, single-leg RDL, dumbbell hip thrust, lateral band walk, reverse lunge, dead bug, and Copenhagen plank. The reverse lunge is preferred over the forward lunge in-season because it’s easier on the knee under game wear. The Copenhagen plank — side plank with the top leg elevated — targets the adductors, which are a common weak point for softball players under high game volume and are among the first things to decline without direct training.

Day B — Upper Body & Rotational runs 7 exercises: med ball rotational toss, single-arm dumbbell row, half-kneeling dumbbell press, face pull, Y-T-W raises, Pallof press, and bat overspeed swings. The bat overspeed drill — 3 sets of 8 swings with the lightest bat available at maximum intent — is a nervous system drill. It keeps the fast-twitch pathway active that drives bat speed throughout the season. It’s different from swinging a heavy bat, which is a load-based approach and is better suited for off-season training.

Equipment requirements are minimal: dumbbells in the 15–30 lb range, loop bands, resistance bands, a 6–8 lb medicine ball, and J-Bands. No barbell or trap bar required. The program is designed to run in a basic school weight room or at home — the goal is zero setup time so the session starts immediately.

What should high school softball players skip during the season — and why?

In-season is not the time for maximum effort lower body days, new movement patterns, or any training that creates significant delayed onset muscle soreness (DOMS). The list of what to avoid during the season is just as important as the list of what to do.

Skip: Heavy barbell squats and deadlifts. These are excellent off-season exercises that produce significant DOMS — which is fine when there’s 72 hours before the next game. In-season, that same DOMS shows up in Thursday’s game after a Tuesday lift. Dumbbell and bodyweight alternatives are used in the in-season program specifically to reduce this risk while maintaining the movement pattern.

Skip: Heavy overhead pressing. High school softball involves substantial shoulder accumulation. Adding heavy strict overhead press to a week that already includes 150+ throws is a recipe for rotator cuff inflammation by mid-season. The half-kneeling dumbbell press used in Day B presses at a natural angle, not straight overhead, which keeps the rotator cuff in a healthier position under load.

Skip: Sprint conditioning and high-volume plyometrics. These are CNS-intensive and slow recovery. The game itself — base running, outfield reads, stolen base situations — provides plenty of explosive movement training during the season. Adding sprint intervals or box jump series on top of that schedule is too much for most high school athletes to recover from adequately.

The rule that covers all of this: if an exercise would make your daughter noticeably sore 24–48 hours later, don’t do it in-season unless there’s enough calendar space to recover before the next game. Game performance is the priority. Training supports it — it doesn’t compete with it. This is the same guiding principle behind the college softball S&C program and applies equally at the high school level. It’s the same thinking behind every high school softball in-season strength training decision in this program.

How do you fit in-season softball S&C into a full game and practice schedule?

The scheduling rule for Day A (lower/core): perform it on a practice day, after practice, not before a game day. The legs need 24–36 hours to clear the training stimulus before a game. The most reliable slot is mid-week after a light practice — Wednesday for most teams with Tuesday/Thursday games.

The scheduling rule for Day B (upper/rotational): perform it on an off-day or two days after the most recent game. It can be done the morning before an evening game if the session stays at moderate intensity — no maximum-effort pressing on a game day, but the rotational work and arm care exercises are fine. Saturday morning is the most common slot for teams with a Friday game.

On heavy game weeks — three games in five days — the lift that gets skipped is Day A (lower/core). The legs are taking game wear from running the bases, fielding, and the physical demands of three games. In those weeks, Day B (upper/rotational) and the J-Band arm care are prioritized, and the lower body gets its recovery from the games themselves.

Sleep and hydration are built into this framework as training variables — not just “general wellness” advice. Eight to nine hours of sleep is when the body adapts to the training stimulus and repairs the tissue stressed by games. Three to four liters of water daily keeps muscular contraction efficient. These two things, done consistently, amplify the effect of every 30-minute session in the weight room. The mental and physical preparation around game performance works the same way — small habits, done consistently, compound across a full season. That’s the payoff of consistent high school softball in-season strength training.

Frequently Asked Questions: High School Softball In-Season Strength Training

How many days per week should a high school softball player lift during the season?

Two days per week is sufficient to maintain off-season strength gains throughout a high school softball season. Two sessions per week maintains power levels; more than two risks accumulating fatigue that shows up in games. Sessions should be 30–35 minutes at moderate intensity — lower volume than off-season training, same quality of movement. That intensity-first design is what makes high school softball in-season strength training effective in 30 minutes.

Will lifting during the season make my daughter sore before games?

Not if the program is structured correctly. The key rules: never lift lower body the day before a game, never do a heavy upper-body session the morning of a game, and reduce off-season volume by 30%. A well-designed 2-day in-season program produces minimal soreness because sessions are built around game schedules, not around maximizing volume. That scheduling principle is what makes high school softball in-season strength training sustainable through a full spring season.

What’s the most important part of in-season training for high school softball players?

Arm care — specifically the J-Band arm care sequence performed before every throwing session. Five minutes of J-Band work before throwing is the single highest-return investment in a high school softball player’s in-season training. The rotator cuff and posterior shoulder capsule absorb deceleration stress on every throw and are the most common failure points in a full season. That’s why arm care is non-negotiable in any high school softball in-season strength training program.

Should high school softball players do arm care exercises every day during the season?

Yes — on every day that involves throwing. That includes practice days, game days, bullpen sessions, and catch days. The J-Band sequence is performed before throwing begins, when the shoulder is cold. Skipping it on heavy throwing days is the most common arm care mistake at the high school level, and those are exactly the days it matters most. This is the most important habit in high school softball in-season strength training: do the arm care on game days.

Can in-season strength training help my daughter hit with more power during the softball season?

Yes, indirectly. In-season S&C preserves the power built in the off-season. Without it, exit velocity and bat speed typically decline significantly by mid-season as fast-twitch muscle fiber capacity decreases from lack of training stimulus. The rotational med ball work and bat overspeed swings in the in-season program specifically target the nervous system pathway that drives bat speed, keeping it sharp for game performance. Bat speed maintenance is one of the key outcomes of high school softball in-season strength training done properly.

What happens if a high school softball player stops lifting during the season?

Research on detraining shows that strength and power gains begin declining within 2–3 weeks of stopping resistance training. For a 12–16 week high school softball season, stopping entirely means the off-season work disappears by mid-season. The player may look mechanically unchanged but will have meaningfully less bat speed, slower throwing velocity, and reduced first-step explosion — all of which show up gradually as the season progresses.

Free Download

Get the HS Softball In-Season S&C Program — Updated 2026

The updated PDF — now built on 5 training frameworks: Weck rotational mechanics, Poliquin maintenance periodization, Starrett tissue quality protocols, Chek primal patterns, and VeloRESET arm readiness. Session A (lower/core) + Session B (upper/rotational), with Poliquin tempo on every exercise, pre-session tissue quality protocols, J-Band arm care, daily soreness check, weekly schedule templates for 2-game and 3-game weeks, and a 15-week season tracker. Free. Instant.

39k+
Email Subscribers
20k+
Programs Downloaded
20+
Years Coaching
D1
College Athlete Background

College Softball Strength & Conditioning Program: The Complete 12-Week Off-Season Guide

By Joey Myers — D1 Baseball, Fresno State | Author, Catapult Loading System | NASM-CES · IYCA Youth Fitness Specialist | 20+ years of coaching

A college softball strength and conditioning program has to do three things simultaneously that most general strength programs only do one of. It must build rotational power for bat speed and throwing velocity, develop the linear speed needed to take advantage of 60-foot bases, and protect a throwing arm that accumulates serious volume over a 60+ game season.

Specifically, this guide walks through the evidence-based approach HPL uses with college-level softball players. It covers the full 12-week program structure, the arm care protocol that belongs in every session, and how to peak physical performance so you’re at your best when conference play starts — not burned out from a poorly designed off-season.

Want the full 12-week program as a printable PDF?

Download the free College Softball Off-Season S&C Program — 7-page printable PDF with every workout, warm-up, arm care sequence, and progress tracking sheet.

Or click here to go to the download page →

Why Is Softball-Specific S&C Different from General Strength Training?

Most off-the-shelf strength programs — even ones marketed to female athletes — are built around symmetrical bilateral movement patterns: barbell squats, bench press, conventional deadlifts. These are excellent exercises, but they don’t address the specific demands that make softball athleticism unique.

Softball is a rotational sport played at short distances with explosive bursts. That’s what makes a dedicated college softball strength and conditioning program different from generic strength training. The swing is a rotational power event. The throw is a rotational power event. The pitching delivery is a rotational power event. None of these movements are trained effectively by sitting on a machine and pressing in a straight line.

As a result, a well-designed college softball strength and conditioning program addresses four specific demands that general programs overlook:

  • Hip-to-Shoulder Sequencing — The rotational power of the swing and throw comes from loading the hips and transferring force through the core to the shoulder. Training this sequence with med ball work and rotational plyometrics directly improves bat speed and throwing velocity.
  • Posterior Chain Dominance — Softball power comes from the posterior chain: glutes, hamstrings, and thoracic extensors. Trap bar deadlifts, single-leg RDLs, and barbell hip thrusts are more position-specific than the traditional back squat.
  • Throwing Arm Durability — College softballers throw more than most people realize. A daily J-band protocol that builds rotator cuff strength and posterior capsule integrity is the difference between a healthy arm at the conference tournament and one that’s been managing pain since February.
  • Short-Distance Explosive Speed — The bases are 60 feet apart. Top-end velocity matters less than first-step reaction time and acceleration mechanics. Sprint training needs to emphasize the 0-to-20 yard window, not 40-yard dash performance.

How Should a College Softball Off-Season Program Be Structured?

Specifically, the ideal college softball strength and conditioning program runs 12 weeks, 4 days per week, organized into three progressive phases. Four days is the sweet spot for college players: enough frequency to drive real adaptation without accumulating the recovery debt that leads to in-season breakdown.

Phase 1 (Weeks 1–4): Foundation. The goal is movement quality, not maximum load. Establish the hip hinge pattern with Romanian deadlifts, introduce anti-rotation core work via the Pallof press, and begin the arm care protocol that will run every session. Athletes who rush Phase 1 get hurt in Phase 2. As a result, the temptation to jump ahead is real — and it’s the fastest path to a February shoulder problem.

Phase 2 (Weeks 5–8): Power Development. Load goes up 5–10% across all compound lifts. The trap bar deadlift replaces the RDL as the primary strength exercise. Med ball rotational complexes increase in weight and intent. This is the phase where bat speed and throwing velocity gains happen.

Phase 3 (Weeks 9–12): Peaking. Volume drops 20–25% and intensity peaks. Every explosive rep — jump squats, med ball slams, flying 30 sprints — is performed at absolute maximum intent. By Week 12, the athlete transitions to a 2-day maintenance version that carries power gains through the competitive season.

Additionally, within each phase, the four day types are: Day A (Lower/Posterior Chain), Day B (Upper/Throwing Support), Day C (Rotational Power), and Day D (Speed & Agility). Ideal weekly schedule: Monday A · Tuesday B · Thursday C · Friday D.

What Exercises Should Every College Softball Player Do for Rotational Power?

First, rotational power training for softball is not the same thing as throwing weighted balls or swinging a heavy bat. Those activities have their place, but the foundational work in any college softball strength and conditioning program happens in the weight room with exercises that teach the body to sequence hip-to-shoulder force before applying it in sport-specific contexts.

The most effective rotational power exercises for college softball players:

  • Med Ball Hip-Load Scoop Toss (wall-facing) — The player stands facing a wall, loads into the hip of the back leg, and drives through the hip to launch the ball into the wall. The key teaching point is that the hip loads before the shoulder moves. This mirrors the swing sequence exactly.
  • Med Ball Rotational Slam (side-facing) — Stand perpendicular to a wall or open space, load into the back hip, and slam the ball as hard as possible. Full hip-to-shoulder sequence at game speed. Use an 8–10 lb ball at maximum intent — if you’re not trying to break the floor, you’re not training power.
  • Pallof Press (anti-rotation) — Before you can express rotational power, you need to control rotational force. The Pallof press teaches the core to resist rotation while the arms move — the foundational skill that makes every other rotational exercise safer and more effective.
  • Barbell Hip Thrust — Not traditionally classified as rotational, but the hip thrust builds the glute strength that drives the initial hip rotation in both the swing and the throw. It’s the most important lower body exercise in a softball-specific S&C program.
  • Jump Squat (30% of 1RM) — Power is force times velocity. The jump squat at submaximal load trains the athlete to move a moderate weight as fast as possible — the definition of power. Results show up in first-step reaction time and exit velocity.

What Is the Most Important Arm Care Protocol for College Softball Players?

Arm care at the college level is not something you do when your shoulder starts hurting. By the time you have pain, you’ve already lost weeks of the off-season to recovery. The most important arm care protocol for college softball is one you do every single day. Run it before throwing and after every upper body lift session, starting in Week 1 of the off-season. Within this college softball strength and conditioning program, arm care is built into every training day — not added as an afterthought.

For example, the J-band protocol is the gold standard for overhead athletes at the college level. Coaches at Vanderbilt, LSU, Auburn, UCLA, and dozens of other programs have made it mandatory for their pitching staffs. The research basis for this college softball strength and conditioning program is straightforward: the exercises specifically target the posterior rotator cuff and posterior capsule, which are the structures most commonly damaged in overhead athletes who throw at high volume.

Specifically, the five most critical exercises in the college softball arm care sequence:

  • External Rotation (elbow at 90°) — Band anchored at elbow height, forearm rotates away from the body. 2 sets of 10. The most protective exercise in the protocol — directly strengthens the infraspinatus and teres minor, which decelerate the arm after every throw.
  • Internal Rotation (elbow at 90°) — Same setup, forearm rotates toward the body. Balances the external rotation work to prevent the muscle imbalances that cause impingement.
  • Horizontal Abduction — Arms out to the side, pulling back against the band. 2 sets of 10. Strengthens the posterior capsule — the structure most commonly involved in “dead arm” among college pitchers and position players.
  • Standing Trunk Rotation (with band) — Band anchored at shoulder height, athlete rotates through the core. 2 sets of 10 each side. Bridges arm care to rotational power — teaches the athlete that arm health and swing power come from the same physical system.
  • Y-T-W Raises (prone, light dumbbells) — Performed on an incline bench or prone on the floor. These are scapular stabilizer exercises, not strength exercises. 2–3 lb dumbbells, 10 reps of each. The scapula is the foundation that every rotator cuff exercise relies on.

Additionally, college pitchers and catchers should add 2 sets of 10 pronation/supination with a 2–3 lb dumbbell after the J-band sequence on upper body days. The wrist rotation involved in pitching delivery and catching generates forearm fatigue that accumulates over the course of a season.

“I absolutely love my J-Bands! I am a college softball player and have been using them for years as a staple in my throwing routine. They have strengthened my arm and given me confidence in a solid warm-up. As a coach, I will always advocate for my athletes to use J-Bands each time they pick up a ball. I 100/10 recommend to all overhead athletes.”

— Gabi Nilles, College Softball Player & Coach  ·  via JaegerSports.com

How Do You Build First-Step Speed on the 60-Foot Base Paths?

Here’s the most common mistake in college softball speed training: running too many full-speed 40-yard dashes. At 60-foot bases, the distance between home and first is about 18 meters — the average college softball player covers that distance in about 3.0–3.3 seconds. At that distance, acceleration mechanics dominate. Top-end velocity barely matters.

First-step speed on the base paths comes from three things: reactive hip extension power, efficient acceleration mechanics, and the ability to decelerate and re-accelerate at the bases. Train all three:

  • Broad Jump → 10-yard Sprint — Combine horizontal power with sprint conversion. Broad jump, land, and immediately sprint 10 yards. This mimics the burst out of the batter’s box or the reaction step reading a pitch.
  • Resisted Sprint (band) — Partner holds a band from behind while the athlete sprints 15 yards against the resistance. Forces a forward lean and high knee drive that mirrors proper acceleration mechanics. Over-speed on release builds the neural pattern.
  • 5-10-5 Pro Agility Shuttle — The most directly applicable agility test for softball. Plant and cut on the outside foot, keep the center of gravity low through the turn. This is the core movement of rounding bases at full speed.
  • Reaction Drop Sprint — A partner drops an object from shoulder height. Athlete reacts on visual movement and sprints 10 yards. Trains the read-react first step that separates fast base runners from fast straight-line sprinters.
  • Barbell Hip Thrust (again) — Every speed coach worth listening to will tell you: the single best predictor of acceleration speed is hip extension strength. The hip thrust is non-negotiable for base path speed development.

How Do You Maintain Strength and Power During the Softball Season?

However, the biggest mistake college softball players make is doing too much in the weight room during the competitive season. Between practice, games, travel, and recovery, most college players have the capacity for exactly two quality lifting sessions per week. More than that becomes a cumulative fatigue problem that shows up as performance decline in the back half of the conference schedule.

Specifically, the in-season maintenance model from this program uses two days per week at 60% of off-season volume. The exercises stay the same — you don’t change the training menu during the season, you just reduce the portion size. One lower-dominant day (trap bar deadlift, hip thrust, lateral bounds) and one upper-dominant day (bench press or dumbbell press, pull-ups, arm care sequence).

Key in-season rules:

  • Never lift the day before a game. CNS fatigue from a heavy lower body session takes 24–48 hours to fully recover. Schedule lifting on non-game days or immediately after a game, never before.
  • The arm care protocol does not get reduced. In-season is when throwing volume is highest. If anything, add an extra J-band session on game days before warm-up. The arm care protocol prevents the cumulative damage that becomes a chronic problem by April.
  • Track shoulder soreness weekly. A 0–10 scale checked every Monday morning is the most useful monitoring tool for in-season arm health. Soreness above 4 means reducing throwing volume before practice that day. Above 6 means a full evaluation before returning to full throwing.

College Softball Strength and Conditioning Program: Frequently Asked Questions

Can freshmen use this program, or is it only for upperclassmen?

This college softball strength and conditioning program is designed for college-level athletes — which means incoming freshmen who’ve completed a high school strength and conditioning program can use it. Athletes coming from a program without a structured S&C background should spend the first week in Phase 1 learning movement patterns before adding load. The program scales down for athletes who need it.

Do I need a college weight room, or can I do this at a commercial gym?

For example, a commercial gym with access to a barbell, dumbbells, a cable machine, a trap bar (or hex bar), and medicine balls covers everything in this program. J-bands cost approximately $30 and come with the exercise guide. The plyometric work and sprint drills need an open field or turf surface — a park or high school track works fine if your gym doesn’t have turf.

What if my college program has a team S&C coach? Should I still use this?

That said, if your program has a dedicated S&C coach, follow their college softball strength and conditioning program. This guide is designed for college softball players who don’t have access to a team-provided strength program — whether that’s a club team, a smaller program without S&C resources, or a player training individually during an off-season gap. It’s also useful as a framework for understanding what well-designed softball-specific training should include, regardless of who’s programming it.

How many weeks before the season should I start this program?

Start the college softball strength and conditioning program 12–14 weeks before your first game. That gives you enough time to complete all three phases and transition into the 2-day in-season maintenance model before the competitive calendar begins. Starting 8 weeks out means compressing Phase 1 or skipping it — both of which increase injury risk during Phase 2 loading.

Will this program improve bat speed, or is that separate training?

Yes — the rotational power work in this program directly develops the physical qualities that produce bat speed: hip-to-shoulder sequencing, rotational rate of force development, and posterior chain power. The primary tools are the med ball hip-load scoop toss, rotational slams, and jump squats. Bat speed is a physical quality before it’s a skill. Building the engine in the weight room makes everything you do with a bat more effective. That’s the foundation this college softball strength and conditioning program is built on.

How do you maintain softball-specific strength during the competitive season?

That means two days per week at 60% of off-season volume — the correct in-season maintenance dose from a college softball strength and conditioning program for most college players. One lower-dominant session and one upper-dominant session, never the day before a game. The J-band arm care protocol stays at full volume year-round — in-season is when you need it most. Track shoulder soreness on a 0–10 scale each Monday: above 4 means reduced throwing volume that day, above 6 means a full evaluation before returning to full throwing.

Should pitchers follow this program differently from position players?

Yes — this college softball strength and conditioning program accommodates pitchers with two specific adjustments. First, pitchers should extend the arm care J-band protocol to 20 minutes on upper body days from Week 1 — not just Phase 3. Second, any increase in pitching volume during Weeks 9–12 must be coordinated with the pitching coach; don’t ramp throwing intensity at the same time the weight room loading is peaking. Position players follow the program as written, with the standard arm care sequence added to every upper body session regardless of throwing volume.

Free Download

Get the 12-Week College Softball S&C Program PDF

7 printable pages. Every workout, warm-up, arm care protocol, and progress tracking sheet. Instant download — no spam.

Or click here to go to the download page →


Free 12-Week PDF Included

Youth Baseball Workout Program:
The 12-Week Training Plan for Ages 8–14

This free youth baseball workout program is built for ages 8–14. Build bat speed, first-step quickness, and arm strength without heavy barbells or gym equipment. This is how you develop a better athlete — not just a bigger kid.

39k+
Email Subscribers
20k+
Programs Downloaded
20+
Years Coaching
D1
College Athlete

Quick Answer

A youth baseball workout program for ages 8–14 should focus on bodyweight strength, speed and agility, rotational power, and arm care — not heavy lifting. The ideal structure is 3 days per week for 35–45 minutes per session, organized into 4-week phases. A 12-week program lets young athletes build movement foundations in Phase 1, add athletic complexity in Phase 2, and peak for in-season performance in Phase 3.

Most youth baseball “workout programs” are just adult programs scaled down. Fewer sets, lighter weights — same exercises, same logic. That’s the foundational mistake this youth baseball workout program is designed to correct.

That’s the problem.

Players ages 8–14 are in a developmental window that doesn’t look like adult strength training at all. The primary training goal at this age isn’t strength — it’s movement quality, coordination, speed, and the rotational patterns that will eventually produce elite bat speed and arm health.

If you train this window right, you create a player who’s already ahead at 16. If you train it wrong — early specialization, too much volume, heavy barbell work before the movement patterns are locked in — you cap their ceiling before high school. (Here’s the research on early specialization myths.) A well-structured youth baseball workout program addresses this by building general athletic capacity first.

I’ve coached hitters at every level. This 12-week program reflects what I’ve learned about how young baseball bodies actually adapt — and what produces real results on the field, not just in the weight room. That translation from training to performance is what makes this youth baseball workout program different from generic kid fitness programs.

Why Youth Baseball Training Is Different from Adult Training

Youth athletes ages 8–14 are in a sensitive period for motor learning. The nervous system is highly adaptable during these years — meaning movement patterns, coordination, and athletic fundamentals imprint more deeply now than at any other time in development. That’s the biological window a youth baseball workout program is designed to take advantage of.

This is a massive opportunity. A young player who spends these years developing how to move — hip hinge patterns, rotational loading, lateral speed, proprioception — will enter high school with a physical foundation that players who just did push-ups and ran laps simply don’t have. That foundation is what this youth baseball workout program builds across 12 weeks.

Three principles that drive this program:

  1. Movement quality over load. Perfect bodyweight reps train the nervous system better than sloppy weighted reps. If the form breaks down, reduce load — not tempo.
  2. Speed and coordination before strength. Speed is largely a skill. At ages 8–14, training fast-twitch recruitment produces more athletic carry-over than adding weight to a squat.
  3. Arm care is load management. Young arms are structurally vulnerable before growth plates close. Systematic arm care now prevents UCL damage at 17.

What Age Can a Kid Start a Baseball Workout Program?

Kids can start structured athletic training as early as age 6–7 — with the right programming. The confusion comes from equating “workout program” with “lifting weights.” Resistance training with external load should generally wait until puberty is established (typically 11–13 for boys), but bodyweight strength, speed work, agility, and coordination training can and should start early — and that’s exactly what this youth baseball workout program delivers across three 4-week phases.

Here’s a practical breakdown by age tier for this program:

Age Tier Guide

Ages 8–10 (Tier 1)

Use base (bodyweight) versions of all exercises. Focus entirely on form. Reduce reps by half if movement quality suffers. No external resistance until Phase 3 at the earliest, and only if form is dialed in. Sessions should feel fun, not grueling.

Ages 11–14 (Tier 2)

Can progress to light resistance band and medicine ball variations where indicated. Full rep ranges are appropriate. Focus begins shifting toward power output and sport-specific athleticism. Still no heavy barbell Olympic lifts.

What Should a Youth Baseball Workout Include?

A well-designed youth baseball workout has five components — and most programs miss at least two of them:

1. Warm-Up

Dynamic movement prep (5 min): high knees, arm circles, hip circles, leg swings, inchworm, lateral shuffle. Not static stretching — that belongs at the end.

2. Speed & Agility

Sprints, lateral shuffles, cone drills, reaction training. This should be done when the nervous system is fresh — before strength work, not after.

3. Strength Training

Bodyweight squats, lunges, push-ups, glute bridges, core work. Progress to resistance bands and light med balls in Phase 2–3. Focus on hip hinge and rotational patterns.

4. Rotational Power

Medicine ball rotational tosses, scoop throws, hip-to-shoulder sequencing drills. This directly transfers to bat speed when done correctly — loading the back hip before unloading through the core.

5. Arm Care (Every Session)

J-band or resistance band shoulder protocol: pull-aparts, external rotation, W-pattern, wrist flexion/extension. 5 minutes at the end of every session. Non-negotiable for long-term arm health.

How Do You Build Bat Speed in Young Players?

Bat speed at the youth level is almost entirely a movement pattern problem, not a strength problem. A 10-year-old doesn’t have slow bat speed because he’s weak — he has slow bat speed because he hasn’t learned how to load and unload his hips yet.

The Catapult Loading System I use with hitters at every level is built around a specific movement sequence: load the back hip → create thoracic separation → unload through the core into contact. That’s the chain that produces elite exit velocity. Building that chain is the core goal of every youth baseball workout program.

For youth athletes, the most effective bat speed training tools are:

  1. Rotational medicine ball tosses — teaches the hip-load pattern with immediate physical feedback. Start with 4 lbs (ages 8–10) or 6 lbs (ages 11–14).
  2. Pallof press variations — anti-rotation core work that builds the stability the swing rotates around. Don’t skip this — it’s less flashy but essential.
  3. Lateral bounds and speed work — first-step quickness directly transfers to load timing at the plate. Players who move well athletically tend to load well in the box.
  4. Hip hinge pattern training — the posterior chain (glutes, hamstrings) powers the hip load. Players who can’t hinge properly can’t load the swing properly.

Important: Overload bats and underload bats can be useful for older teens but are not recommended for ages 8–12. At this age, focus on the movement pattern itself. The bat speed numbers will follow naturally as the sequencing improves.

Arm Care: The Most Skipped Part of Youth Baseball Training

Tommy John surgery rates in players under 20 have increased 343% since 1995. Most of those surgeries were preventable. That’s why arm care is non-negotiable in any youth baseball workout program.

Young arms are structurally different from adult arms. Growth plates at the elbow and shoulder don’t close until the mid-to-late teens. Before they close, these plates are the weak link in the arm — not the UCL, not the rotator cuff. Overuse and improper mechanics during this window is exactly where the damage begins, even if it doesn’t show up as injury until 17 or 18.

The five-minute arm care protocol at the end of every session in this program is non-negotiable. It includes:

  • J-Band pull-aparts — posterior shoulder and scapular stability
  • External rotation — builds the deceleration muscle group most pitchers and throwers never train directly
  • W-pattern — scapular retraction and lower trap activation
  • Wrist flexion/extension and supination/pronation — forearm and wrist stability, often ignored until it’s too late

Five minutes. Every session. The players who do it consistently enter high school with healthier arms than teammates who didn’t — and the cumulative advantage compounds by the time they’re pitching varsity or playing college ball. This youth baseball workout program is designed to create that compounding advantage from age 8 onward.

The 12-Week Program Structure

The program runs three days per week (Monday / Wednesday / Friday, or any three non-consecutive days) for 35–45 minutes per session. It’s organized into three 4-week phases:

1

Weeks 1–4

Movement Foundation

Bodyweight only. Establish squat, hinge, push, pull, and rotational movement patterns. Every athlete who does Phase 2 poorly missed Phase 1. Plank, glute bridges, reverse lunges, bear crawls, and basic sprints dominate here.

2

Weeks 5–8

Athletic Development

Introduce resistance bands and medicine balls. Add complexity: split squats, lateral bounds, med ball rotational tosses, Pallof press, explosive push-ups. Speed work intensifies. This is where you start seeing real athletic transfer.

3

Weeks 9–12

Power & Speed Peak

Maximum intent on every rep. Lower reps, higher quality, longer rest. Flying sprints, box jumps (Tier 2), rotational power complex, and first-step reaction drills. This phase peaks an athlete for in-season play.

Phase 1: Movement Foundation (Weeks 1–4)

Phase 1 is where most youth programs cut corners — and where the long-term ceiling is either built or limited. Every session starts with a 5-minute dynamic warm-up (never static stretching before training) and ends with the arm care protocol.

Day A (Lower Body + Core) establishes the foundational movement patterns: bodyweight squats, reverse lunges, glute bridges, dead bugs, lateral band walks, and plank holds. Weeks 3–4 add one set to the main lifts and extend plank duration.

Day B (Upper Body + Rotation) introduces push-up patterns, band pull-aparts, seated medicine ball rotation (or broom-handle rotation for Tier 1), bear crawls, supermans, and side planks.

Day C (Speed, Agility & Power Introduction) is the most baseball-specific day in Phase 1: broad jumps, 30-yard sprints, lateral shuffles, hip hinge pattern work, rotational medicine ball tosses, and single-leg balance training.

The rule for Phase 1: if the form breaks down, don’t add reps — fix the form. A sloppy squat at 8 reps is worse than a perfect one at 5.

Phase 2: Athletic Development (Weeks 5–8)

By Week 5, movement patterns are established. Now we add resistance, complexity, and intentionality. This is also where the connection between physical training and bat speed becomes obvious to the players and coaches watching.

Day A introduces goblet squats, Bulgarian split squats, single-leg deadlifts, lateral bounds, Copenhagen adduction, and Pallof press. The Pallof press is often a player’s first real introduction to anti-rotation work — the core stability that a swing rotates around.

Day B levels up to push-up variations, heavy band rows, medicine ball chest passes, rotational med ball slams, lat pull-downs, and hollow body holds. The rotational med ball slam is a key exercise here — it teaches the hip-to-shoulder sequence that directly mirrors the swing.

Day C pushes speed training harder: resisted sprints or hill sprints, speed ladders, drop step + sprint (baseball-specific outfield read drill), rotational med ball side toss, box jumps (Tier 2 only), and reactive shuffles responding to a coach’s verbal cue.

Weeks 7–8: increase med ball weight one tier (Tier 2 only), add one sprint rep per Day C set, and begin incorporating the “show numbers” hip load position — loading the back hip until the jersey numbers are visible to the catcher before releasing through the throw or swing.

Phase 3: Power & Speed Peak (Weeks 9–12)

Phase 3 is about maximum output. The rep ranges drop, rest periods extend, and the intent on every rep should be explosive. This isn’t about accumulating volume — it’s about training the nervous system to fire as hard and as fast as possible.

Day A adds jump squats, heavier goblet squats (3×6 at challenging weight), single-leg box step-ups, skater jumps, and trap bar deadlifts (Tier 2 / if available). The goal: every ground contact should be intentional and explosive.

Day B peaks upper body and rotational power: explosive push-ups (leave the ground), heavy band rows, rotational med ball scoop tosses (the full swing sequence), overhead med ball slams, band face pulls, and ab wheel rollouts.

Day C is the competition prep day: flying 20s (5-yard rolling start into max speed sprint), first-step reaction ball drops, 90-foot sprint simulations, rotational power complex (hip load → med ball toss → shadow swing all back-to-back), and sprint/backpedal change-of-direction relay.

By Week 12, a player who started this program will move measurably better. Exit velocity off a tee should be up. 60-yard dash time should be down. And the movement patterns that produce both will be locked in for the next training cycle.

The 4 Biggest Mistakes in Youth Baseball Training

These are the most common mistakes I see when evaluating youth training programs — and each one either stunts development or increases injury risk:

Mistake #1: Heavy barbell training before movement patterns are established

Load a faulty squat pattern with weight and you train that fault more deeply into the nervous system. Fix the pattern with bodyweight first — then add resistance. Not the other way around.

Mistake #2: Skipping speed training in favor of more strength work

Speed is a trainable quality — but only if you actually train it. At ages 8–14, neurological adaptations from speed work are enormous. A player who trains speed for 12 weeks develops fast-twitch recruitment patterns that carry over directly to base running and first-step reaction at the plate. Speed is a primary output of a complete youth baseball workout program.

Mistake #3: No arm care whatsoever

The arm care protocol in this program takes five minutes. Most youth programs have zero. The players who do it for three years straight enter high school with posterior shoulder strength and scapular stability their competitors don’t have — and they don’t get hurt as often. Arm care is the most overlooked component of a youth baseball workout program for young pitchers.

Mistake #4: Training too many days per week

More is not better at this age. Three non-consecutive training days per week is the right dose. Beyond that, you’re eating into recovery time — and recovery is when adaptation actually happens. Kids who train 5–6 days per week physically and add workouts on top often plateau or get hurt. Three days of quality work beats five days of grinding.

Free Download

Get the Full 12-Week Program PDF

All 3 phases, every workout, the warm-up protocol, arm care protocol, and a progress tracking sheet — formatted as a printable PDF you can take to practice.

Free · No spam · Just the workout program

Frequently Asked Questions

How many days per week should a youth baseball player train?

Three non-consecutive days per week is the optimal training frequency for youth baseball players ages 8–14. Training more frequently doesn’t produce faster results — it reduces the recovery time needed for adaptation to occur. Rest days are when muscles repair and the nervous system consolidates new movement patterns.

Is it safe for a 10-year-old to do strength training?

Yes — bodyweight strength training is safe and beneficial for 10-year-olds when properly supervised and programmed. The American Academy of Pediatrics supports resistance training in youth athletes as long as it’s age-appropriate, technique-focused, and not performed to muscular failure. Heavy barbell training should wait until movement patterns are established and puberty has begun. This program uses bodyweight-first progressions that are appropriate for 8-year-olds and up.

What exercises increase bat speed for youth players?

The most effective exercises for increasing bat speed in youth players are rotational medicine ball tosses, hip hinge pattern work (teaching proper loading), Pallof press for rotational stability, lateral bounds for first-step quickness, and speed/agility training. Bat speed at the youth level is primarily a movement quality issue, not a strength issue. Teaching players how to load the back hip and unload through the core transfers more directly to exit velocity than any single exercise. That sequencing principle drives every rotational component in this youth baseball workout program.

Should youth baseball players use a gym?

No gym is required for this program. The entire 12-week protocol can be done in a backyard, park, or open space with minimal equipment — a resistance band set (optional for Phase 2+), a light medicine ball (4–6 lbs), and J-bands for arm care. A gym is only needed if the player is old enough and advanced enough to add barbell trap bar work in Phase 3, which is optional for Tier 2 players only.

How long does a youth baseball workout session take?

Sessions in this program take 35–45 minutes including warm-up and arm care. For ages 8–10, aim for the lower end of that range. Attention and execution quality drop after 45 minutes for most youth athletes. A focused 35-minute session is more productive than a scattered 70-minute one.

Can this program be used during the season?

Phase 1 and 2 are best run off-season or in the pre-season. Phase 3 can be used to peak for in-season play, but should be modified during the season by reducing training volume (2 days/week, fewer sets) and prioritizing recovery. During a heavy game schedule, maintenance work — not progressive overload — is the goal. Save the volume for the off-season window. That principle is built into the structure of this youth baseball workout program from Phase 1 through Phase 3.

“I was in the gym 6 days a week on top of practices and games. By midseason my knee was breaking down — patellar tendinitis. Joey looked at what I was actually doing and the answer wasn’t more treatment, it was less volume. We cut to 4 days a week. The tendinitis cleared up. I’ve been working with Joey since I was 11 and the biggest thing he’s taught me isn’t a swing cue. It’s how to read what your body is telling you before it shuts you down.”

— Drake Davis, 1B/OF  ·  Fresno City College  ·  .381 AVG, 12 HR, 53 RBI  ·  2025 Freshman of the Year

Written by

Joey Myers

NASM Corrective Exercise Specialist · IYCA Youth Fitness Specialist · Former D1 outfielder at Fresno State (2000–2003). Joey has spent 20+ years studying the biomechanics of hitting and has worked with hitters at every level from Little League to professional. He publishes at HittingPerformanceLab.com.